Simple DIY shelf with reclaimed wood and leather straps
/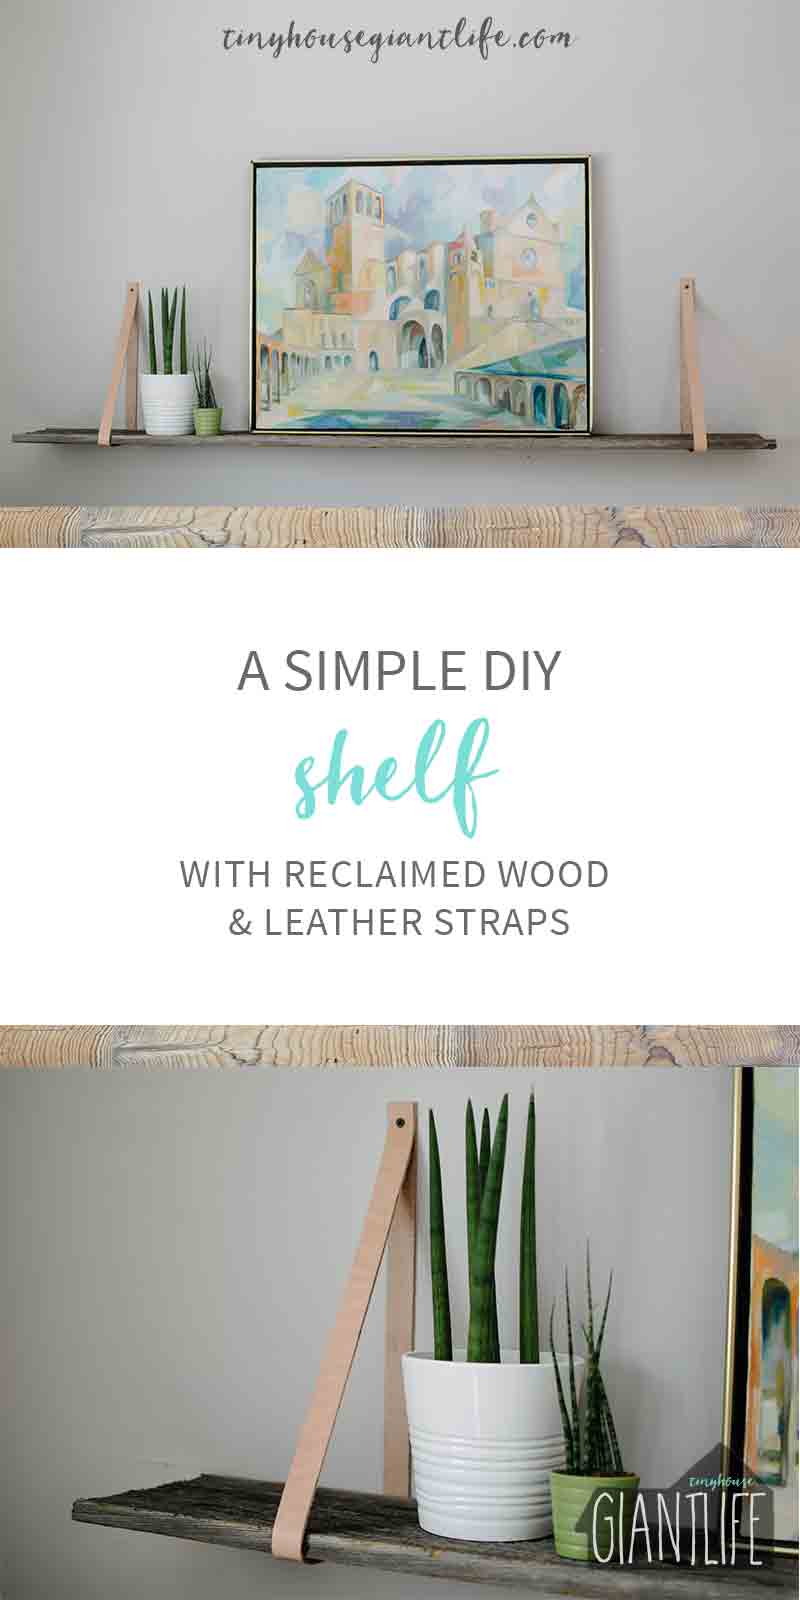
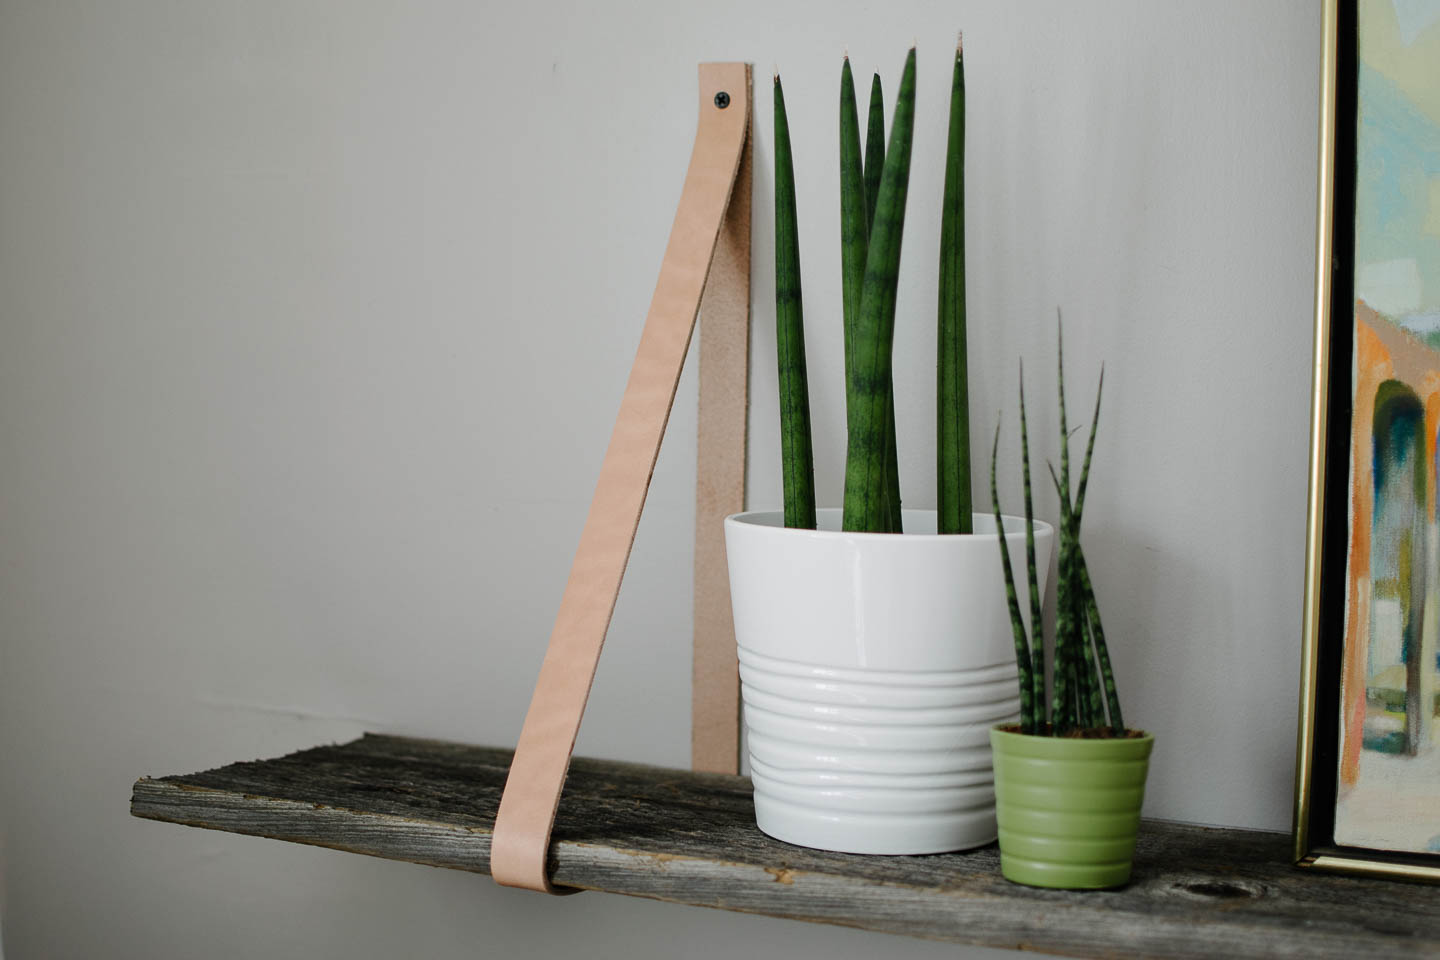
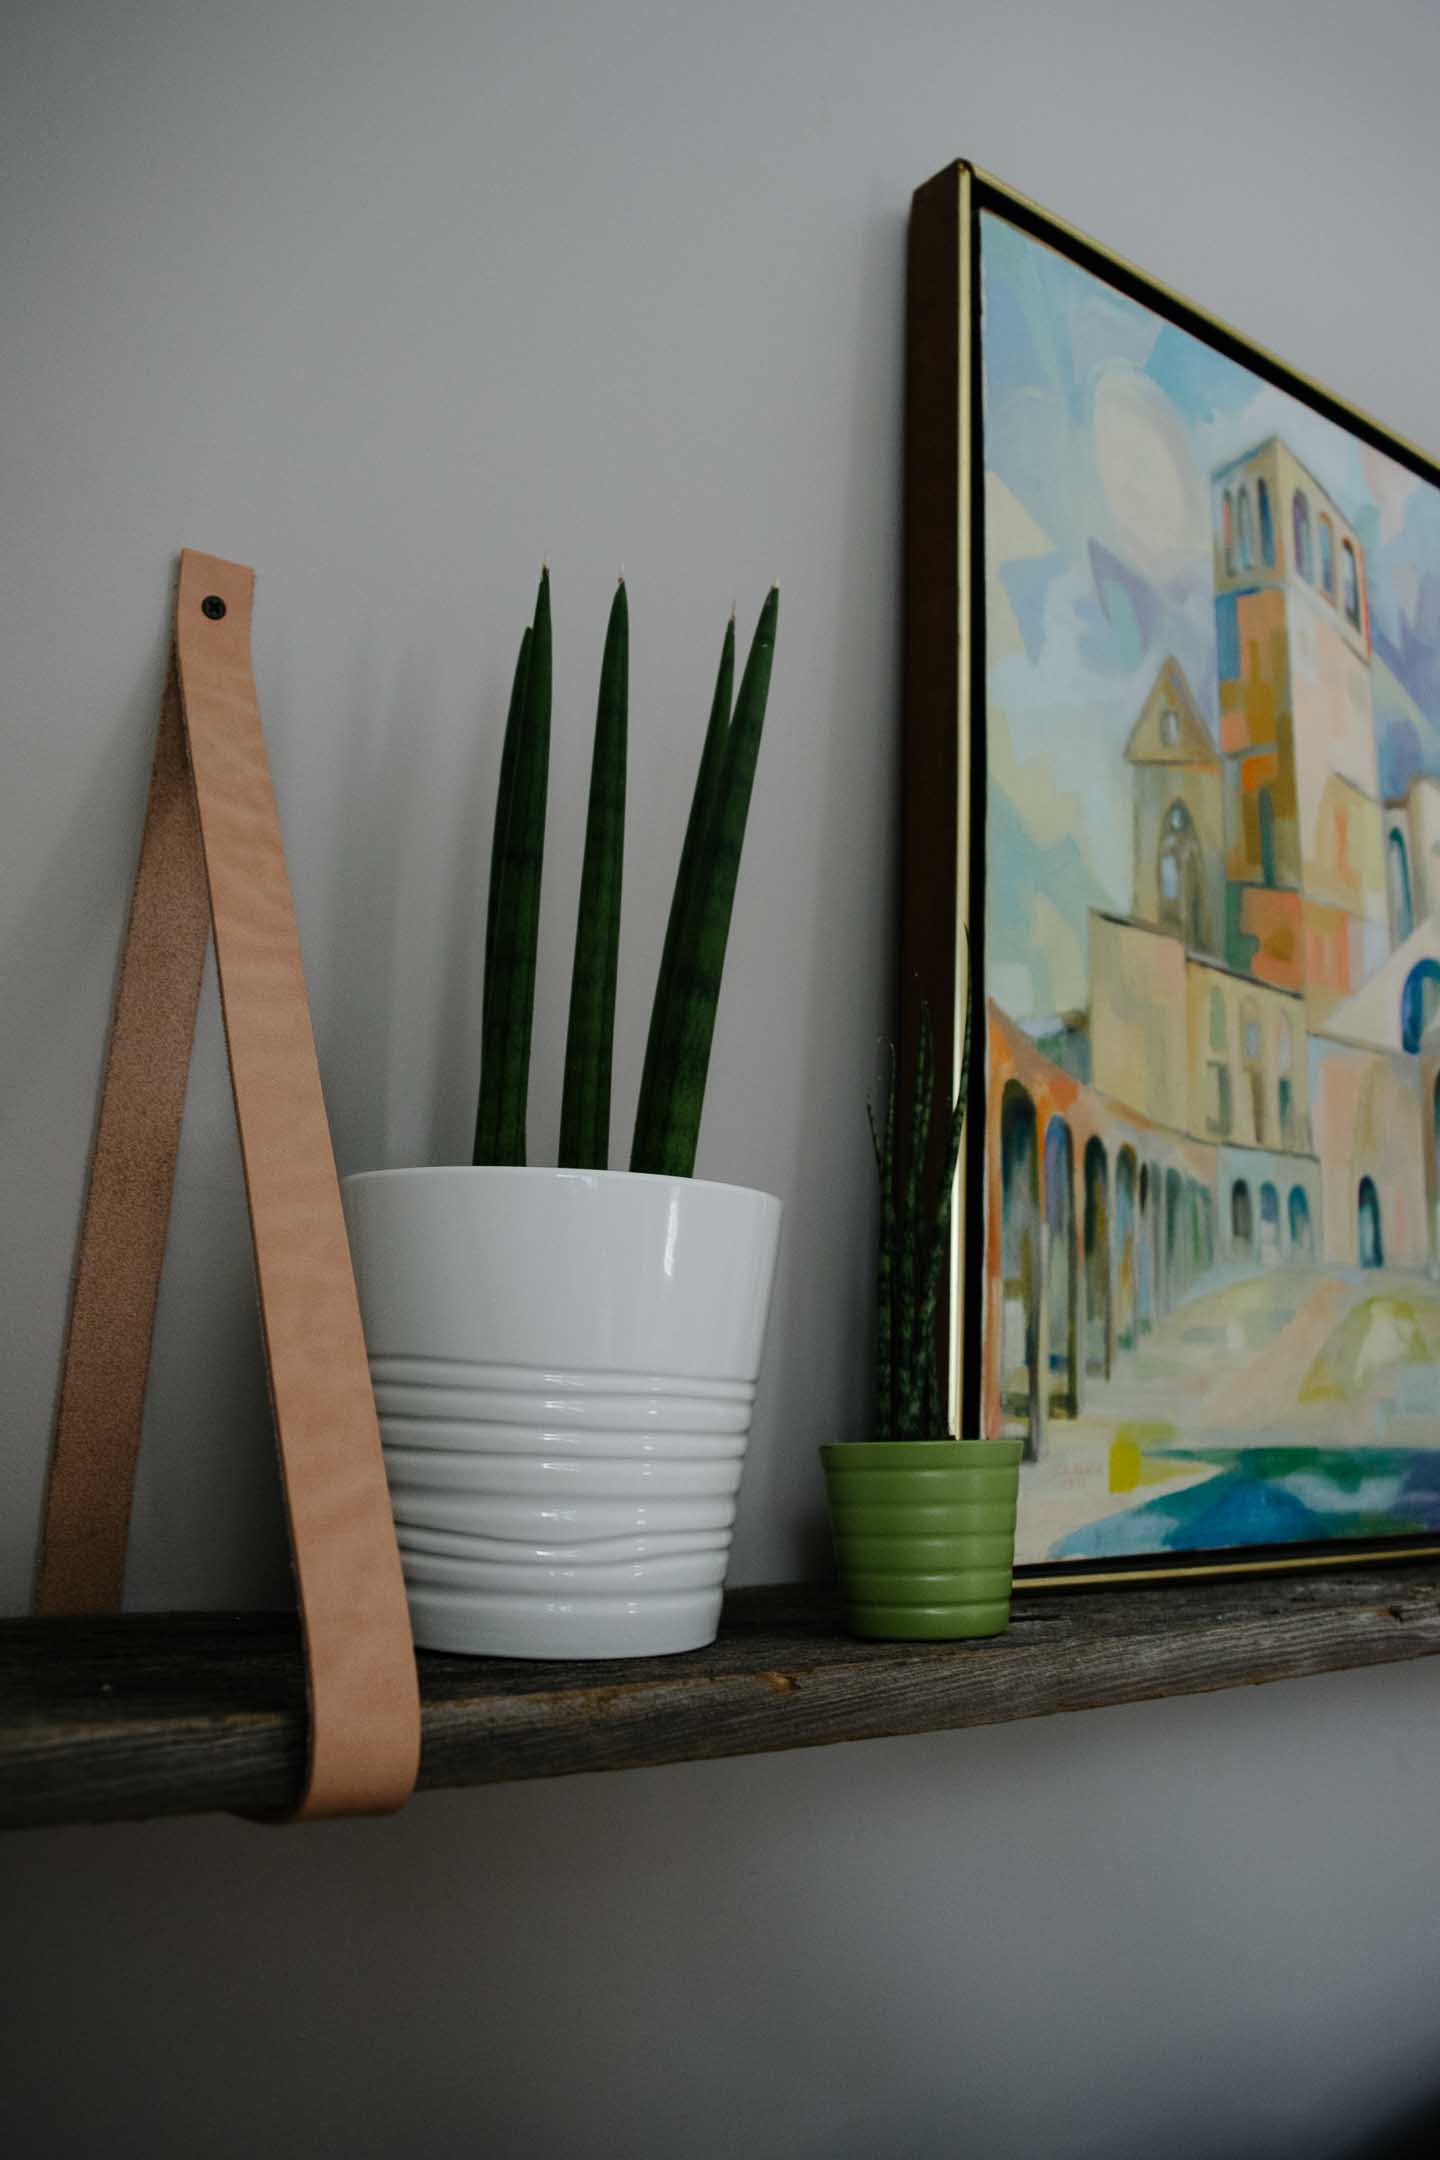
Don't you love that grey-area between something being rustic and eclectic, using reclaimed materials always provides something extra special to a design.
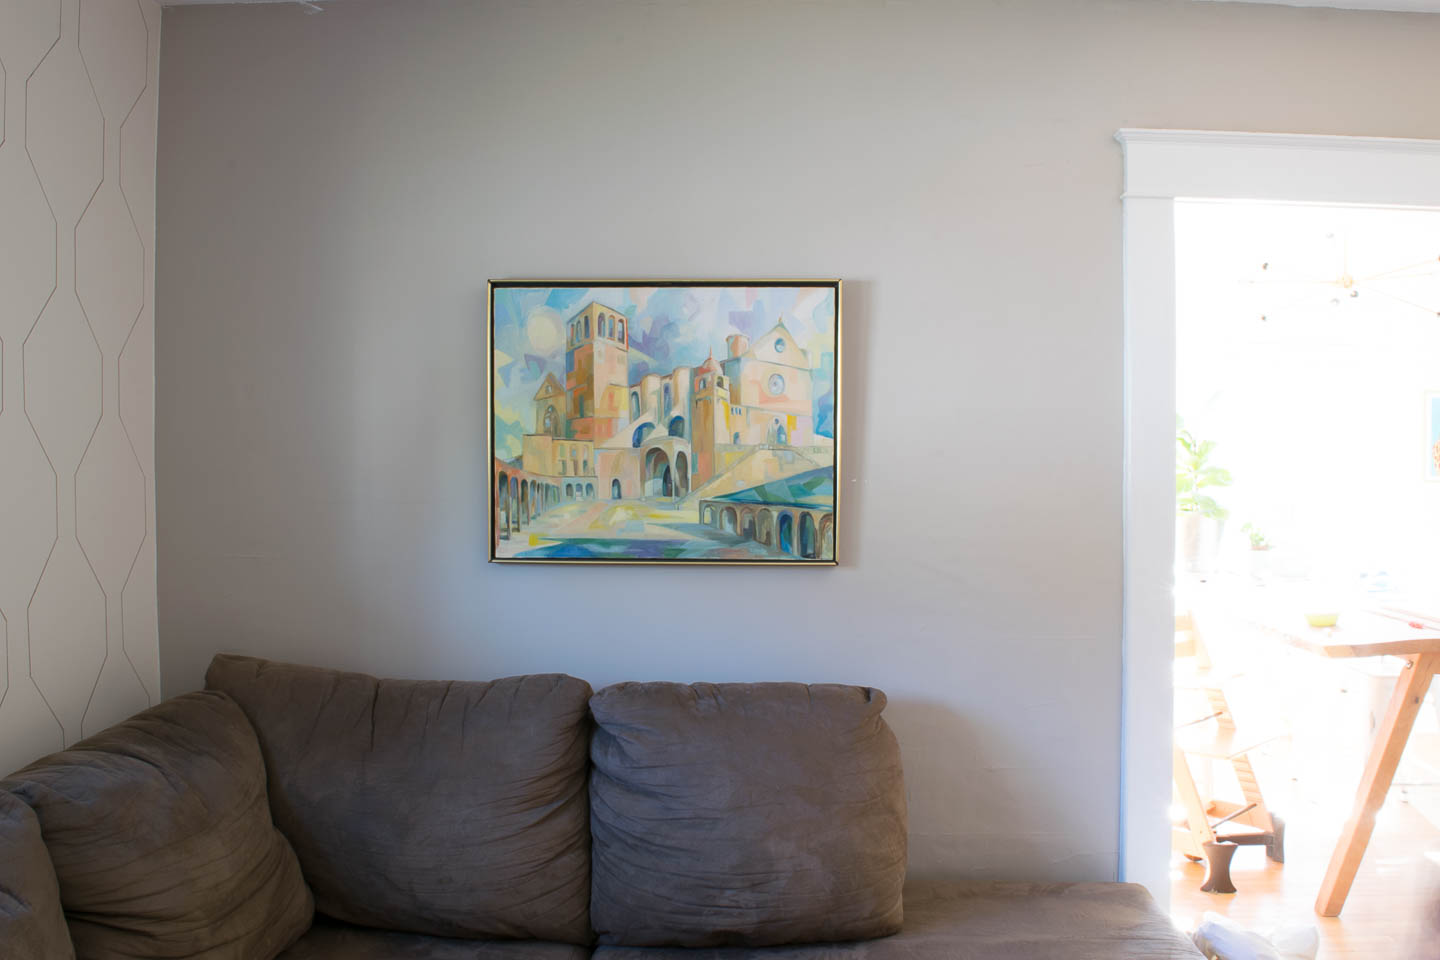
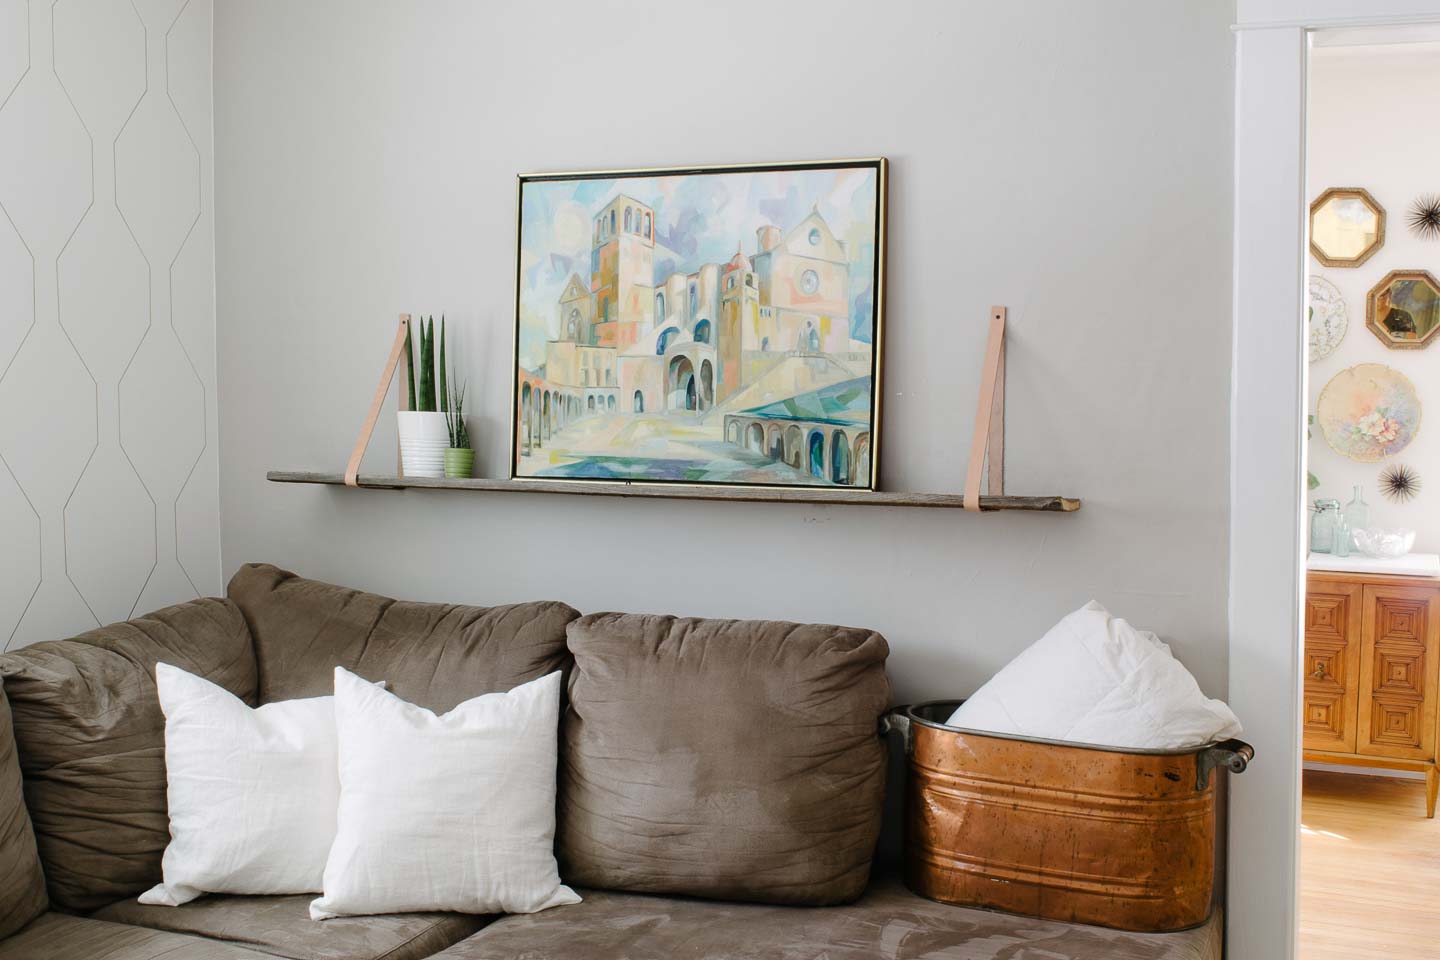
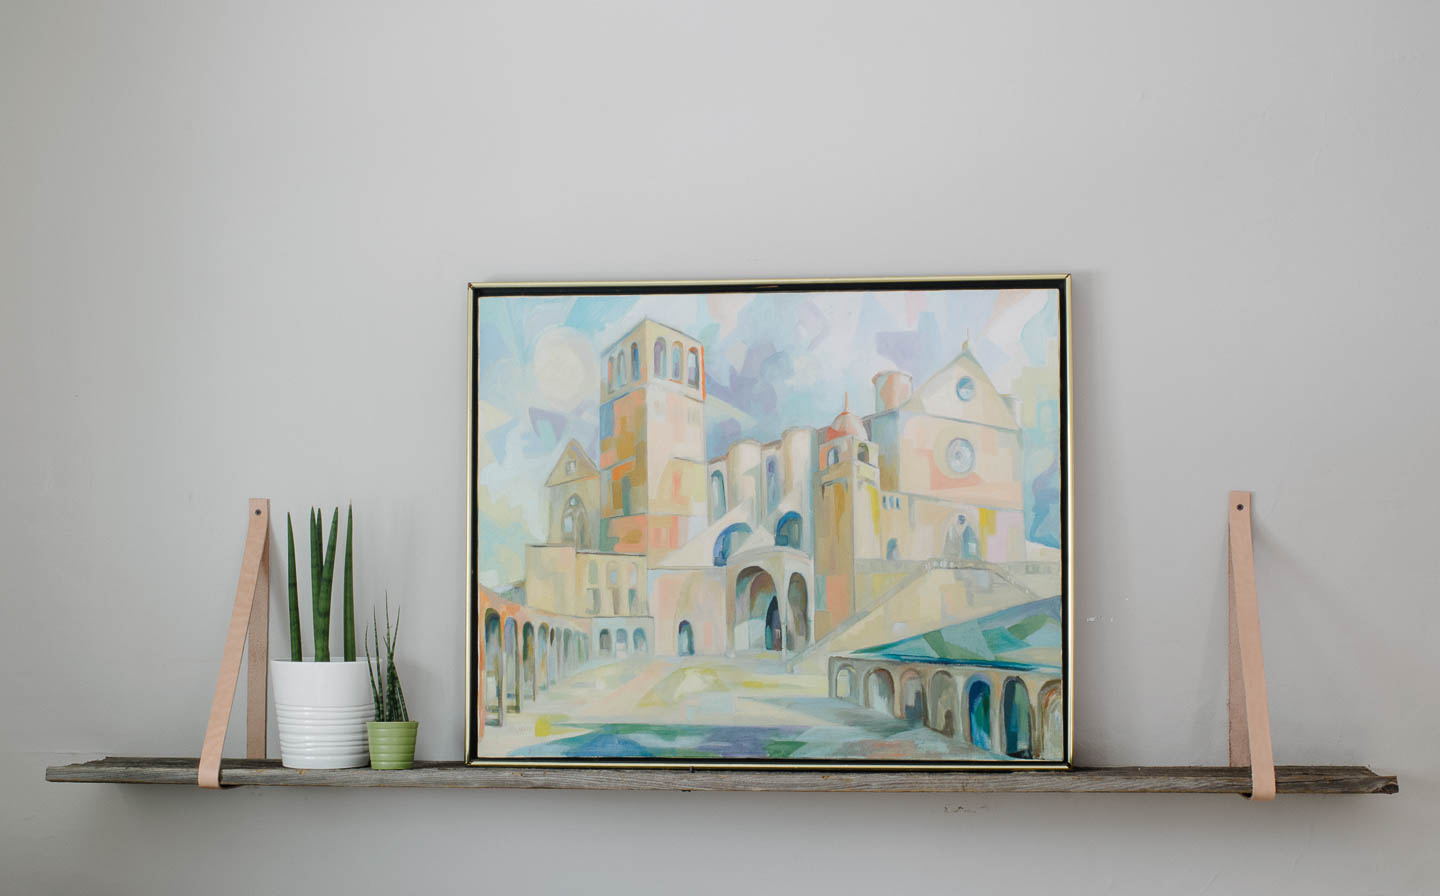
So, when I hung my Great Aunt Susan's painting over the exact spot that used to be a door to our front porch, we just knew it needed something else to draw your eye to the feature (and not focus on the difference in drywall vs. plaster).
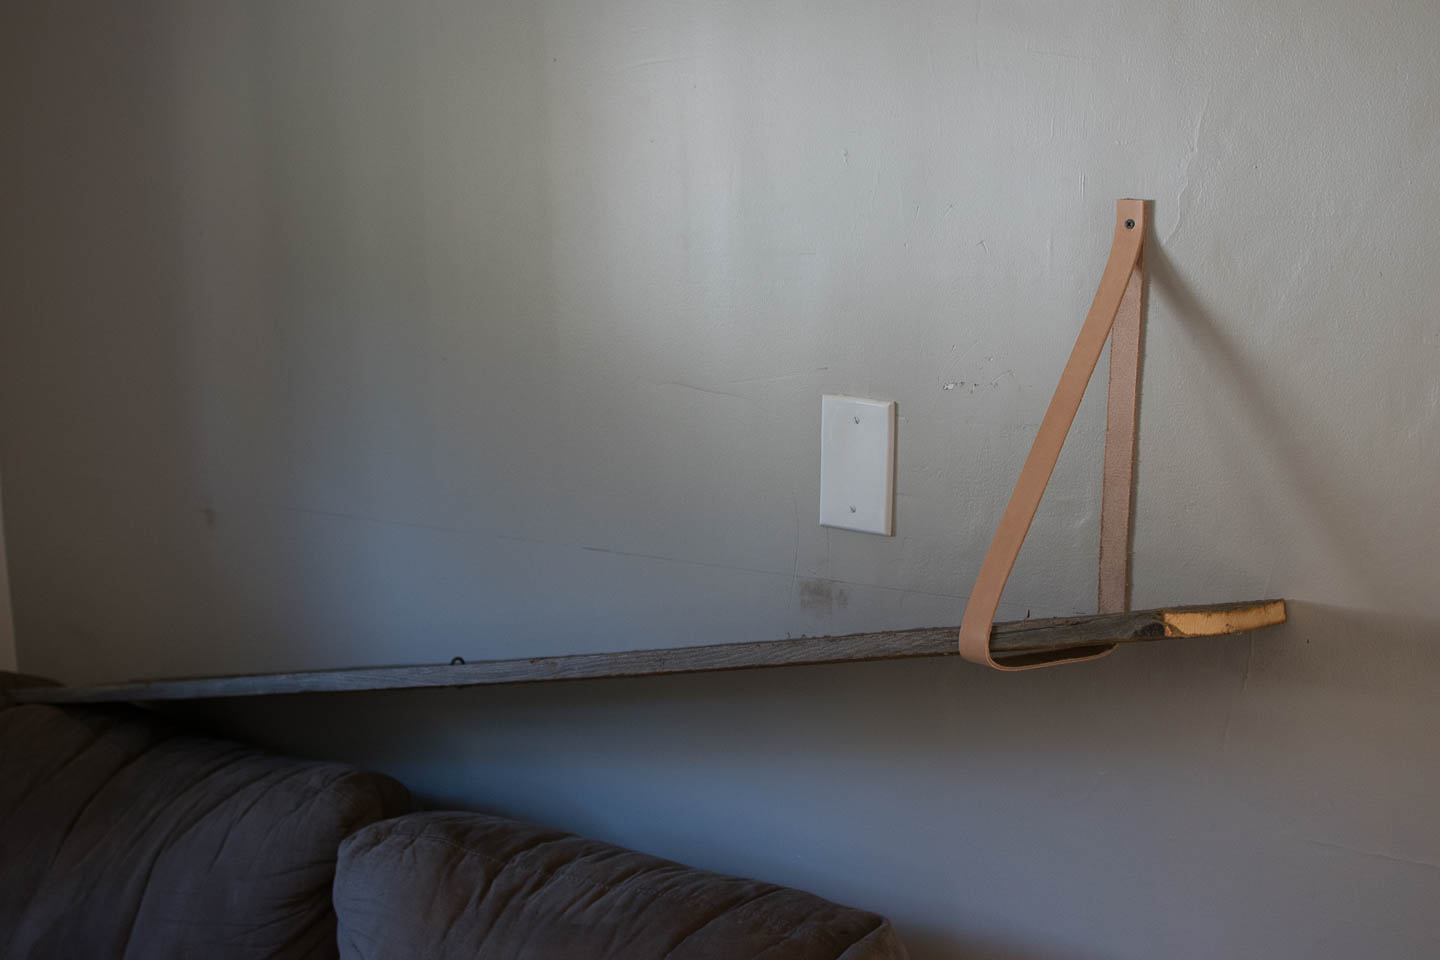
Originally this was going to be an art ledge but a shelf just turned out to be the right thing, at the right price for us.
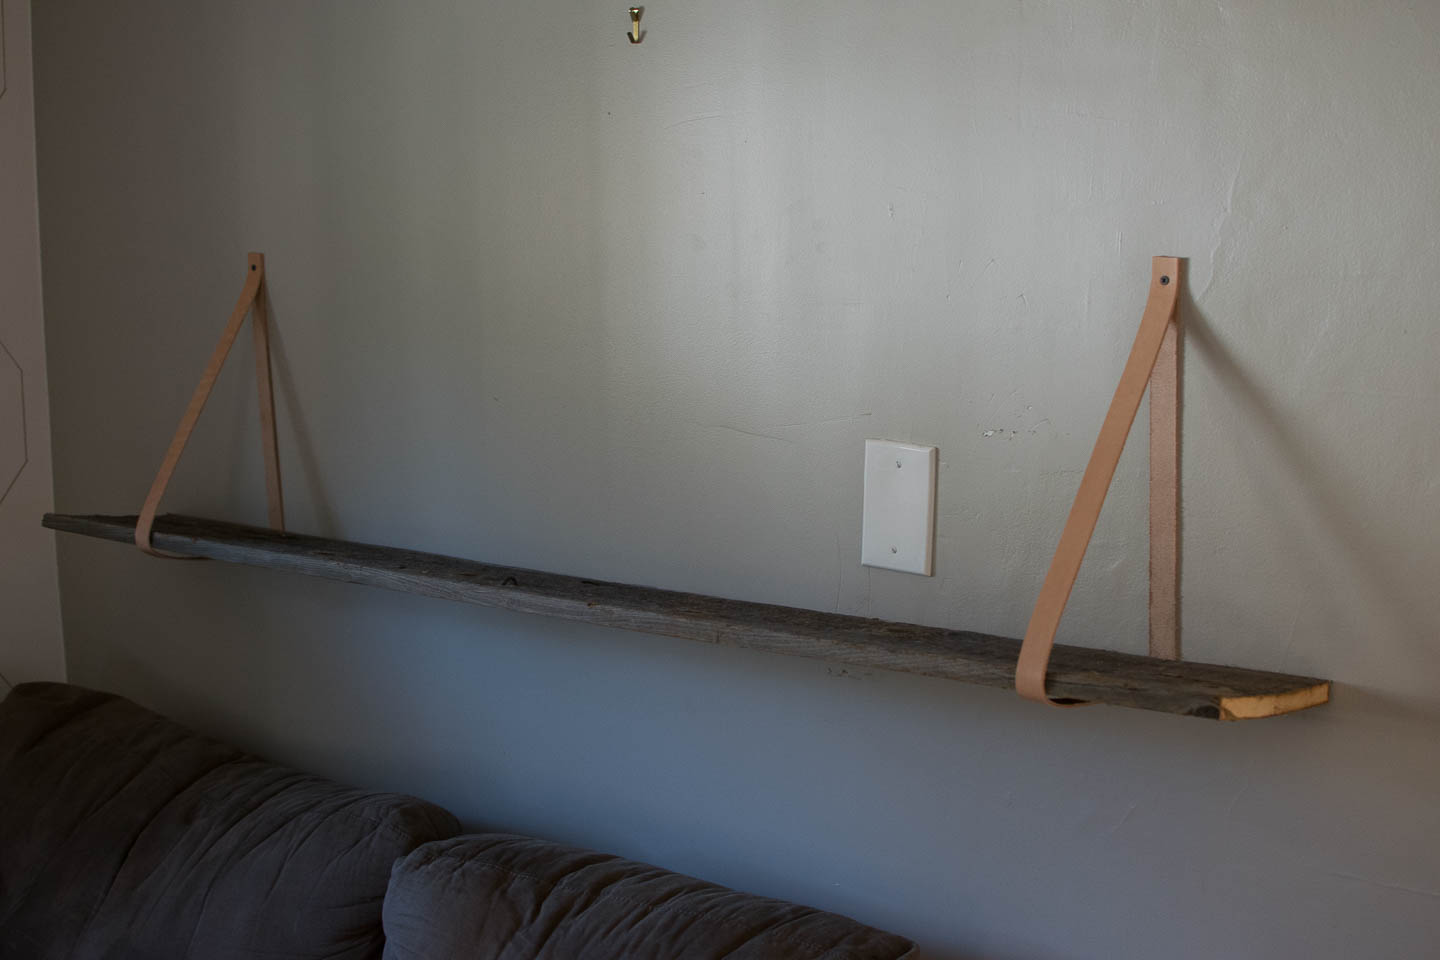
The reclaimed barn board came from a farmer that lives right down the street, makes us feel great to re-use materials and connect with this amazing community.
Additional Reading:
An overview of turning our porch's into interior spaces on our Tiny House Page
See what art we put on the other side of the wall (and our love story)
Here's the painting just hanging before:
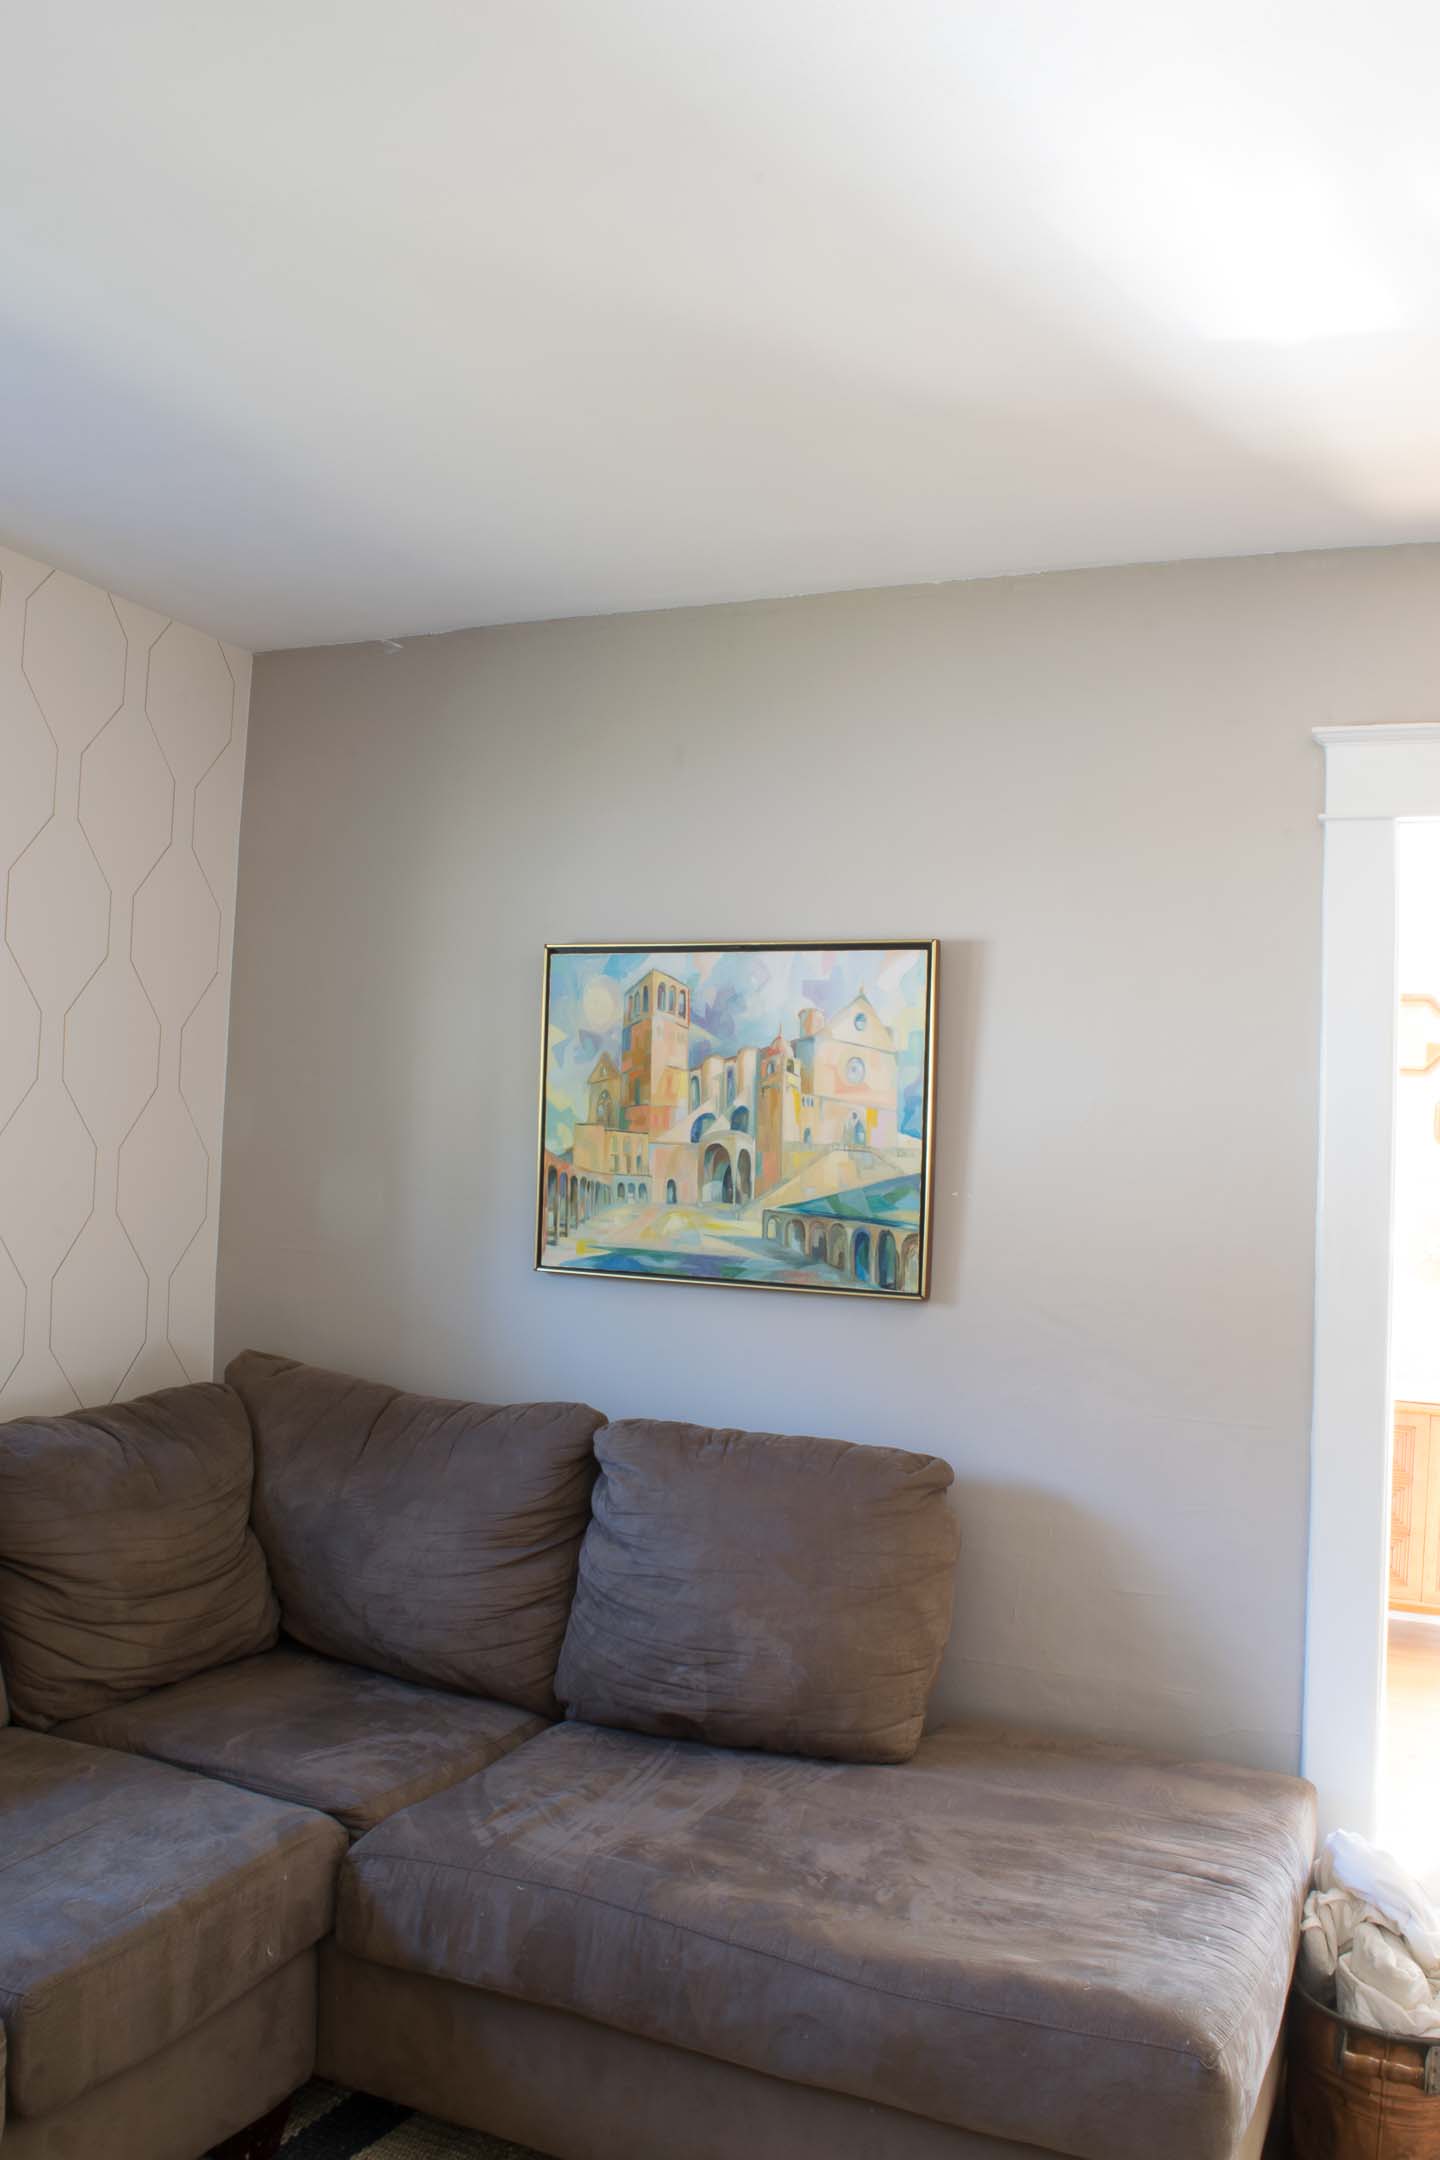
Notice the big difference it made to add some more texture to the area with the DIY shelf and some plants.
*This post may contain affiliate links.When you click on a link and purchase I will get a small compensation at no extra cost to you, win win. Read the full disclosure here.
Shelf Price Tag
Honestly, we had all of the materials except the barn board (which our friend generously gifted to us), and the leather strapping. So the project only cost us about $27 dollars to complete. You may need to purchase wood and tools so the pricing will vary.
DIY Shelf Materials
Reclaimed Wood
Leather Strapping
Screws
Belt Hole Punch (Or Drill)
Stud Finder
Level
Creating the DIY Shelf
I think this actually took us all of a half an hour to complete from start to finish once we had all the materials so when I said simple, what we really meant was s-u-p-e-r e-a-s-y!
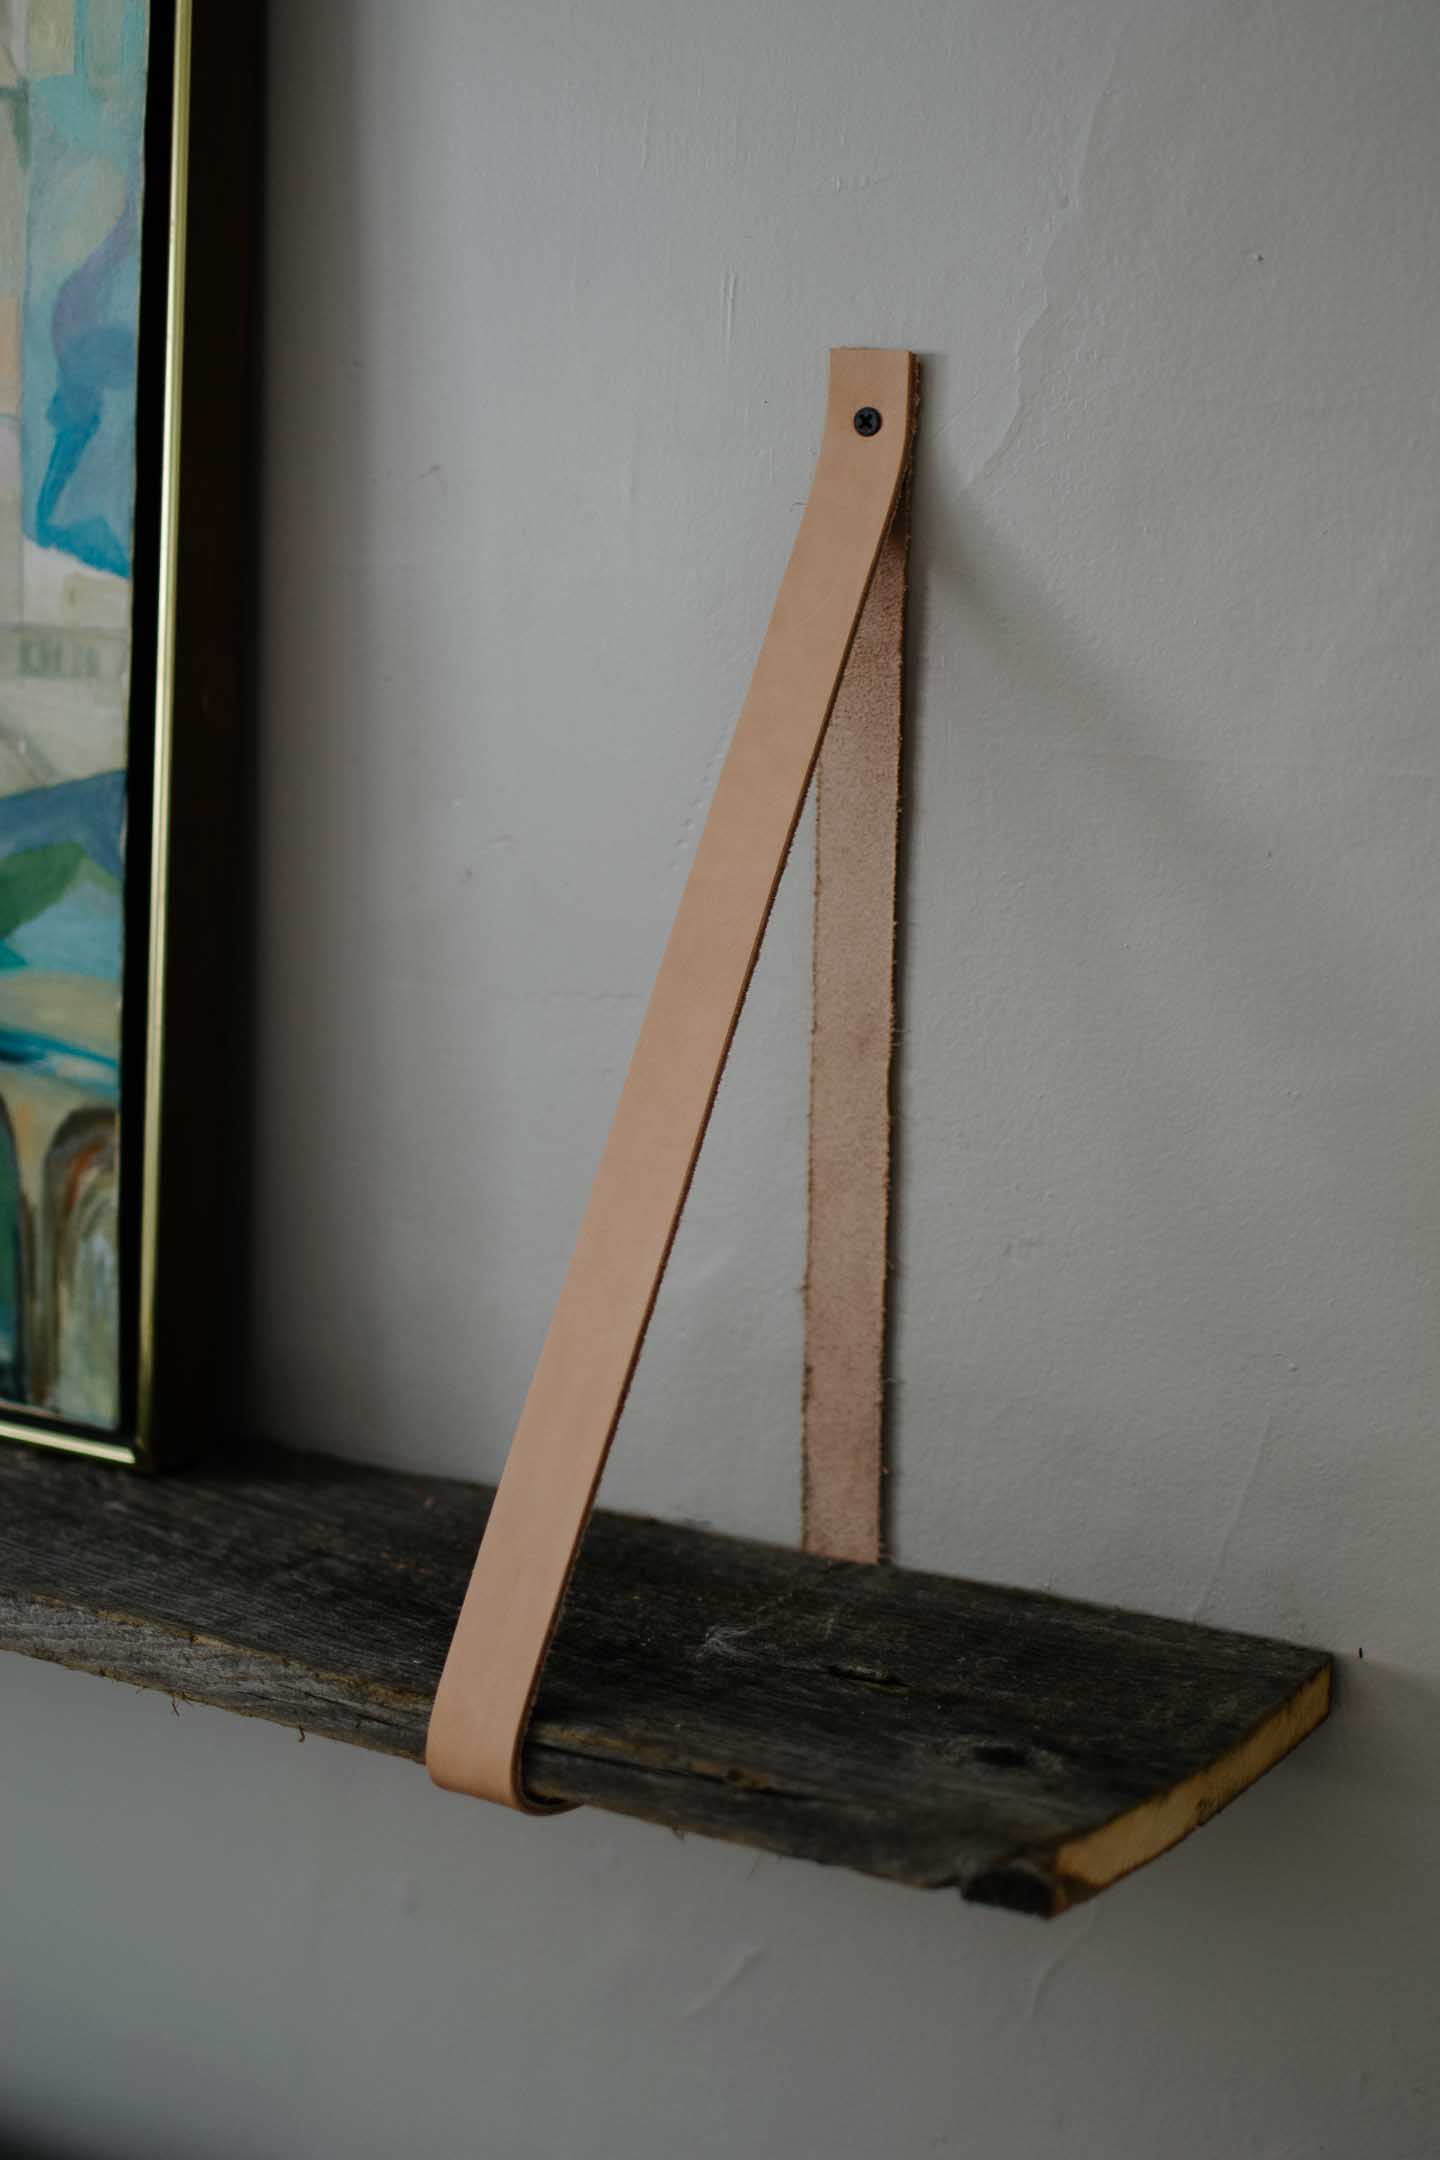
Leather Strapping
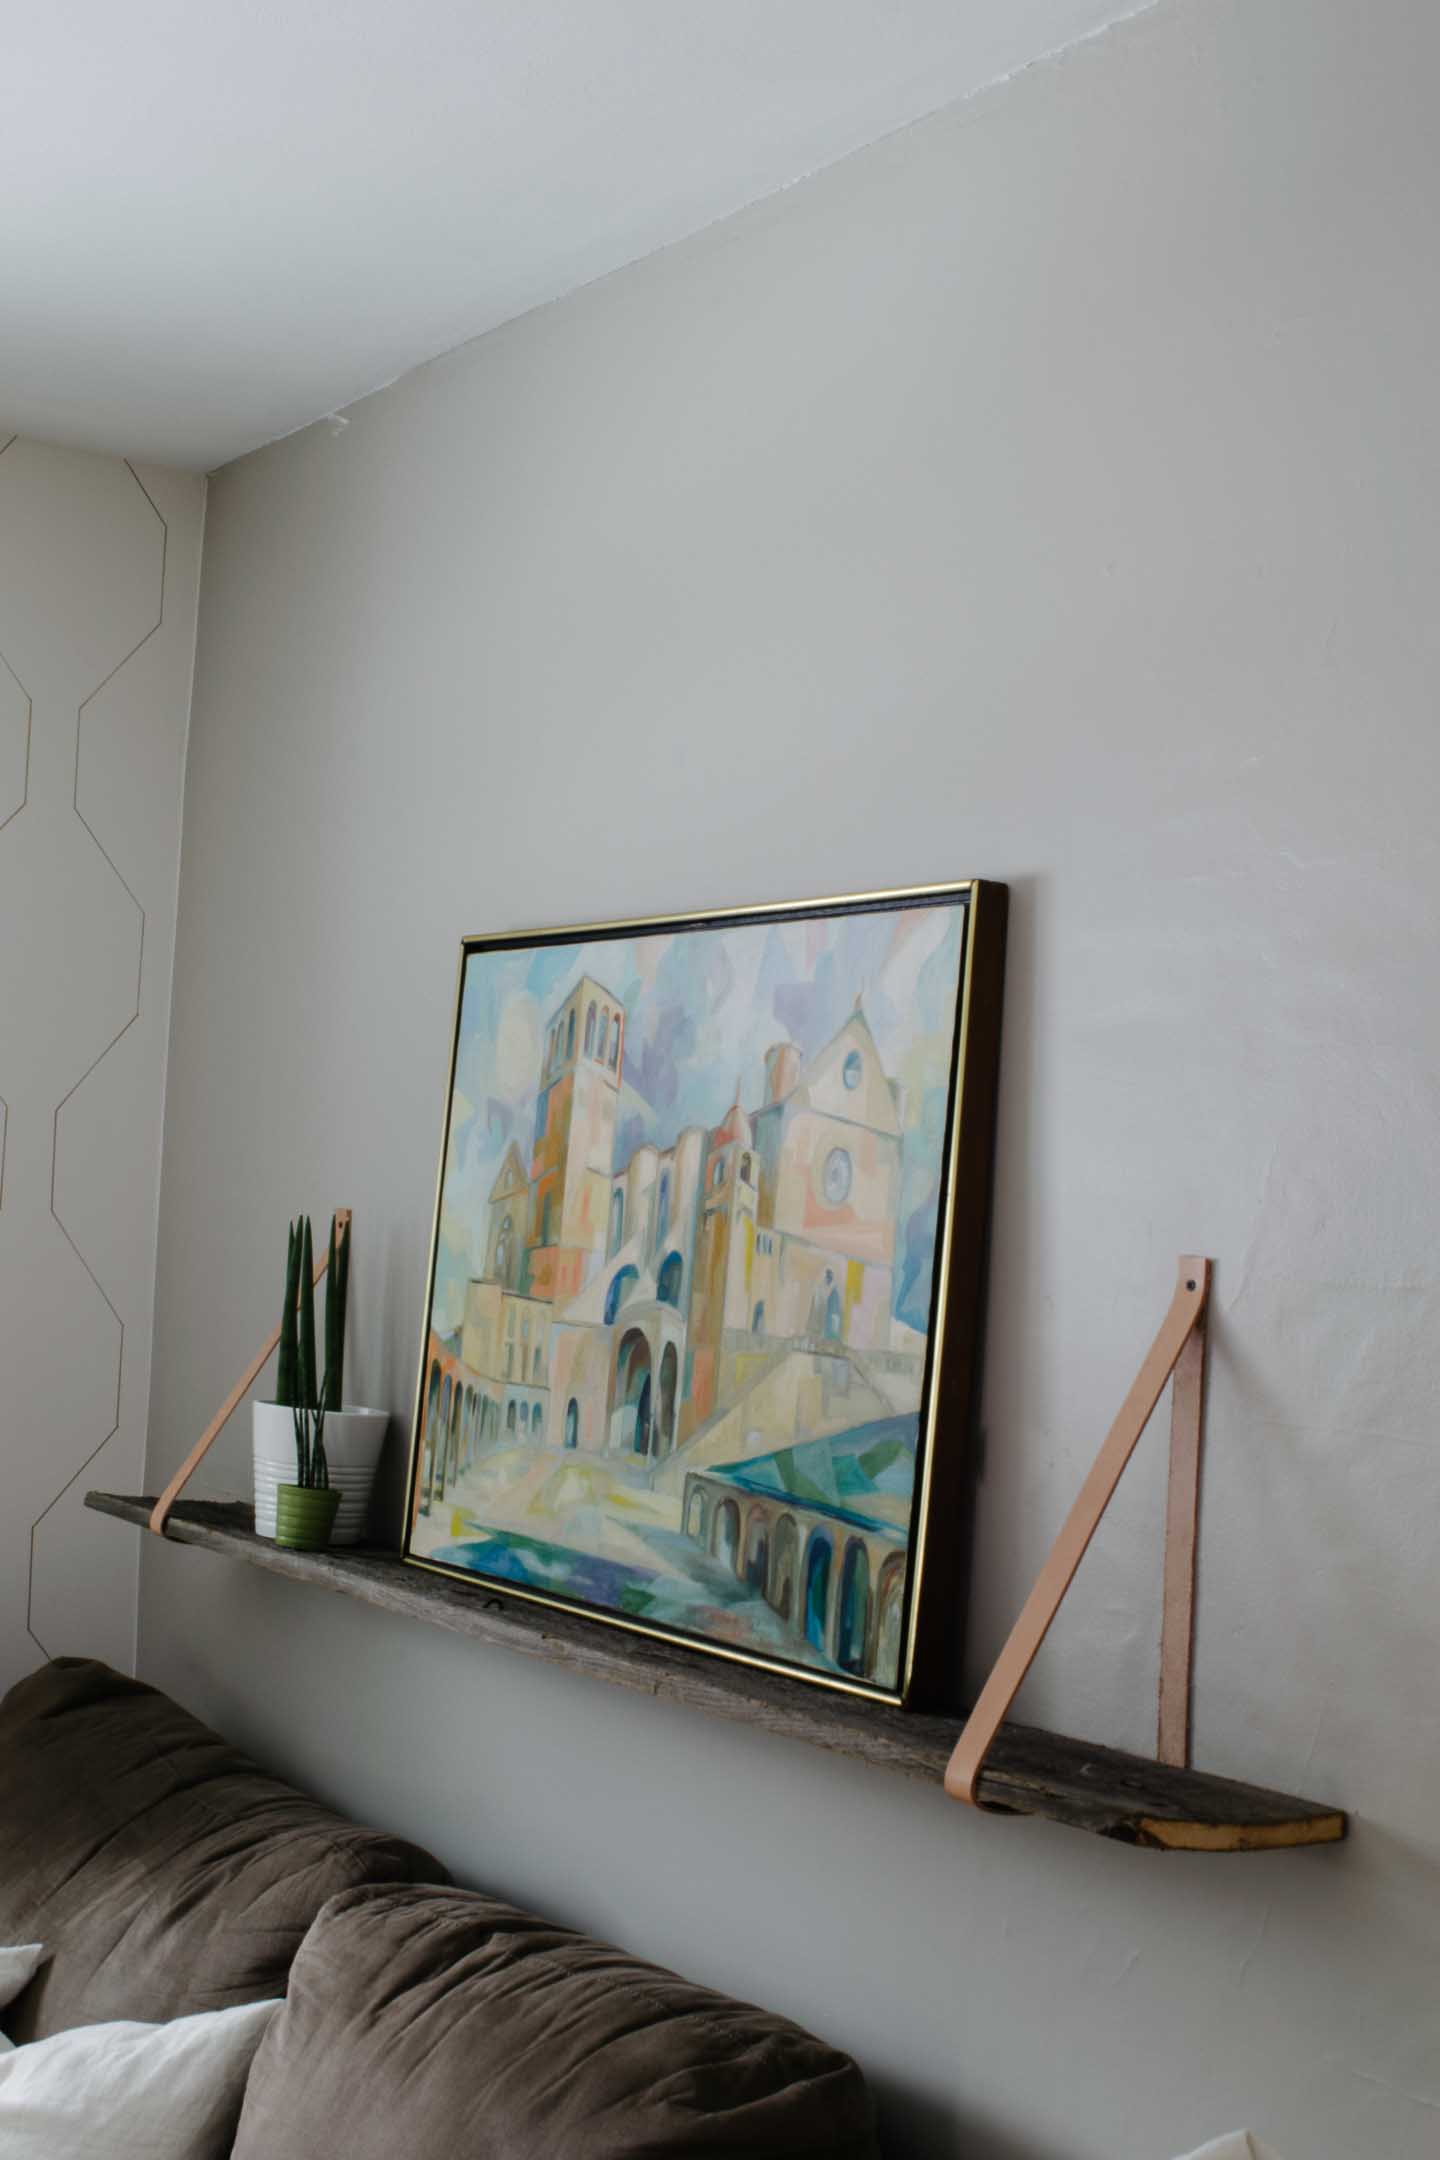
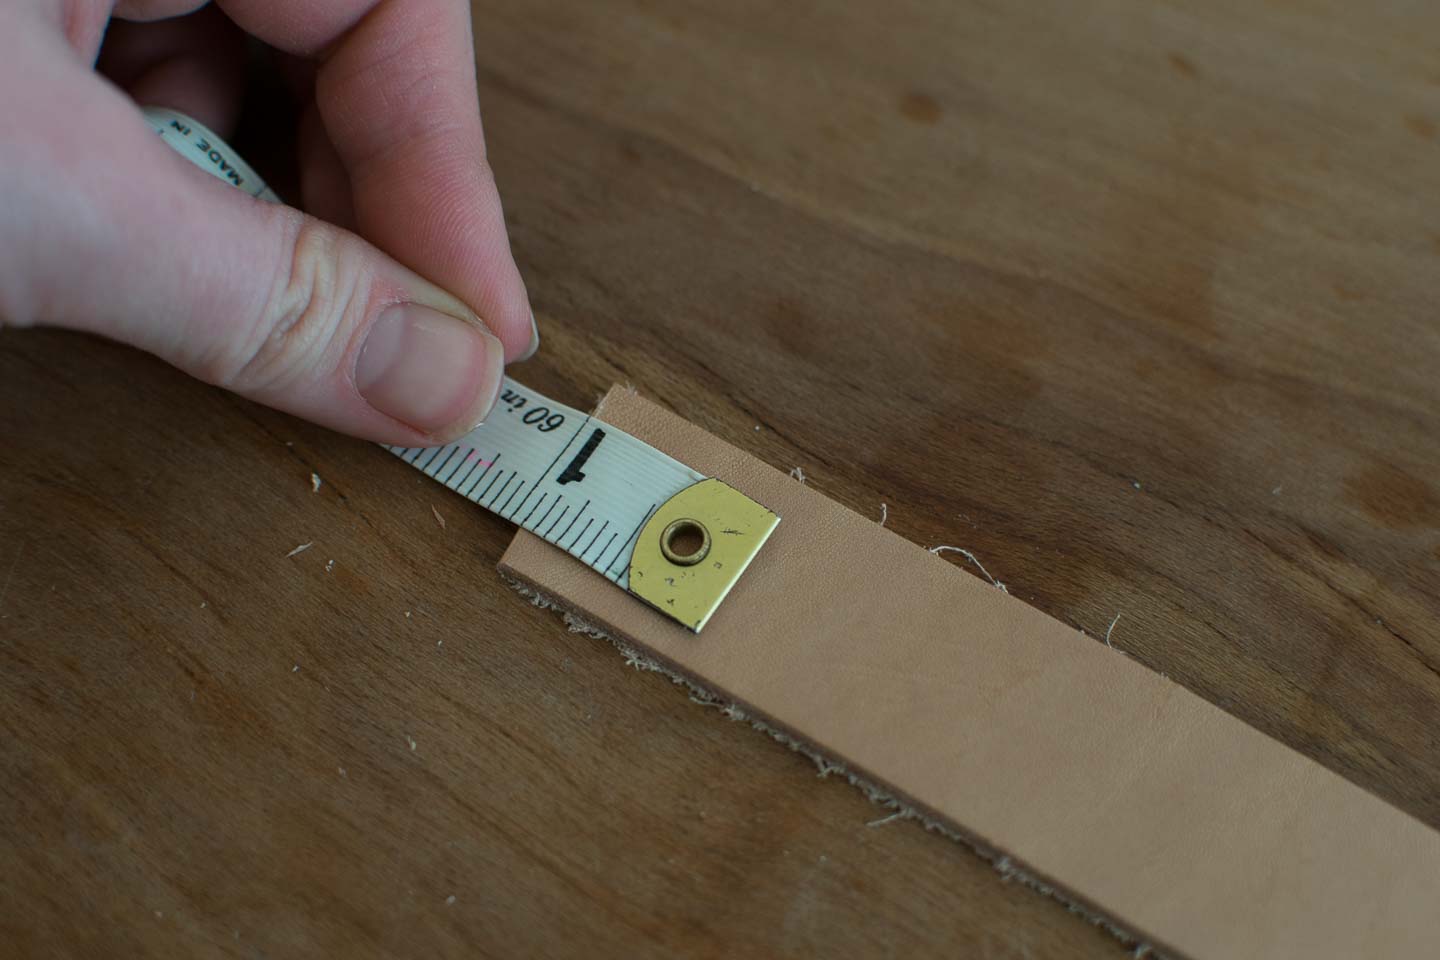
Your leather should be cut in accordance to the depth of shelf. So for instance, our barn board was 8" wide and we made the leather straps 39" long.
Why 39 inches? Because we wanted the shelf too (1) Actually hang from the leather and (2) mount higher than the middle point of our painting which was the most visually pleasing.
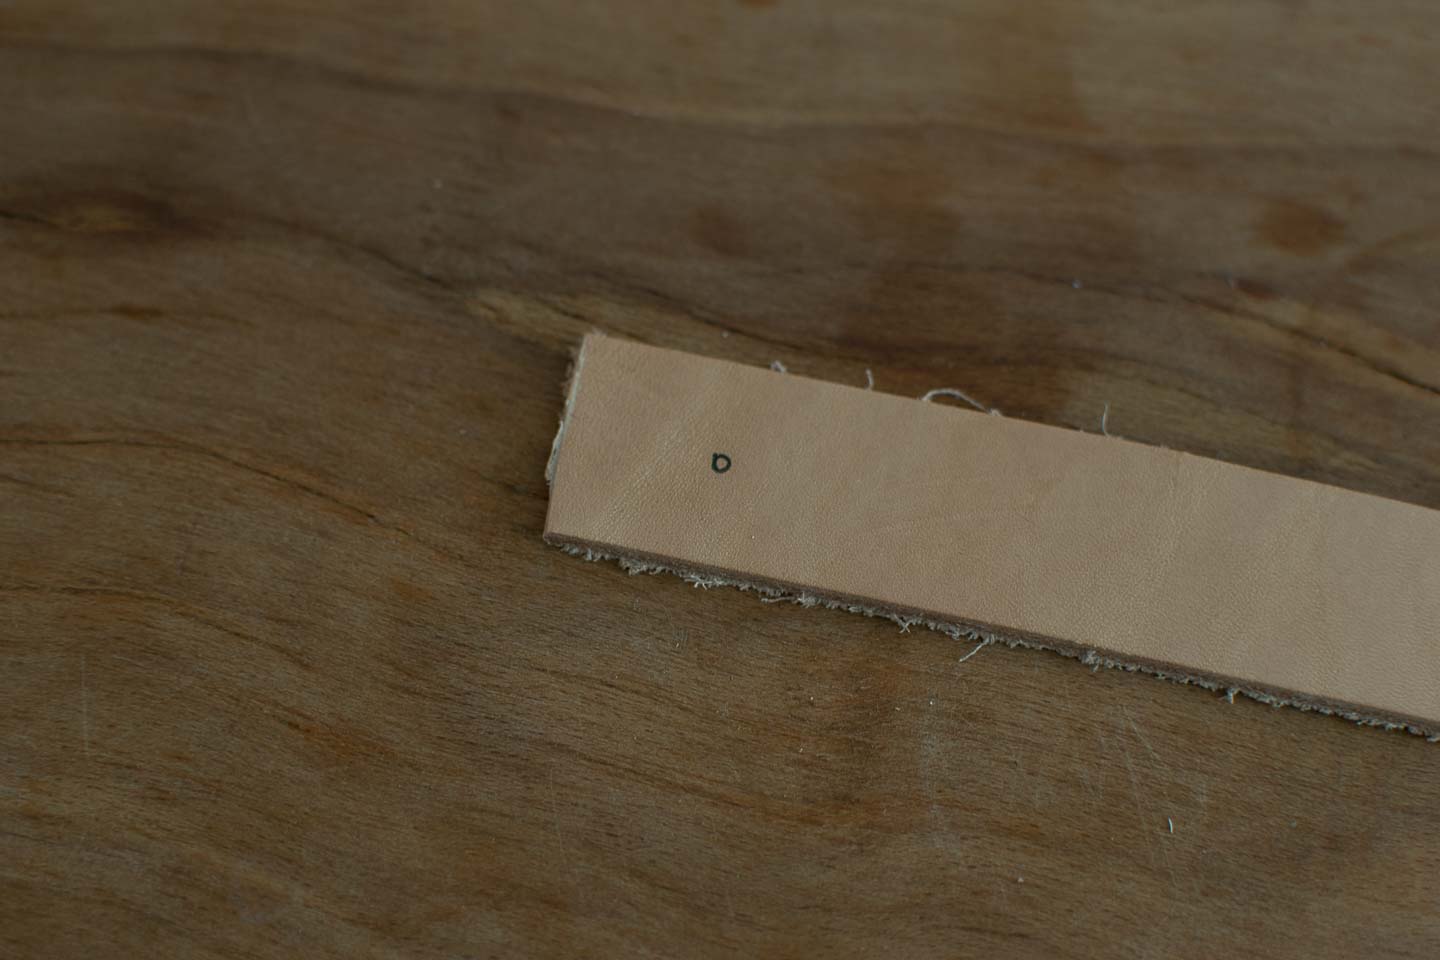
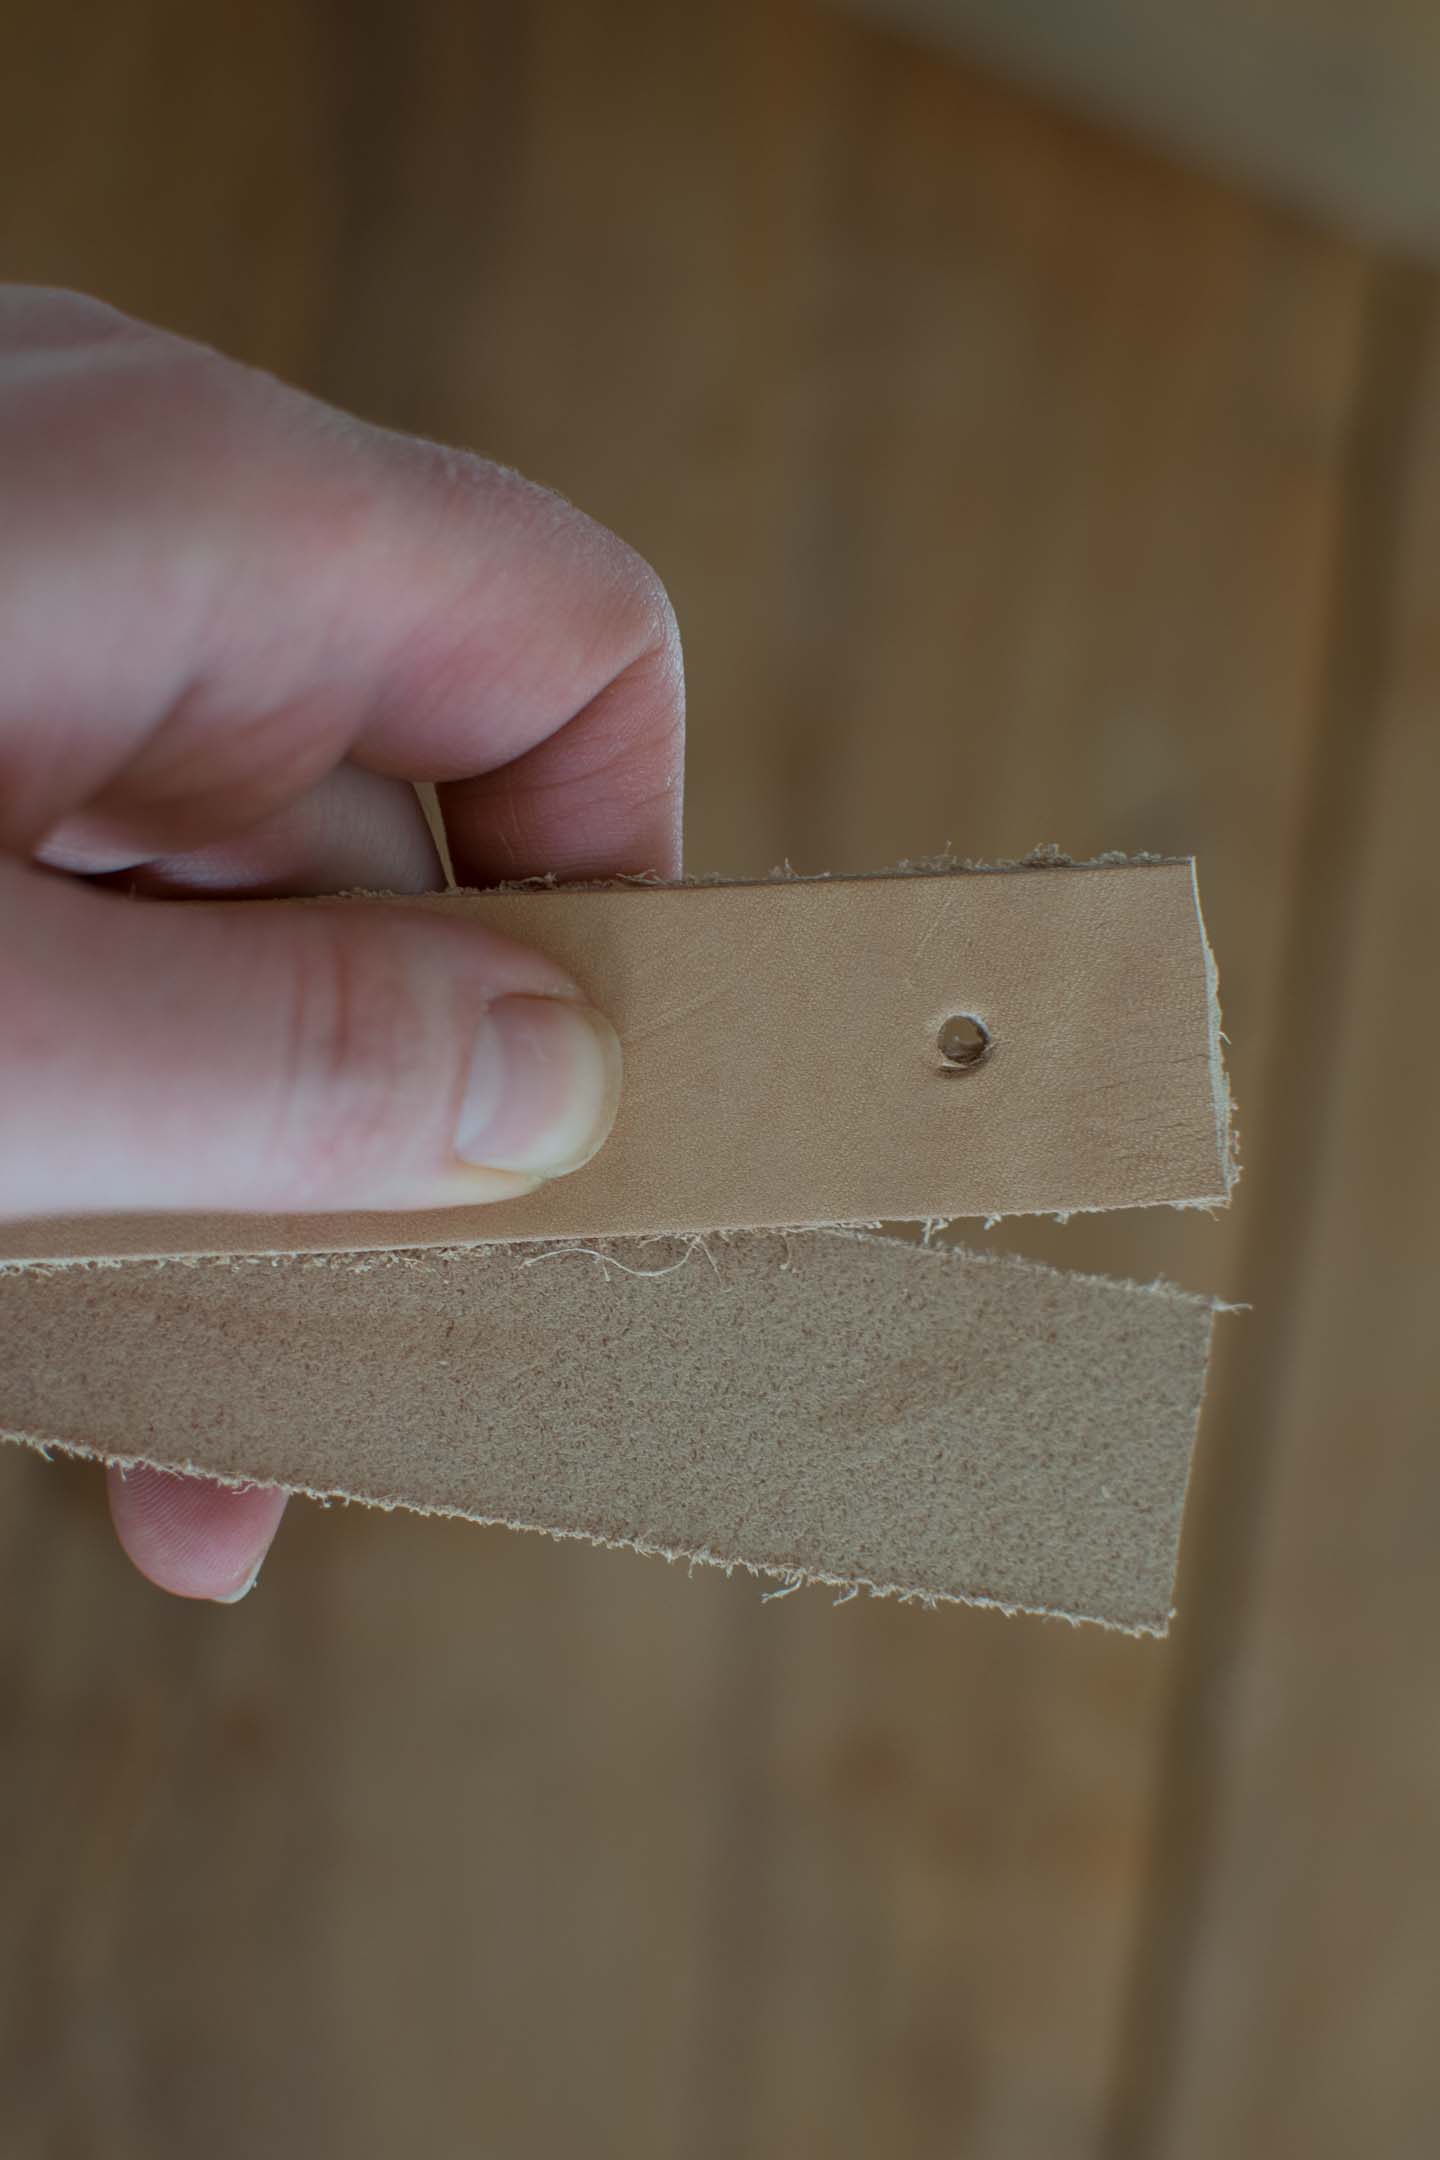
- Cut the strapping to 39"
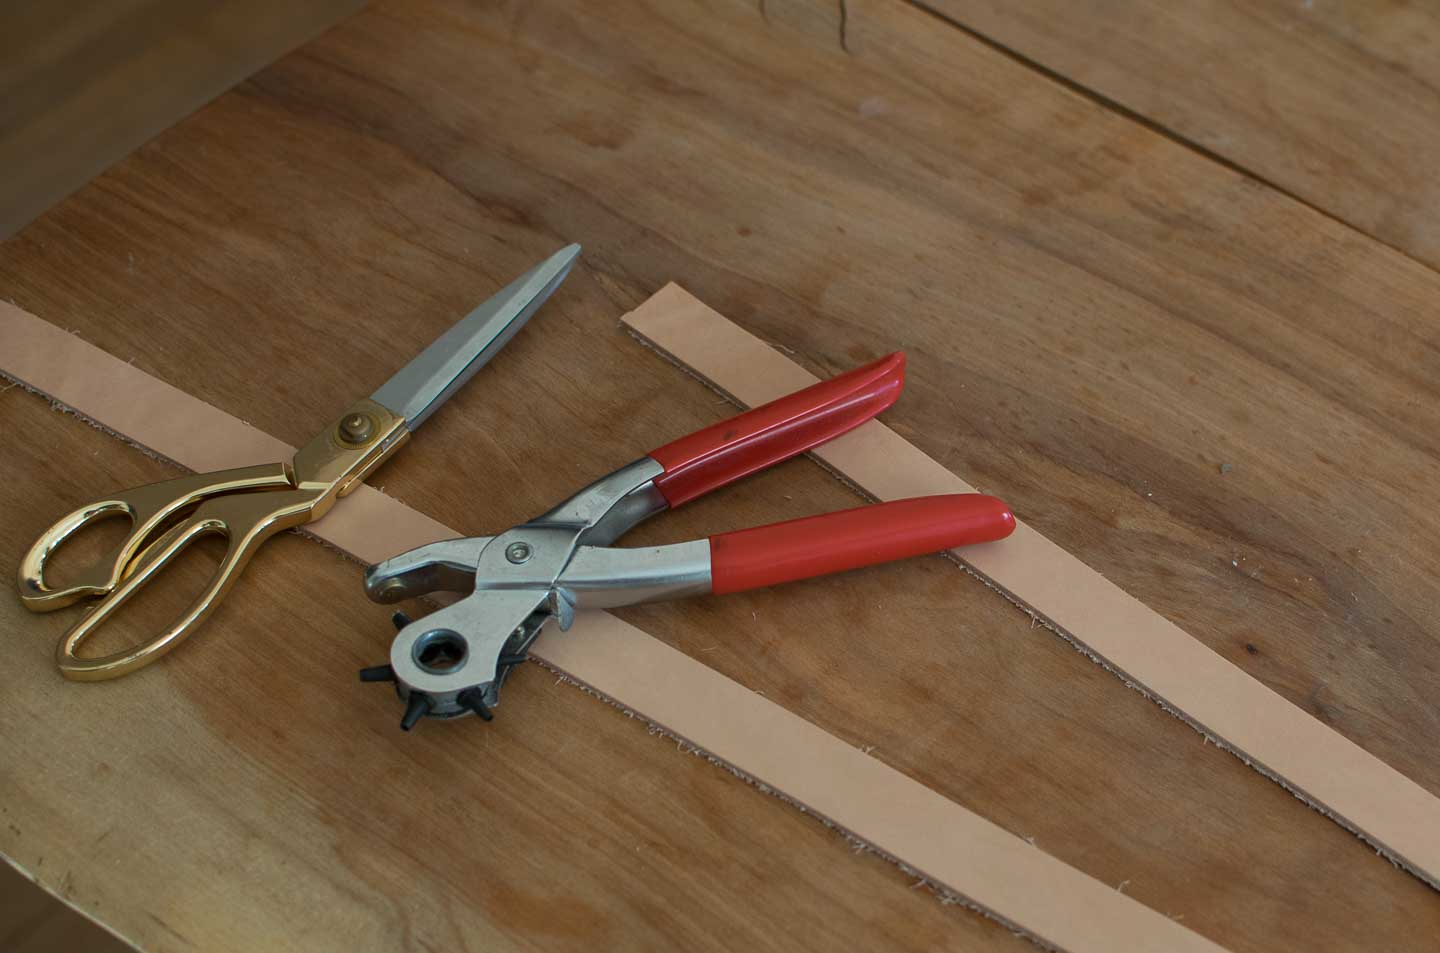
2. Mark hole 1" down
3. Use belt hole puncher on mark
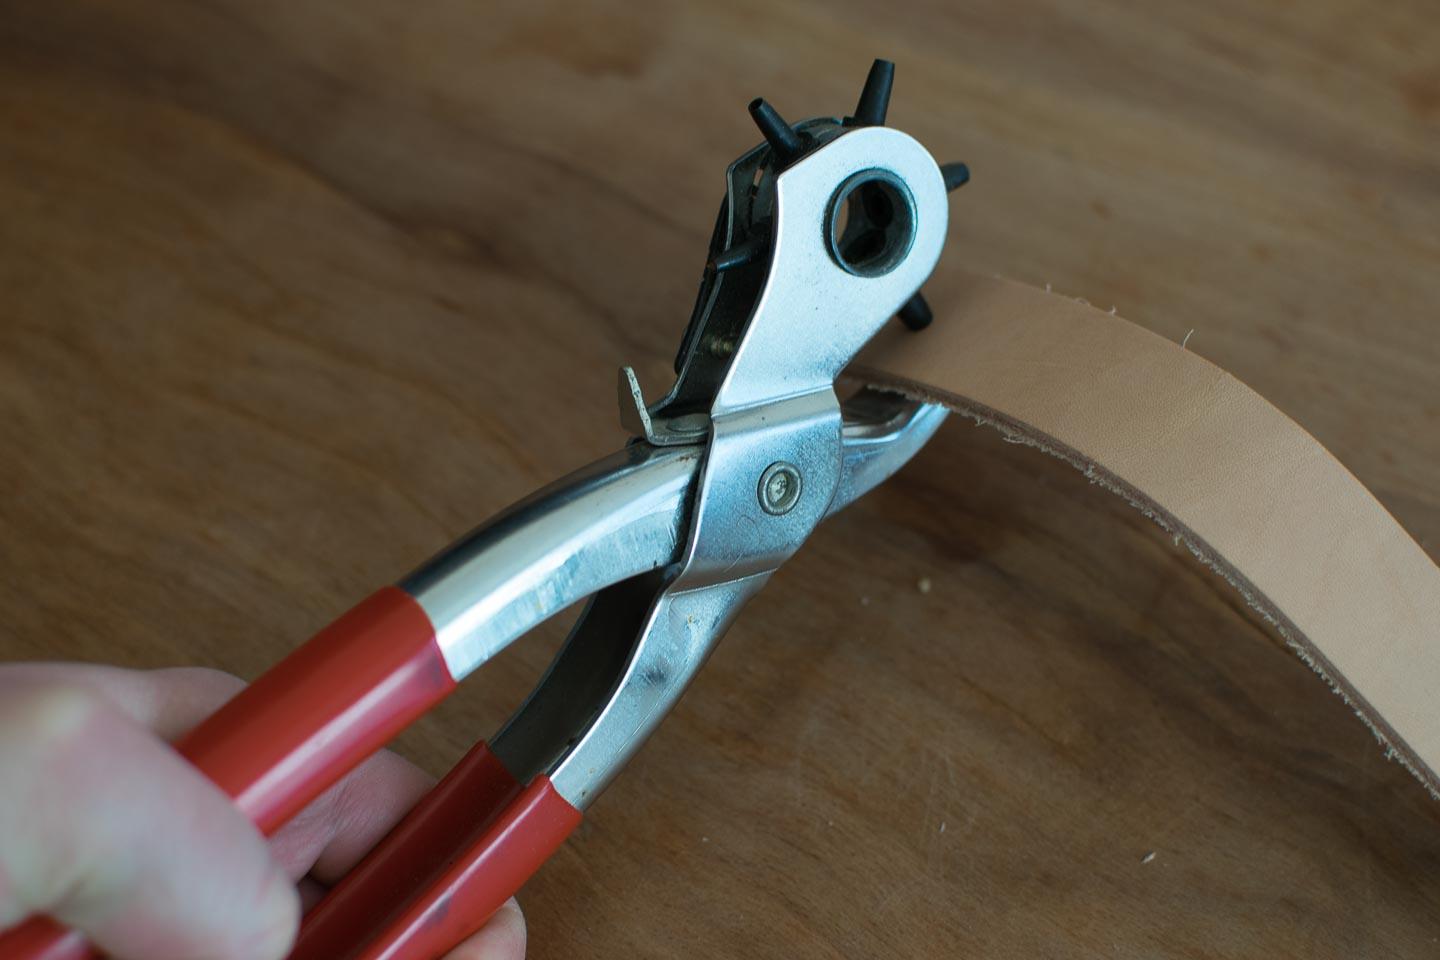
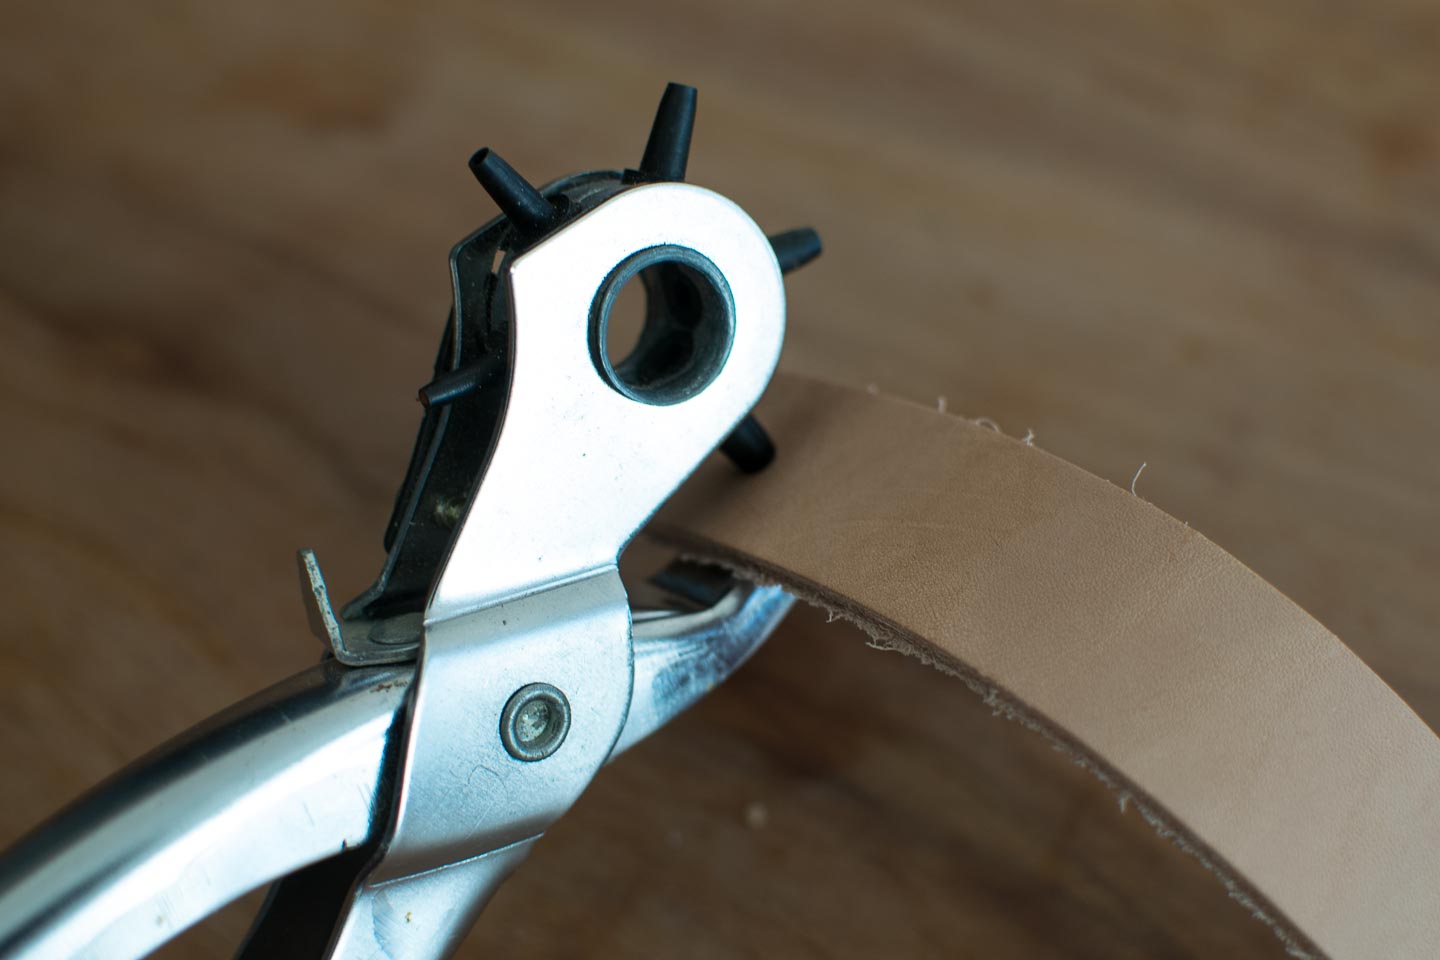
4. Line up other side by folding strap in half , then mark.
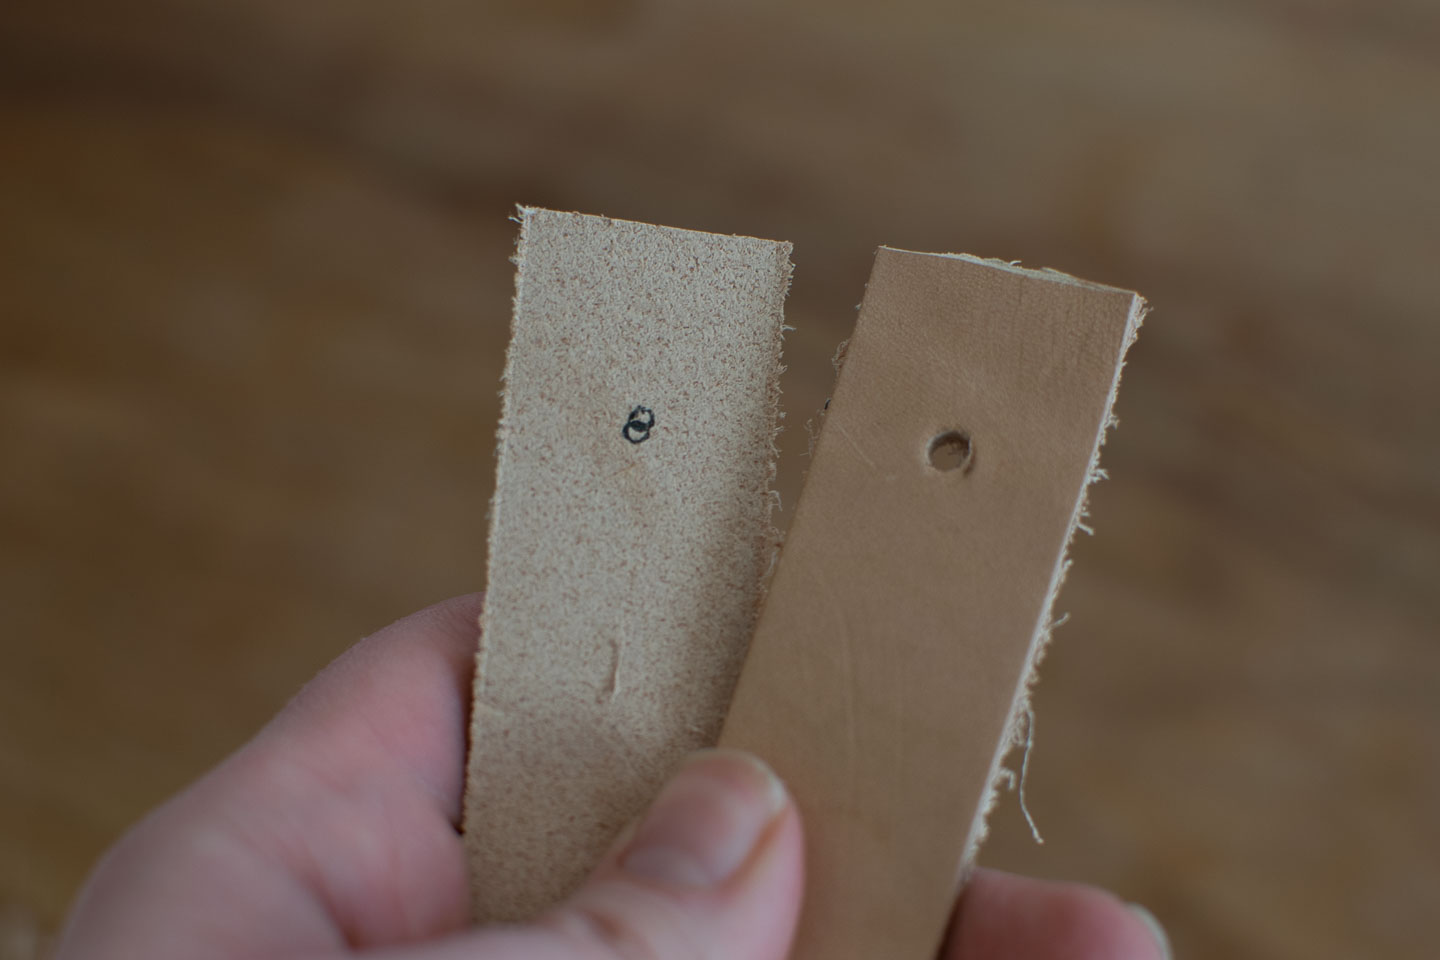
5. Punch second hole
Hanging the Shelf
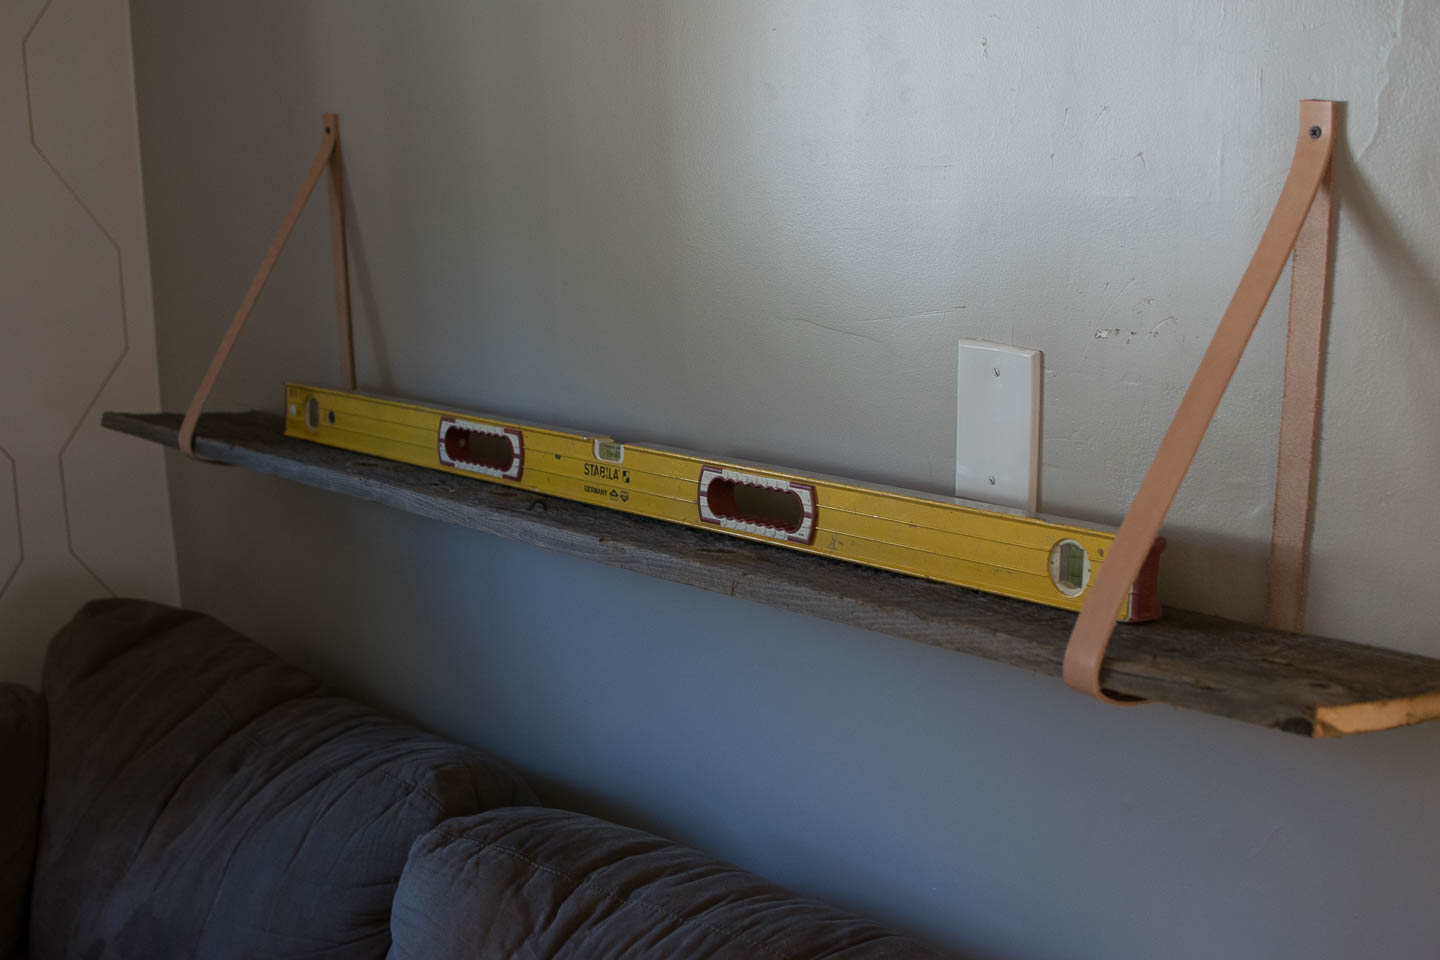
- Find & mark your studs with a stud finder or the knocking method (which is difficult in an older lath and plaster home).
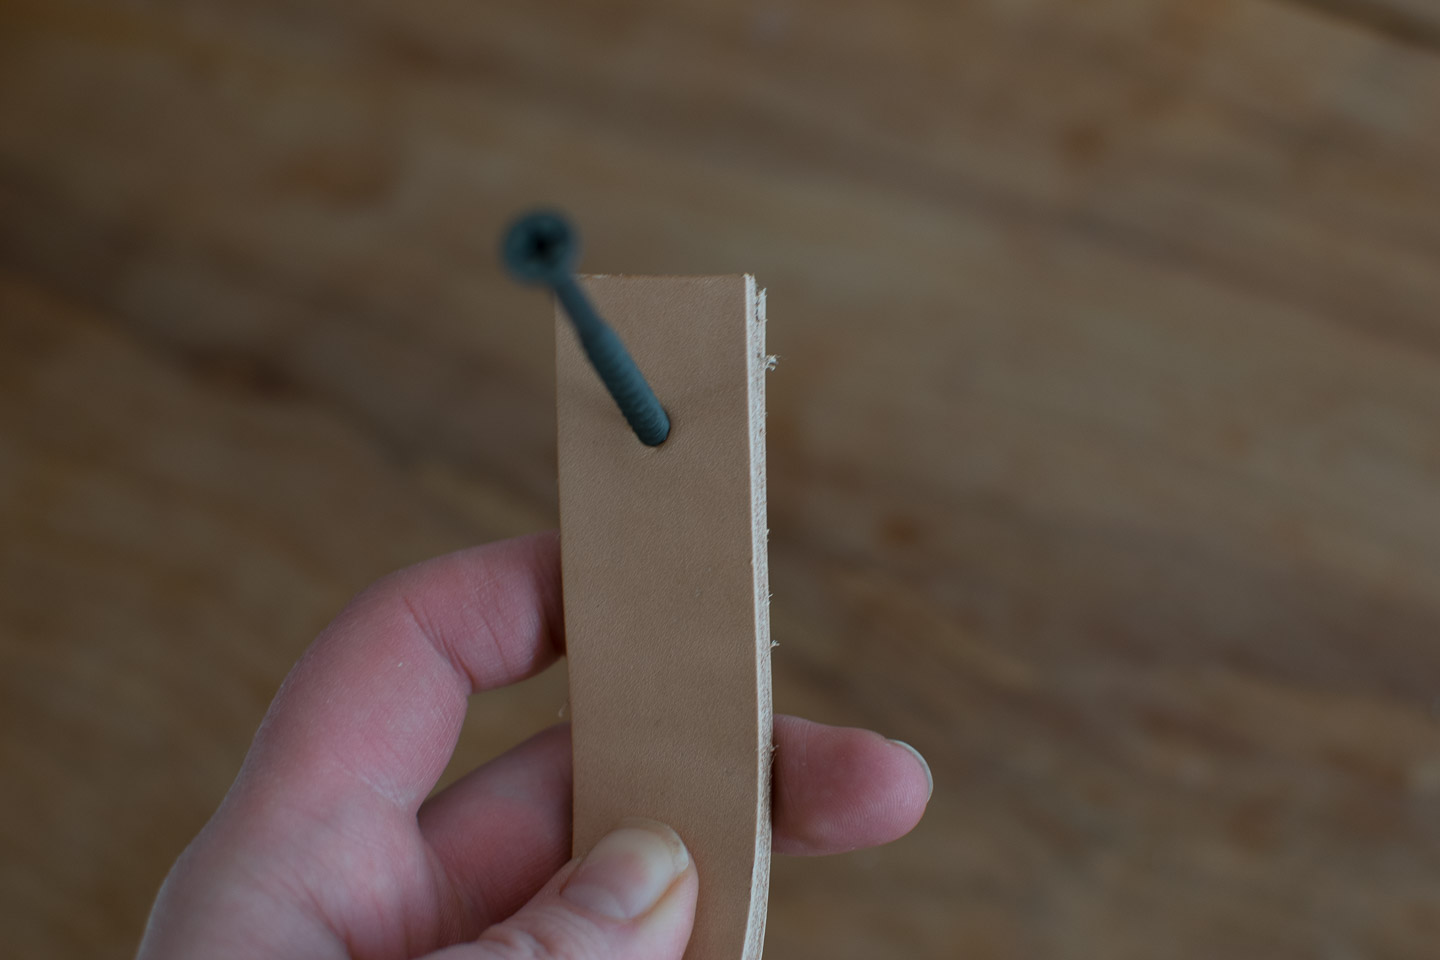
- Hang one side at the height you would like it
3. Put level on shelf and screw in other strap to the stud
Finishing The Shelf
Currently the barn board is unfinished, but it won't be staying that way for long. I'm thinking of using wax to help with the rough splintery wood (its the real stuff not some new wood thats made to look old) and I think epoxy would fill in nice but give too shiny of an appearance. Anyone have any other suggestions on a finish?
Reality Check
This was one of those quick projects that we really like doing. Most of the time projects have so many moving parts things can take a while to get done. Nothing like a quick, simple, but impactful project to revitalize your DIY mojo.
Where would you hang a shelf like this?