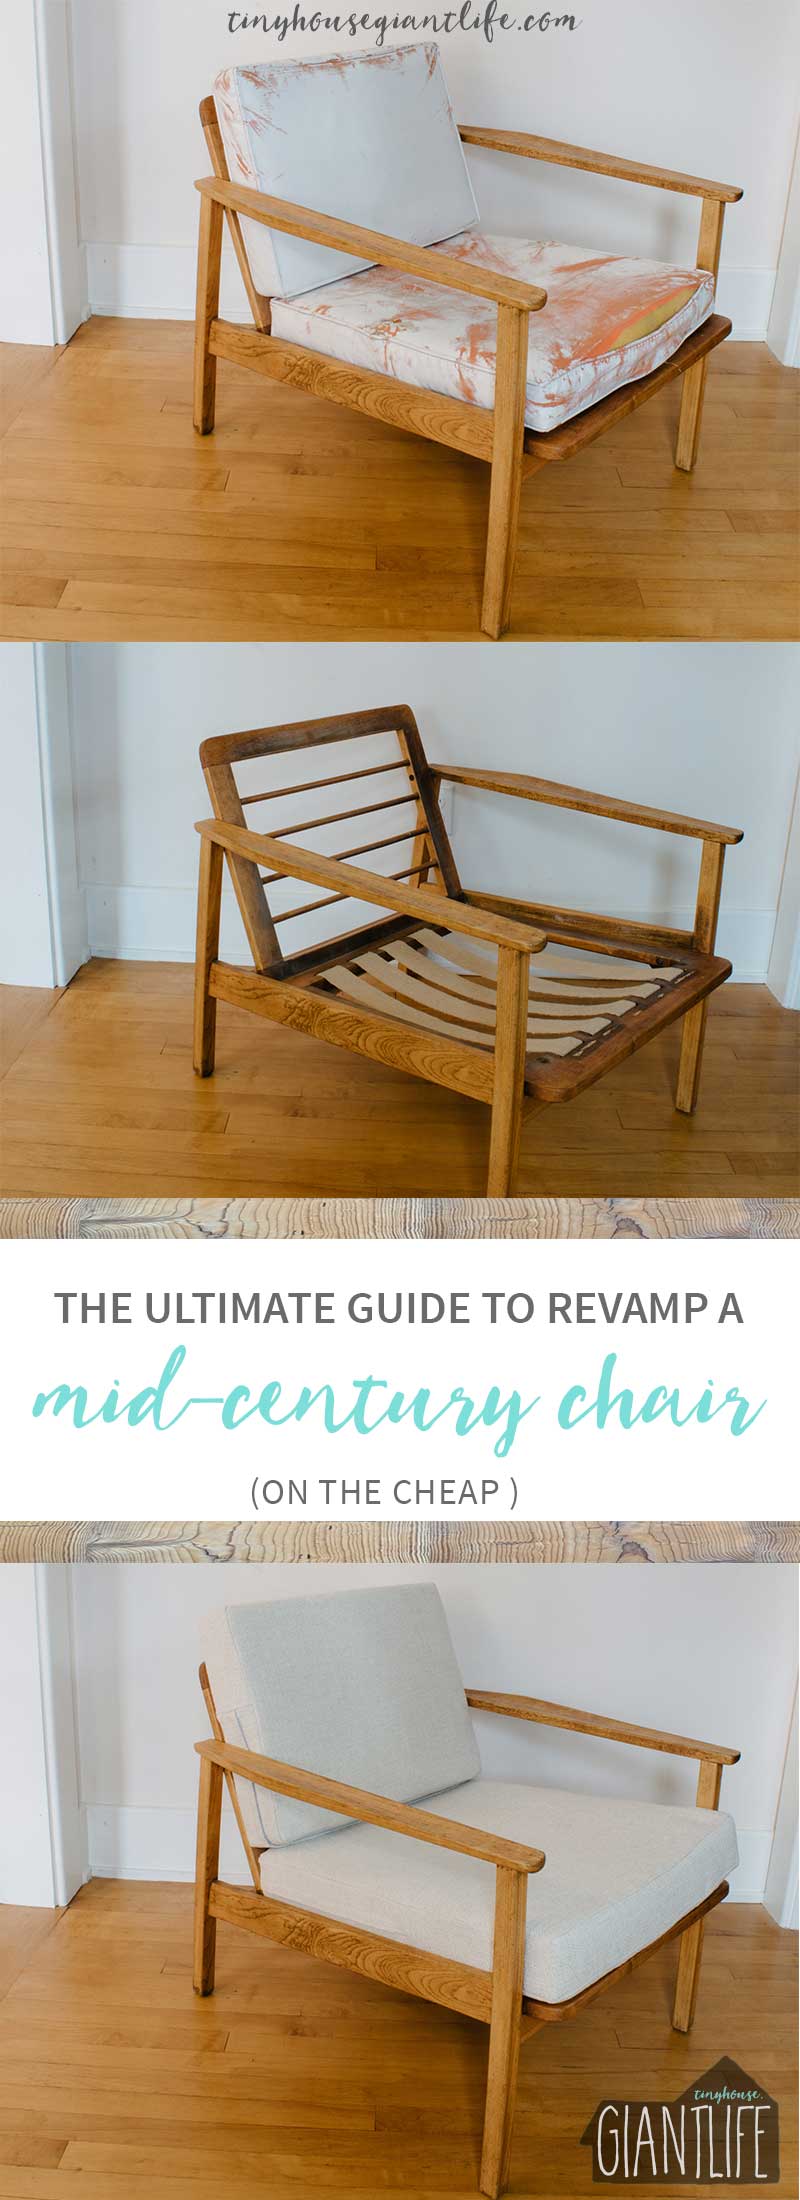
The Ultimate Guide To Revamp A Mid-Century Chair (On The Cheap)
/
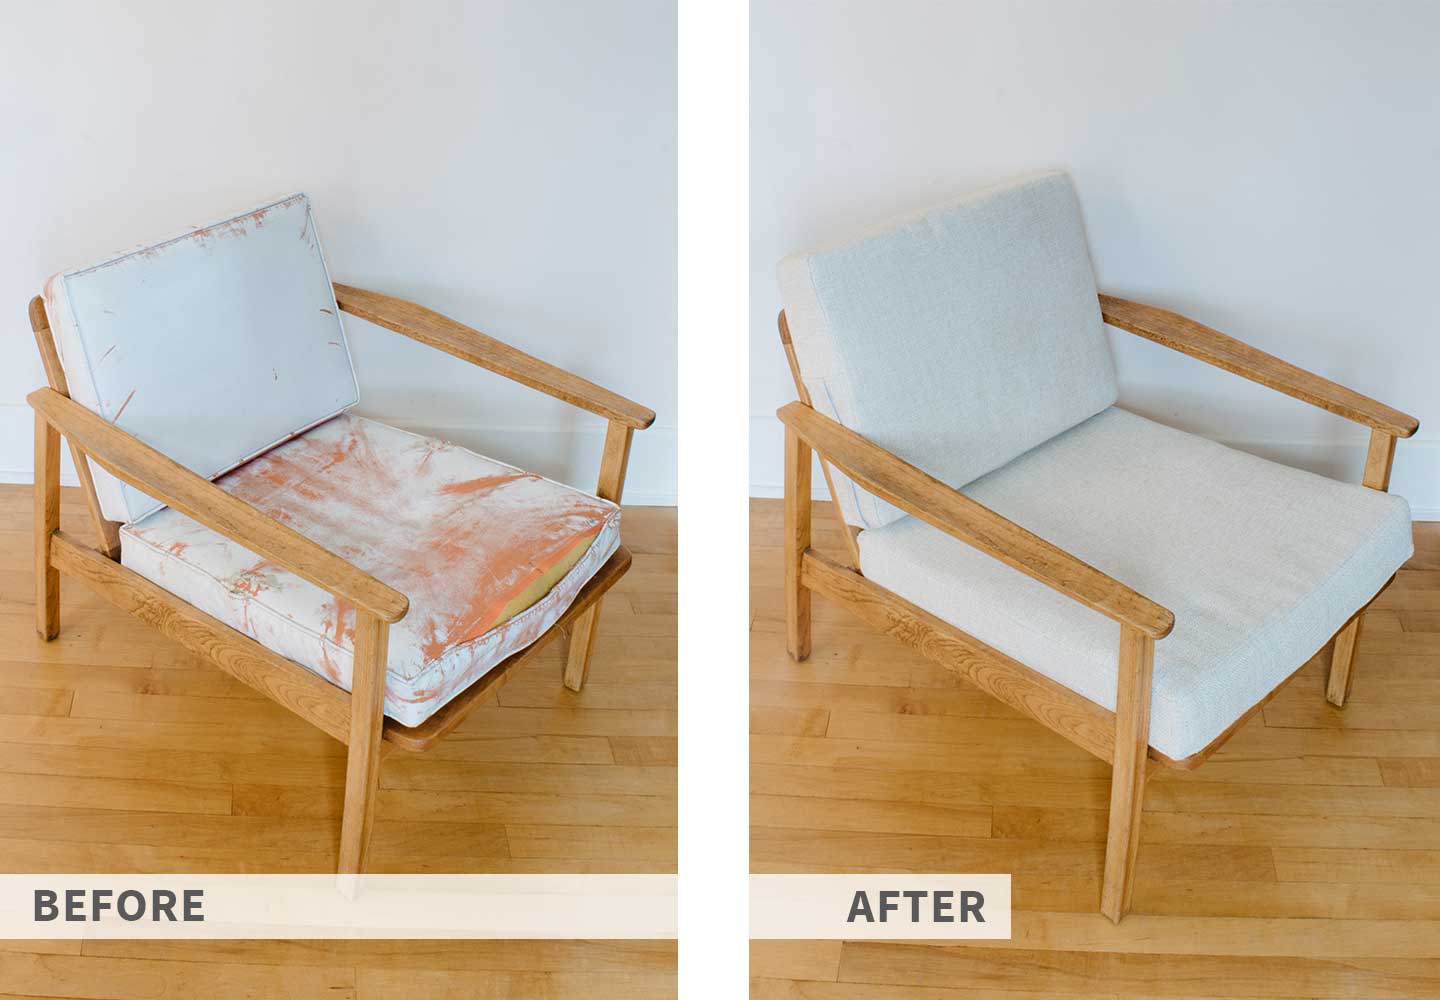
We happened across these two vintage mid-century chairs at the Brimfield fair almost two years ago now and paid $400 for purchasing a set. They originally came out of a hotel in PA although I never got any more specifics I was so busy swooning over finding these.
I had been on the hunt for something I could afford online and at antique shows for about two years previous, but most of the vintage pieces were about 400$ per chair which was more than we could afford.
(THIS POST MAY CONTAIN AFFILIATE LINKS.WHEN YOU CLICK ON A LINK AND PURCHASE I WILL GET A SMALL COMPENSATION AT NO EXTRA COST TO YOU, WIN WIN. READ THE FULL DISCLOSURE HERE.)
1.Finding a Vintage Mid-Century Chair
My advise? Shop antique stores, shows, yard sales, and sign up for notices of estate sales and auctions in your area. If nothing else its fun to go check out some of this items with a history. Believe it or not you can even find these online.
- Find Antique Stores, Yard Sales
- Google estate sale directories & Auction houses in your area
- Shop Etsy, Charish, & EBTH online
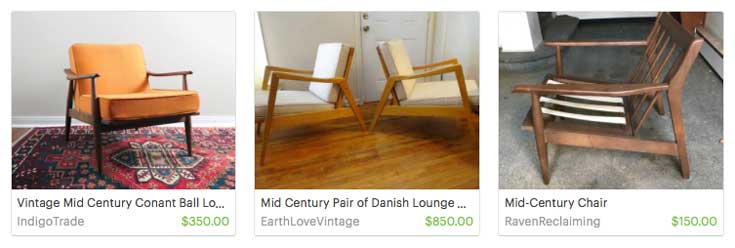
Here are a few examples of what I've found vintage:
Mid-Century Modern Lounge Chairs
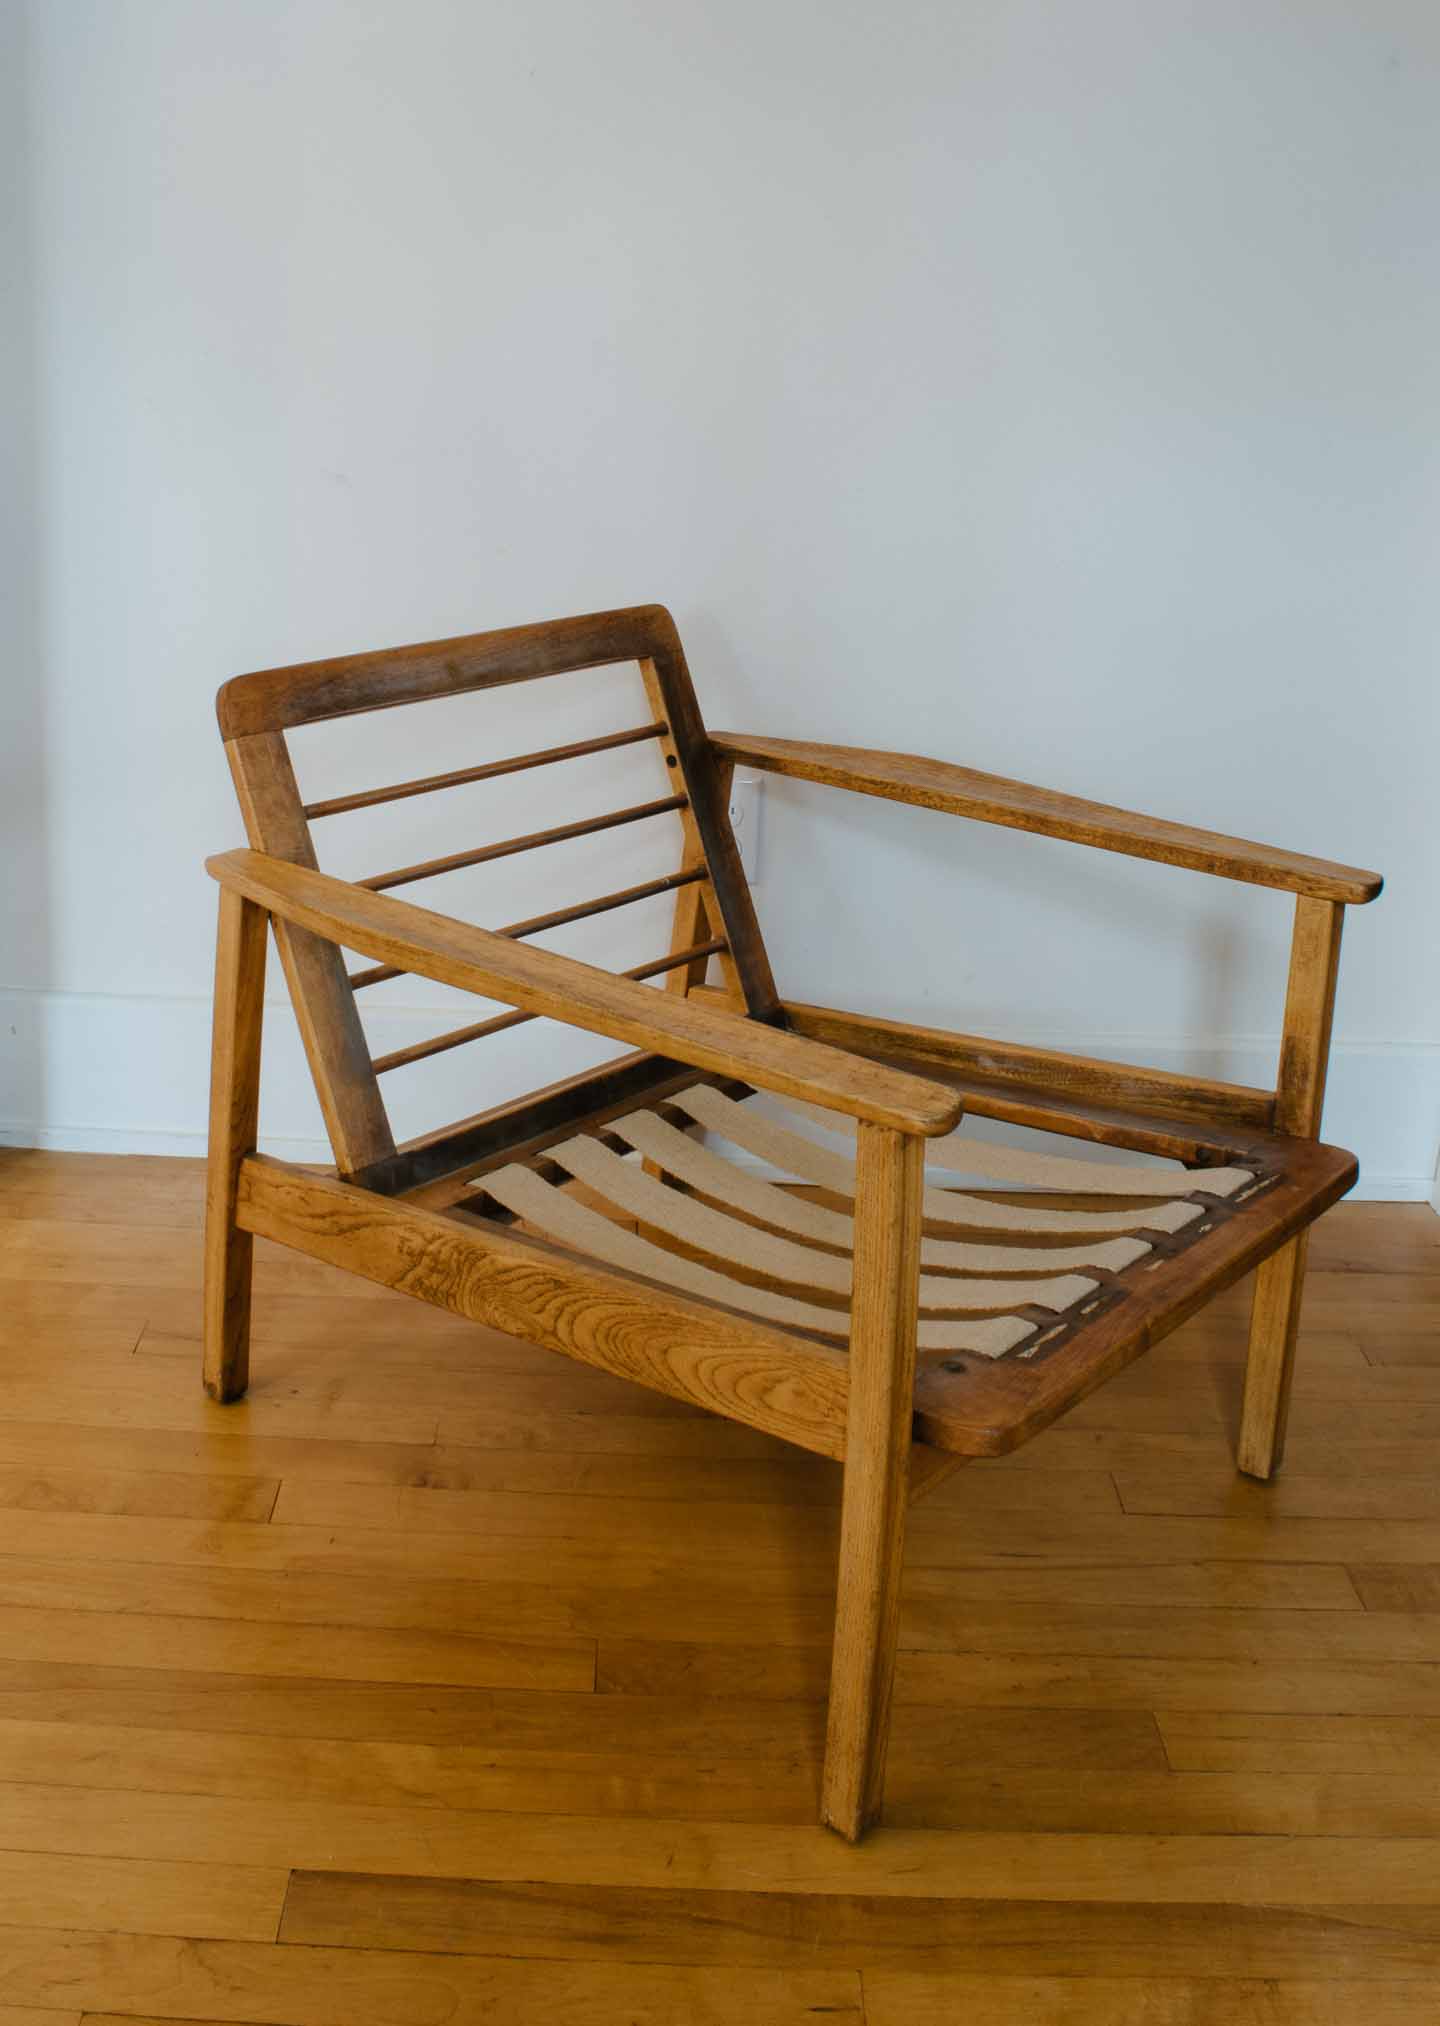
2.Re-enforcing the structure
We went ahead and stapled this strapping onto the chairs to hold up the cushions. When we purchased the seller had removed them because the strapping was in disarray. I would note that our air stapler was too strong for this project so I would use a electric or hand stapler next time. This would be hard to operate with such a dense wood such as teak or walnut, but at least they wouldn't run such a high risk of chipping the wood.
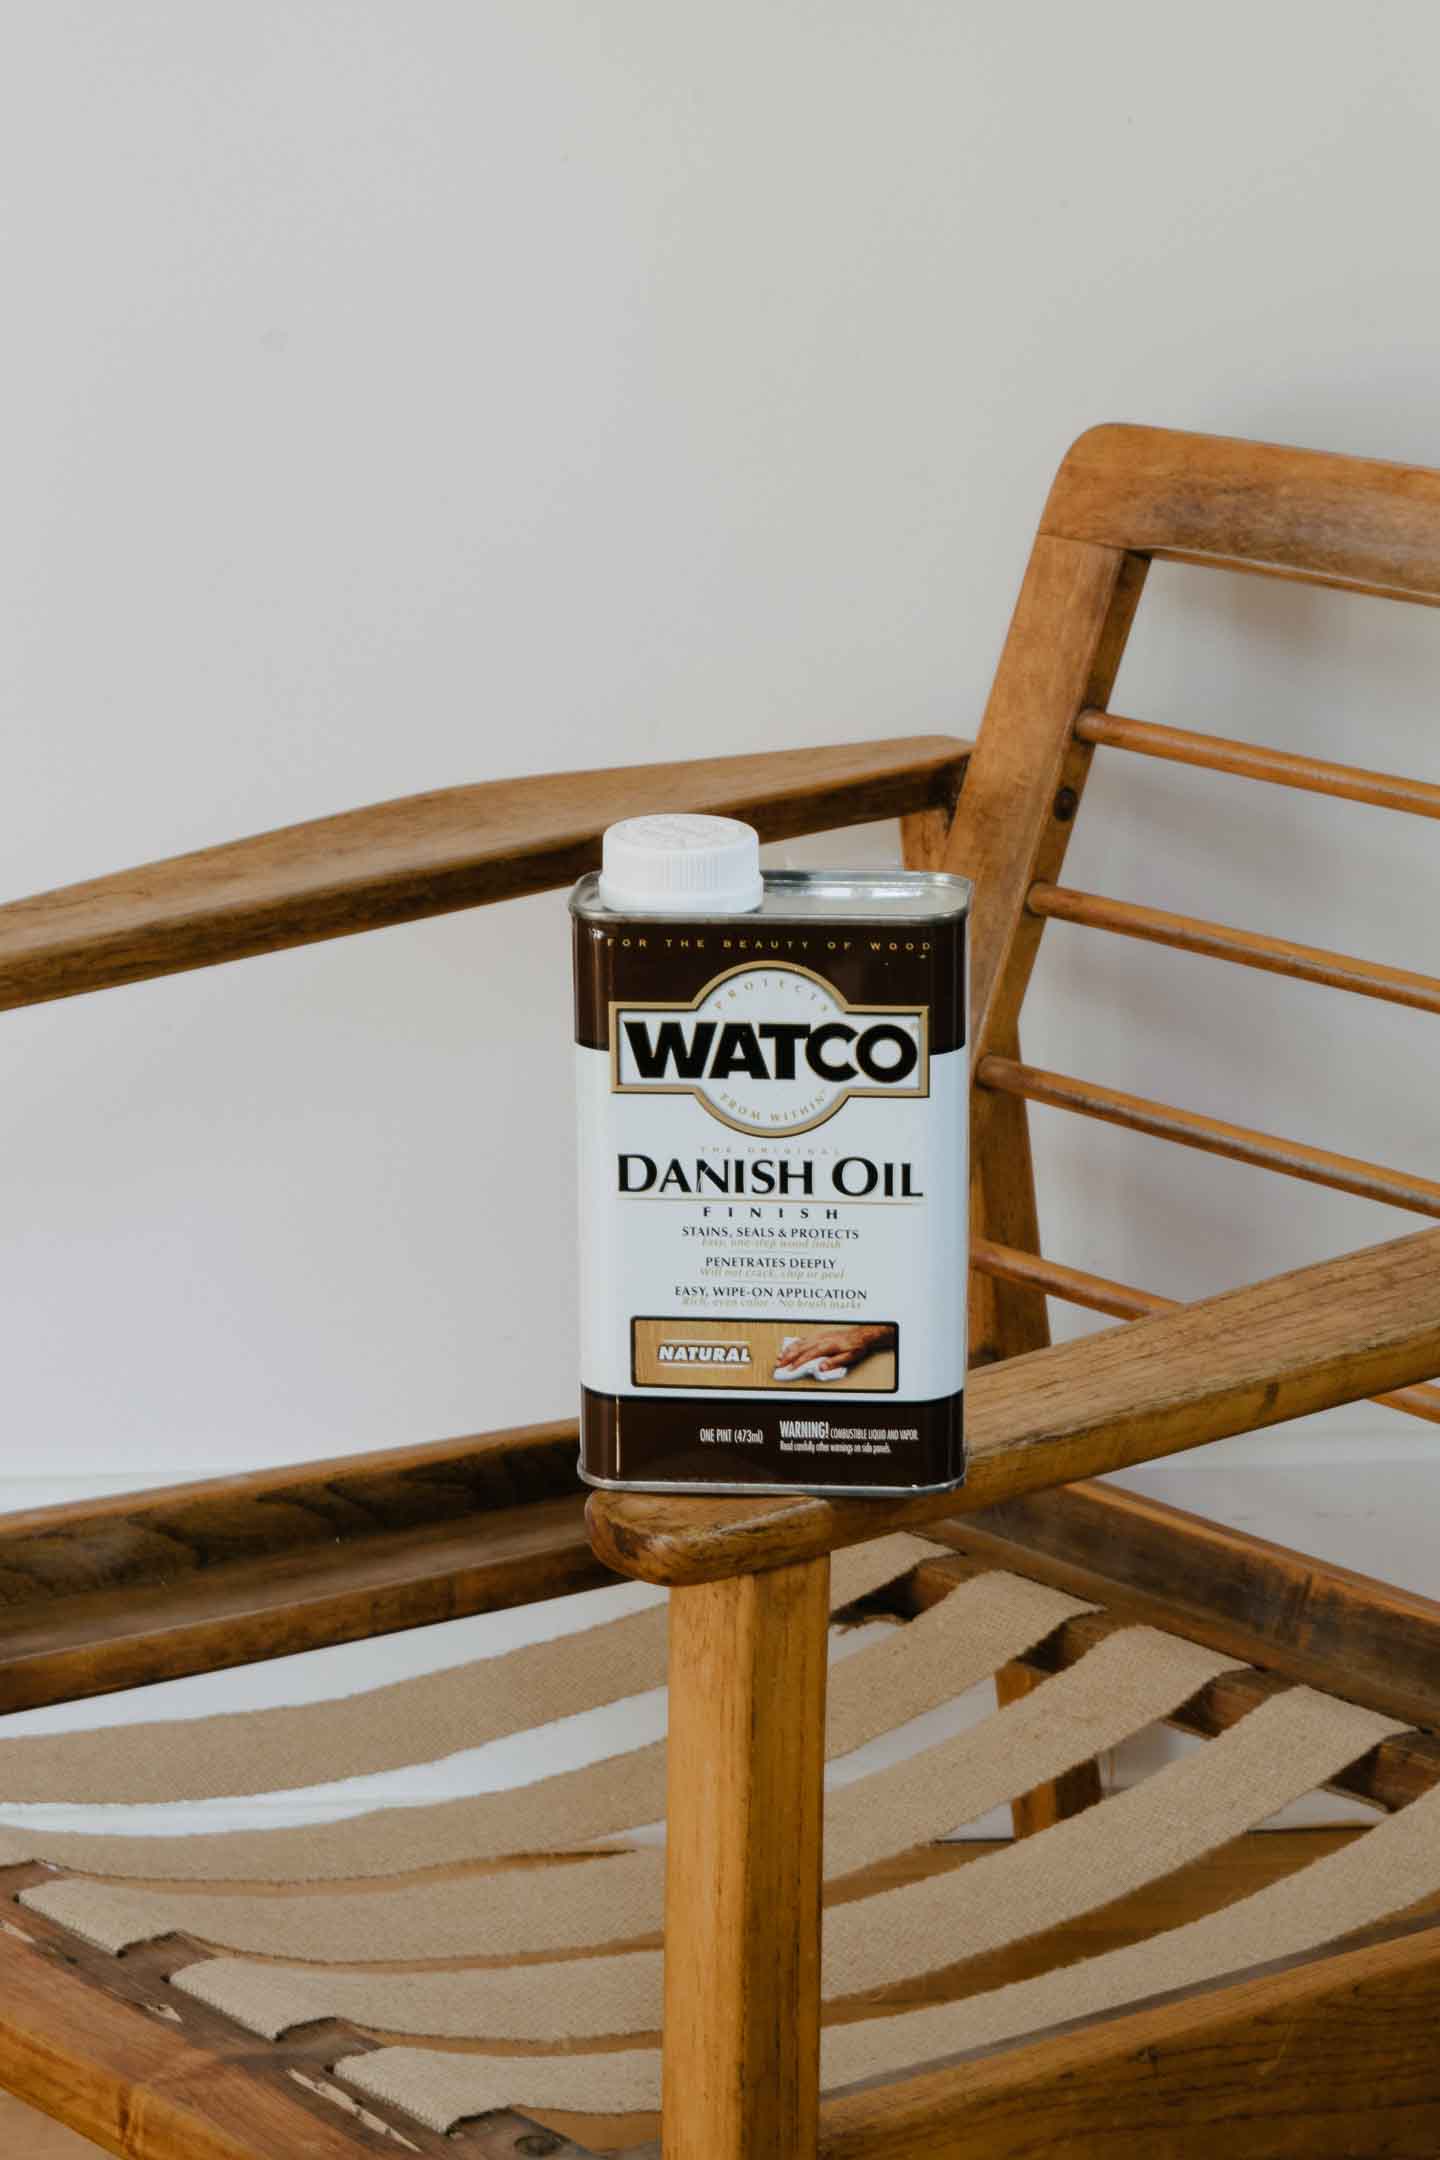
3.Re-finishing the wood
First you need to figure out if the wood already has a poly finish on it or not. Ours didn't so we cleaned the wood and used a Murphy's oil to stain & seal. Murphy's oil will actually harden inside the pores of the wood and create a denser wood while it stains.
- Always apply oil with a stain cloth or rag, no foam brushes!
- Wait at least 72 hours before using a coat of polyurethane on top (not necessary and will give a shine instead of matte finish)
4.Re-upholstering the cushions DIY vs. Purchasing
Typically a mid-century chair like this will not have standard sized cushions, so you can't just find something ready made anywhere. So while I saved to complete this project, I searched out a few purchasing options and we really debated whether we should just go ahead and buy these. Links below on the places I found.
In the end, I found fabric on super sale, and we have a local bulk store that sells and cuts foam filler, so DIY seemed feasible for us. I proceeded to beg my mother for her help (she used to make her own clothing for darn sake!) and we started doing research on how to make these.
Upholstering the Mid- Century Chair :the DIY version
Pick A Fabric
Upholstery fabric can be very expensive so my advise would be pre-estimate the yardage you will need and be on the lookout at Joann's. they can run wonderful sales combined with picking something at discount will save you loads of money.
I found 5 yards of fabric in a nice neutral tweed for 50% off, then at the register they gave me another 50%. Literally this fabric and some matching thread cost me 25$, but I had to be super patient, and snag it when I saw it (which happened to be days before Christmas).
I can't stress enough that picking something neutral will allow you to love it for many more years to come. Whites, Grey's, Black, Navy.... it all depends on your overall room aesthetic. Mid-century chairs have been in style since they were first designed, I'm sure they will fall back out of trend, but they will forever be a classic style.
If you end up with a classic piece of furniture in your home, you will want it to remain looking classic for the longevity. Don't date the piece by making it too trendy with a print. You can always add throw pillows as your style shifts and trends change over the years.
Getting Cushion Foam
This was a real treat (Am I the only one who gets excited for seeing how things are made like this?) Having never upholstered anything before, I went with some advise and stopped by a bulk fabric store localist to us here in Western Ma. Osgood's hasn't disappointed when I've searched for fabric in the past, and they didn't disappoint with the foam either.
- Find a local store similar and have them cut high density foam for your cushions (you are really going to want them to hold up).
- Make a paper pattern of the originals
- Bring the originals for them to measure
- Don't have cushions to measure? You may want to look into visiting an upholsterer and getting a quote to just have the work done so everything fits perfectly. They will even tell you how much fabric to bring them.
- Purchase a roll of foam and cut yourself with a jig saw (If you're a mad crazy DIYer, even I wasn't up for the challenge)

Creating A Pattern Using Construction Paper
They sell large rooms of brown construction paper (the kind your contractor lays when remodeling your home) at the big hardware stores. We use this stuff for all kinds of projects from coloring paper (perfect for babies first crayons because the wide width will keep tables completely covered), too pattern making.
- Make sure to start with your square edge, and be very particular. You can use a regular construction square, sewing square, or a T square to create the pattern.
- Create one pattern per cushion top/ bottom and all the side pieces.
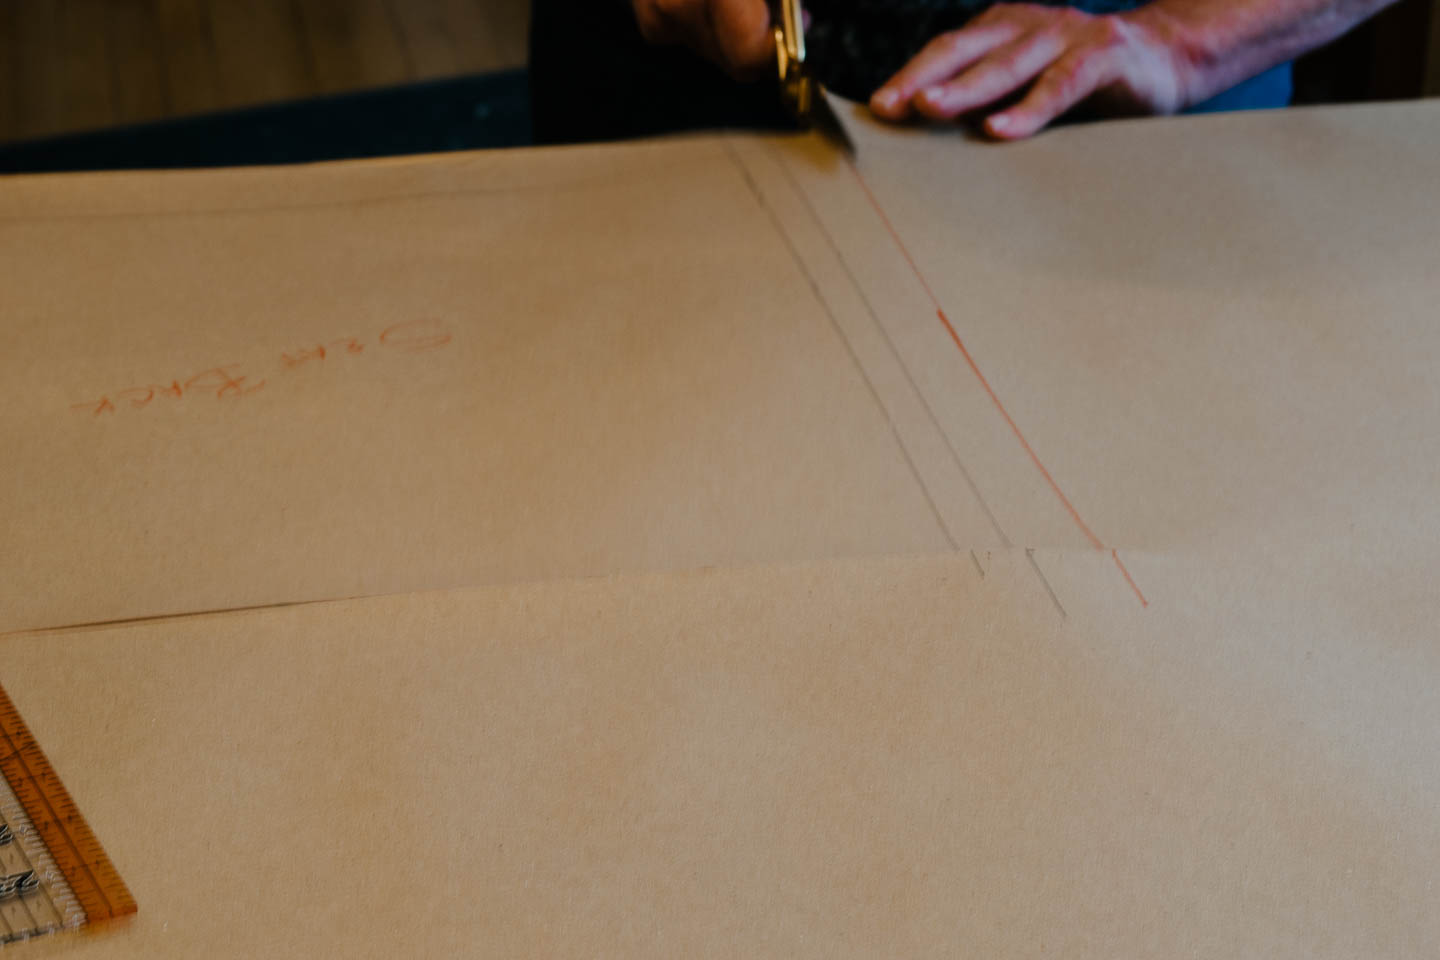
Cutting out the pattern
- Be very careful if you have a fabric with weave lines such as tweed. Line your pattern up to the tweed lines and then cut. Otherwise, the end result will show a drifting fabric pattern and look out of square to the naked eye.


The Sewing Tutorials We Used
You can check out these tutorials for directions on how to make a box cushion similar to ours. Be forewarned, I couldn't have done this without my mother's help and we still ran into issues, so don't go into this project never having sewn anything is your life.
I purchased this Singer Machine in early 2015 and it has been wonderful for all my needs.
Additional Reading on Making a Box Cushion:
The Tutorial We Used- No Cording & Velcro
Design Sponge- Box Cushion with Cording & Zipper
Here are the issues we ran into with creating these for you to take note on:
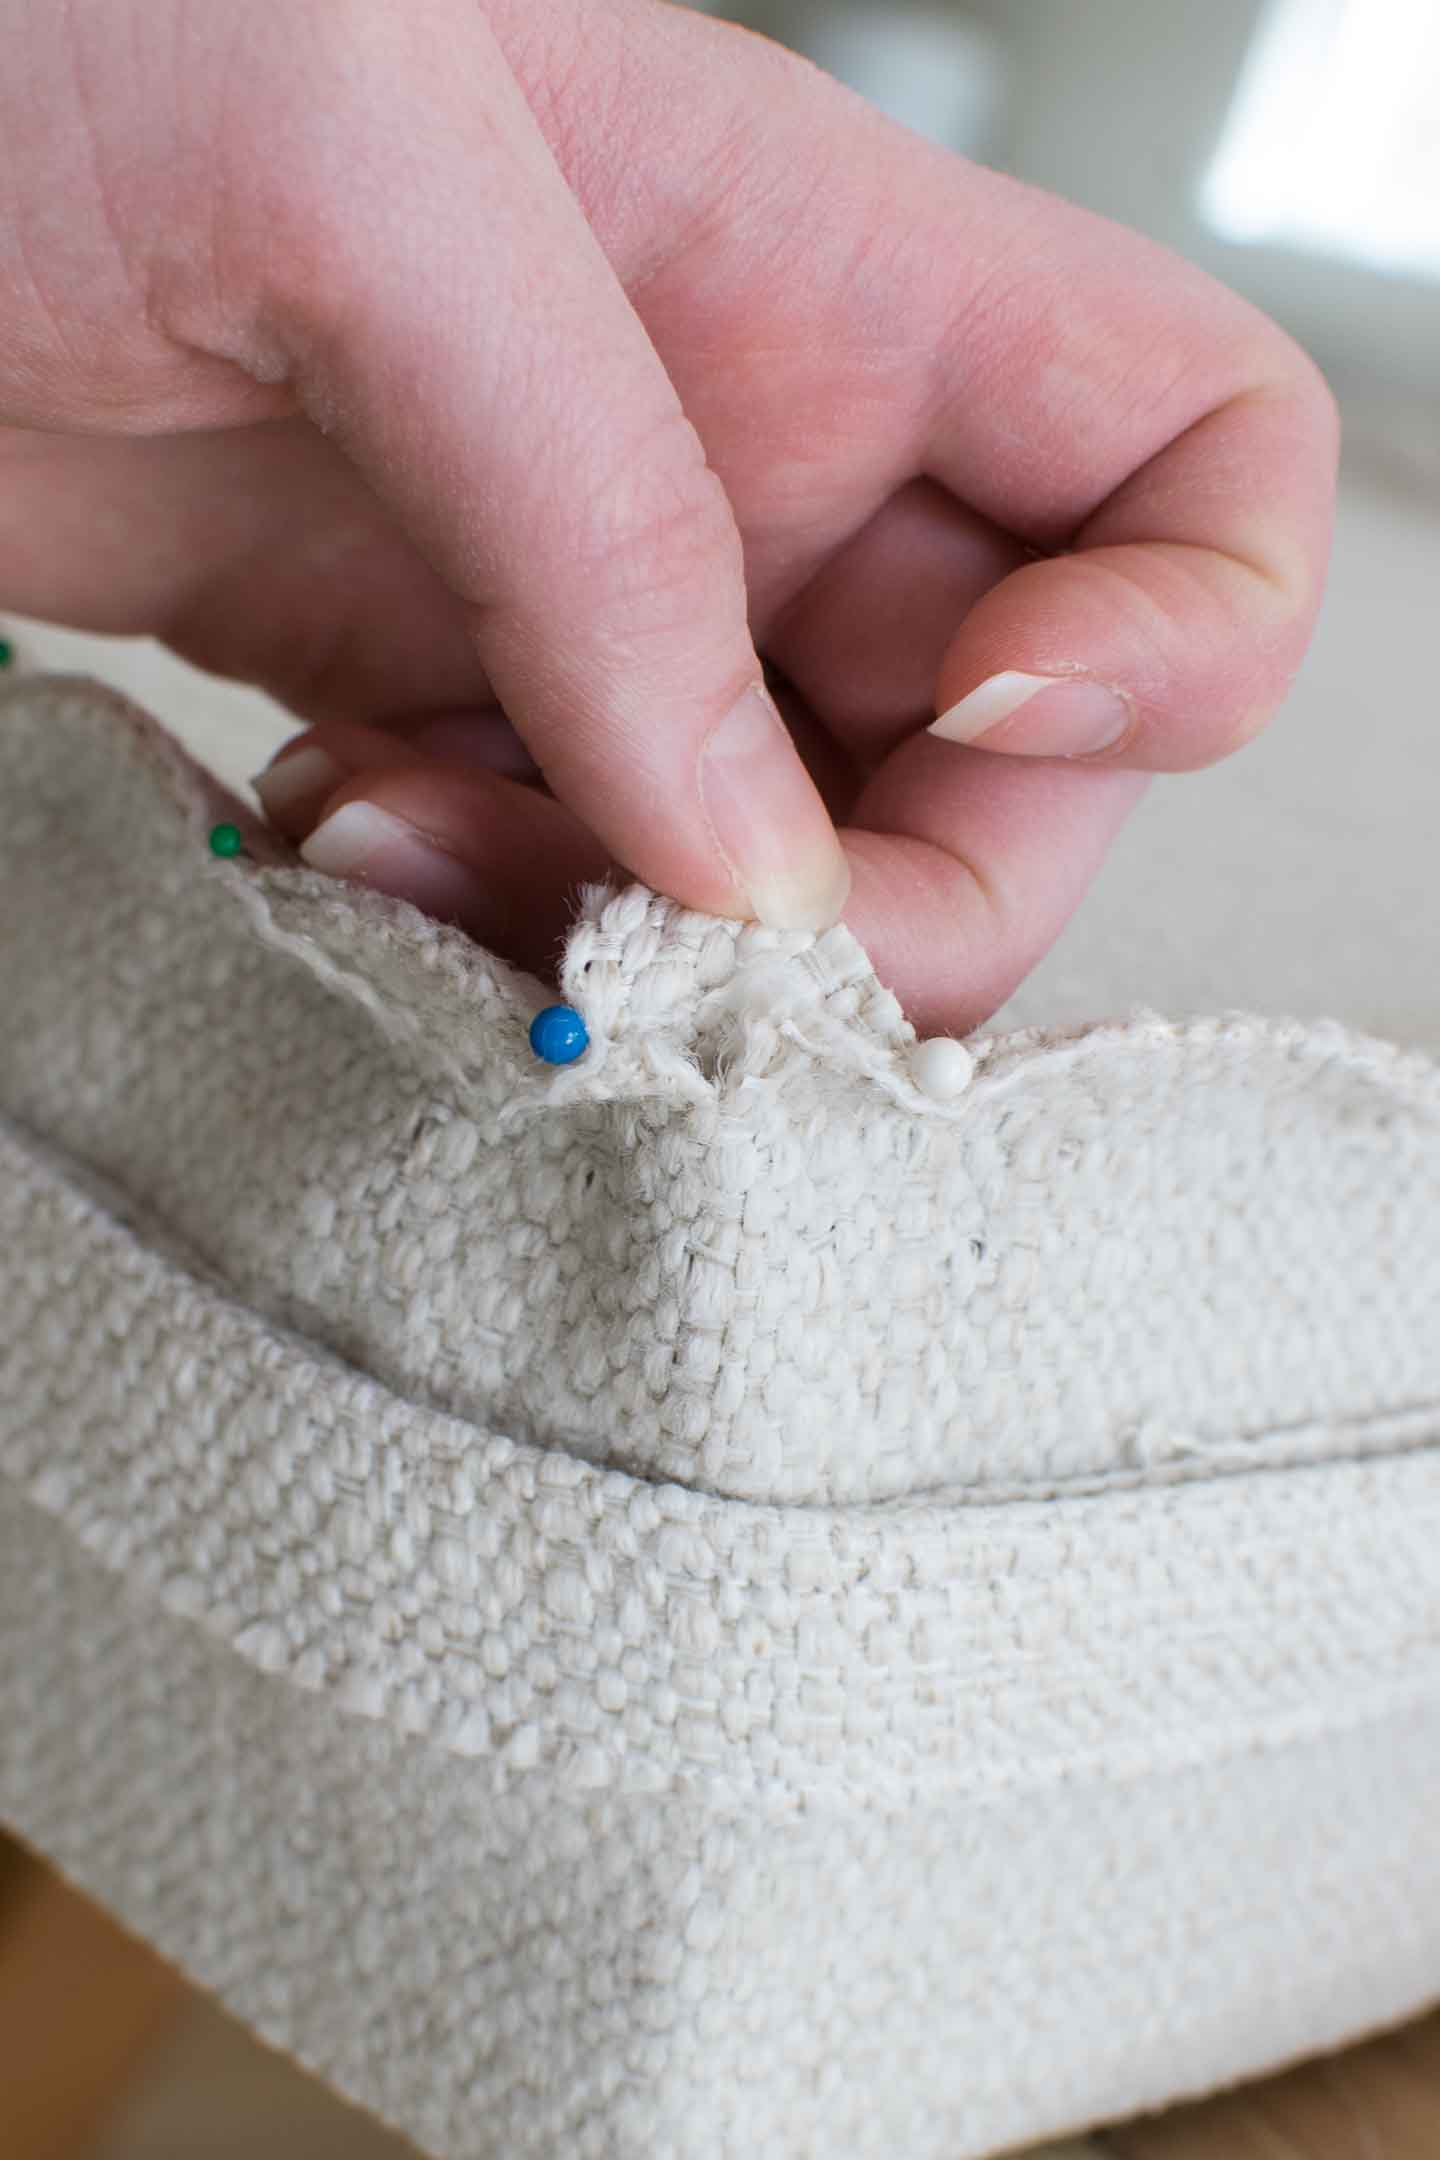
The tutorial we used said to just starting pinning the sides onto and top or bottom piece, when we did this everything didn't end up square at the corners.
We ended up having to pin the fabric for sewing on the cushion and take off via the velcro opening. This was tons more work, but well worth it because we could see how things would look before sewing.
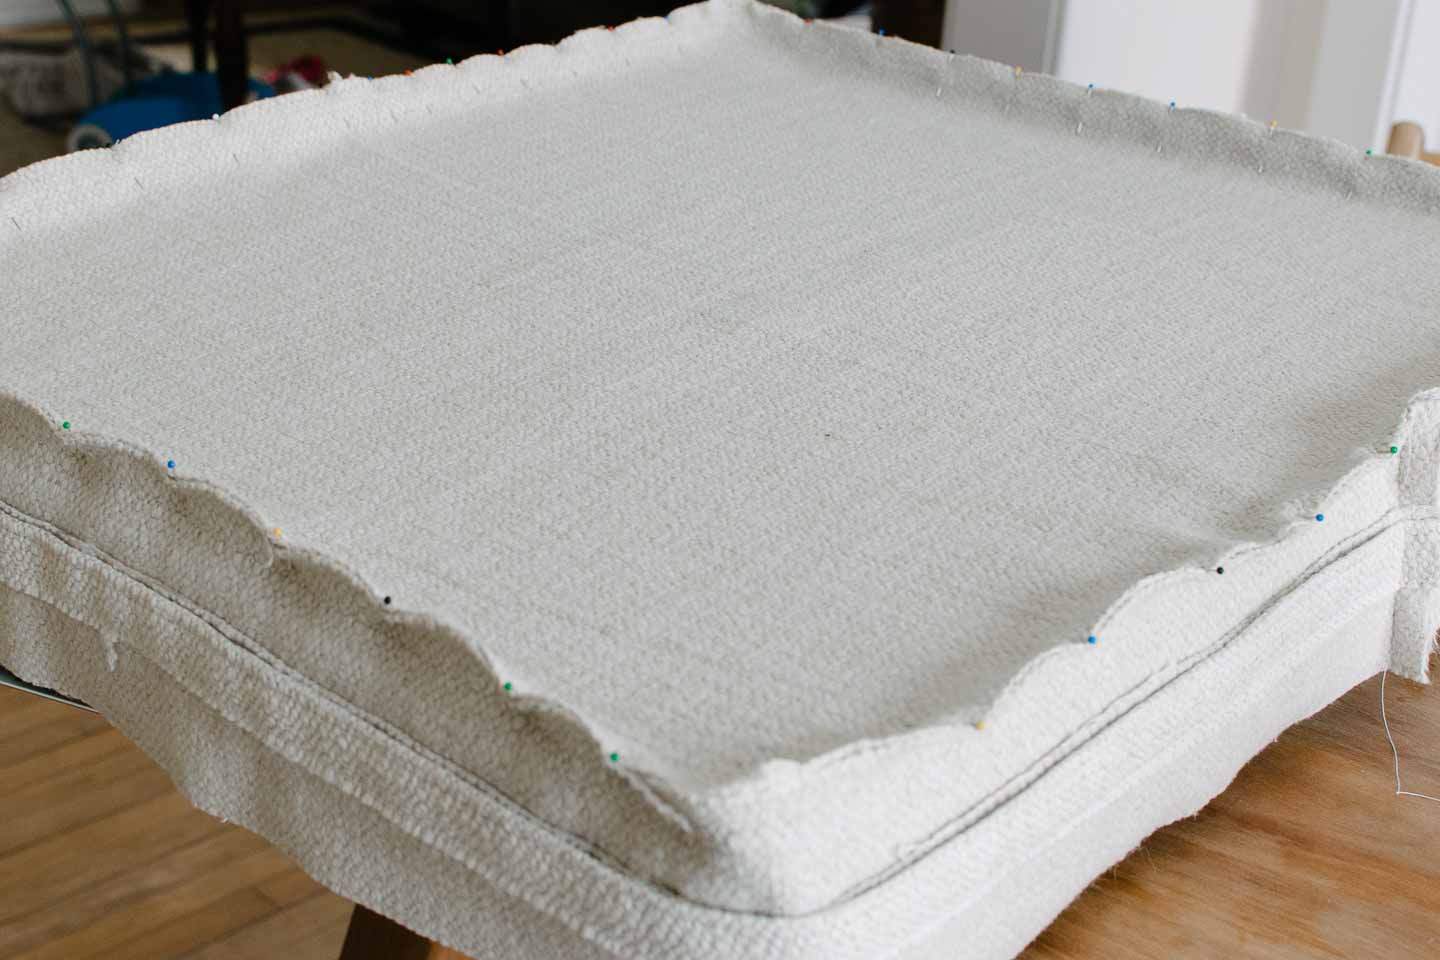 The corners were very stressful, you have to clip down into the sides, and it seems counterintuitive. Its the only way to end up with a crisp corner and not a rounded mess.
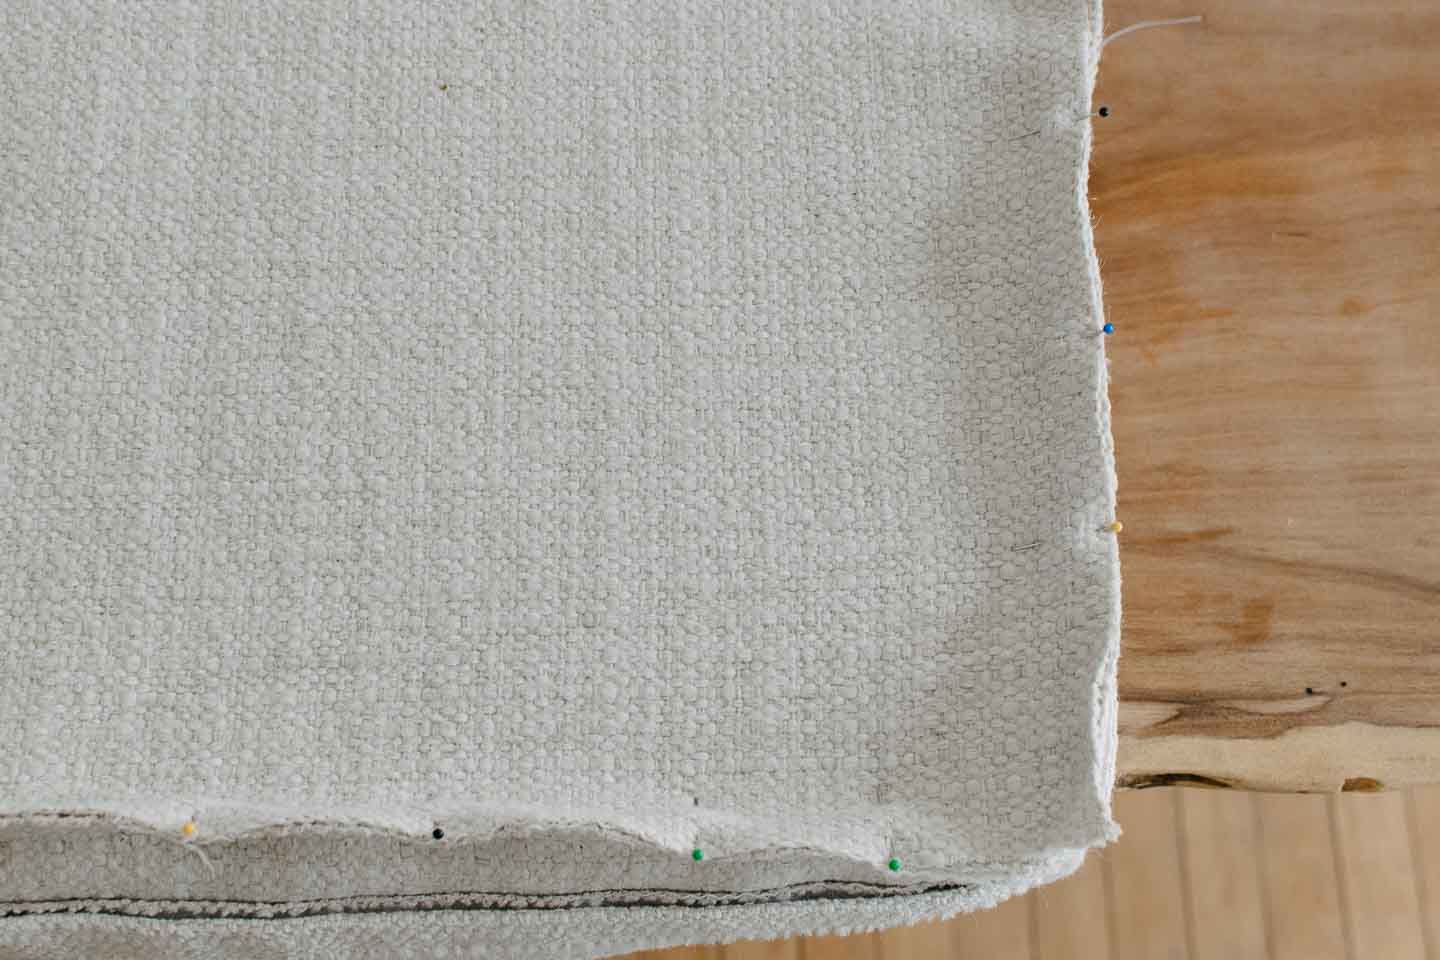
Upholstering a Mid-Century Chair: the purchase version
I found a shop on Etsy that sells custom box cushions and also one website that I almost purchased from. With the fabric being so inexpensive I figured I would give it a go and actually saved about 50% off of purchasing them.
Etsy Cushion Covers (You still need to get the filling)
Custom Cushions (Cushion & Cover with tons of fabric options)
Most areas will also have local upholstery shops like mentioned previously. I have had other furniture pieces taken for estimates. They end up being completely reasonably priced and are experts at figuring out sizing for you. So if you don't have the old cushions to measure from, this will absolutely be the best avenue for you.
The Finish Results

Want the look without all the Work?
Reality Check
You guys, I would totally have the cushions made next time! I'm very proud of what my mother & I were able to create, and thankful to sit on them (its only been two years yo), but upholstery is a hard job to do right. I give it to the masters, its not a beginners DIY by any means.
While saving 50% is significant and sometimes you need to DIY to get the job done in a timely manner and not be forever waiting to sit in them; I would have waited another 6 months and saved had I known how difficult it would be. Love them though, and I love that my mother and I made them together.
Thanks Mom, I seriously couldn't have done any of this without you! Have you teamed up with someone to create anything lately?