Make This Super Simple Leather Tray DIY
/
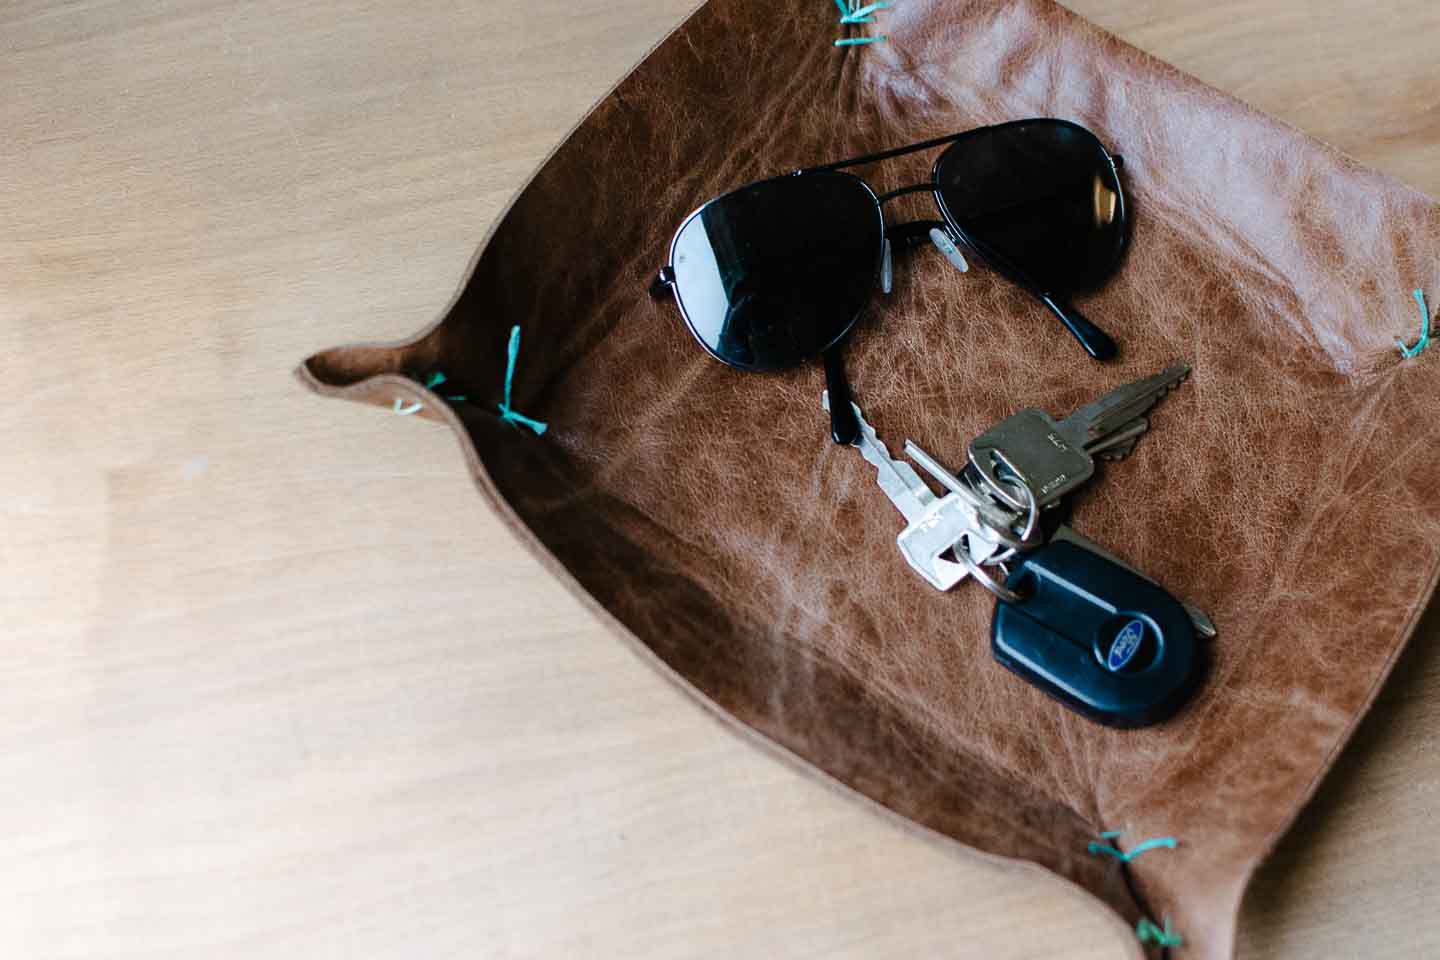
If you were following our One Room Challenge, you may have seen this leather tray in our Entry Reveal already. It was one of the items that was on the DIY docket that I got around to completing (we had to nix a few of our DIY's and make purchases due to a whirlwind month). It was so simple, has become very useful, and really helped balance the dresser top.
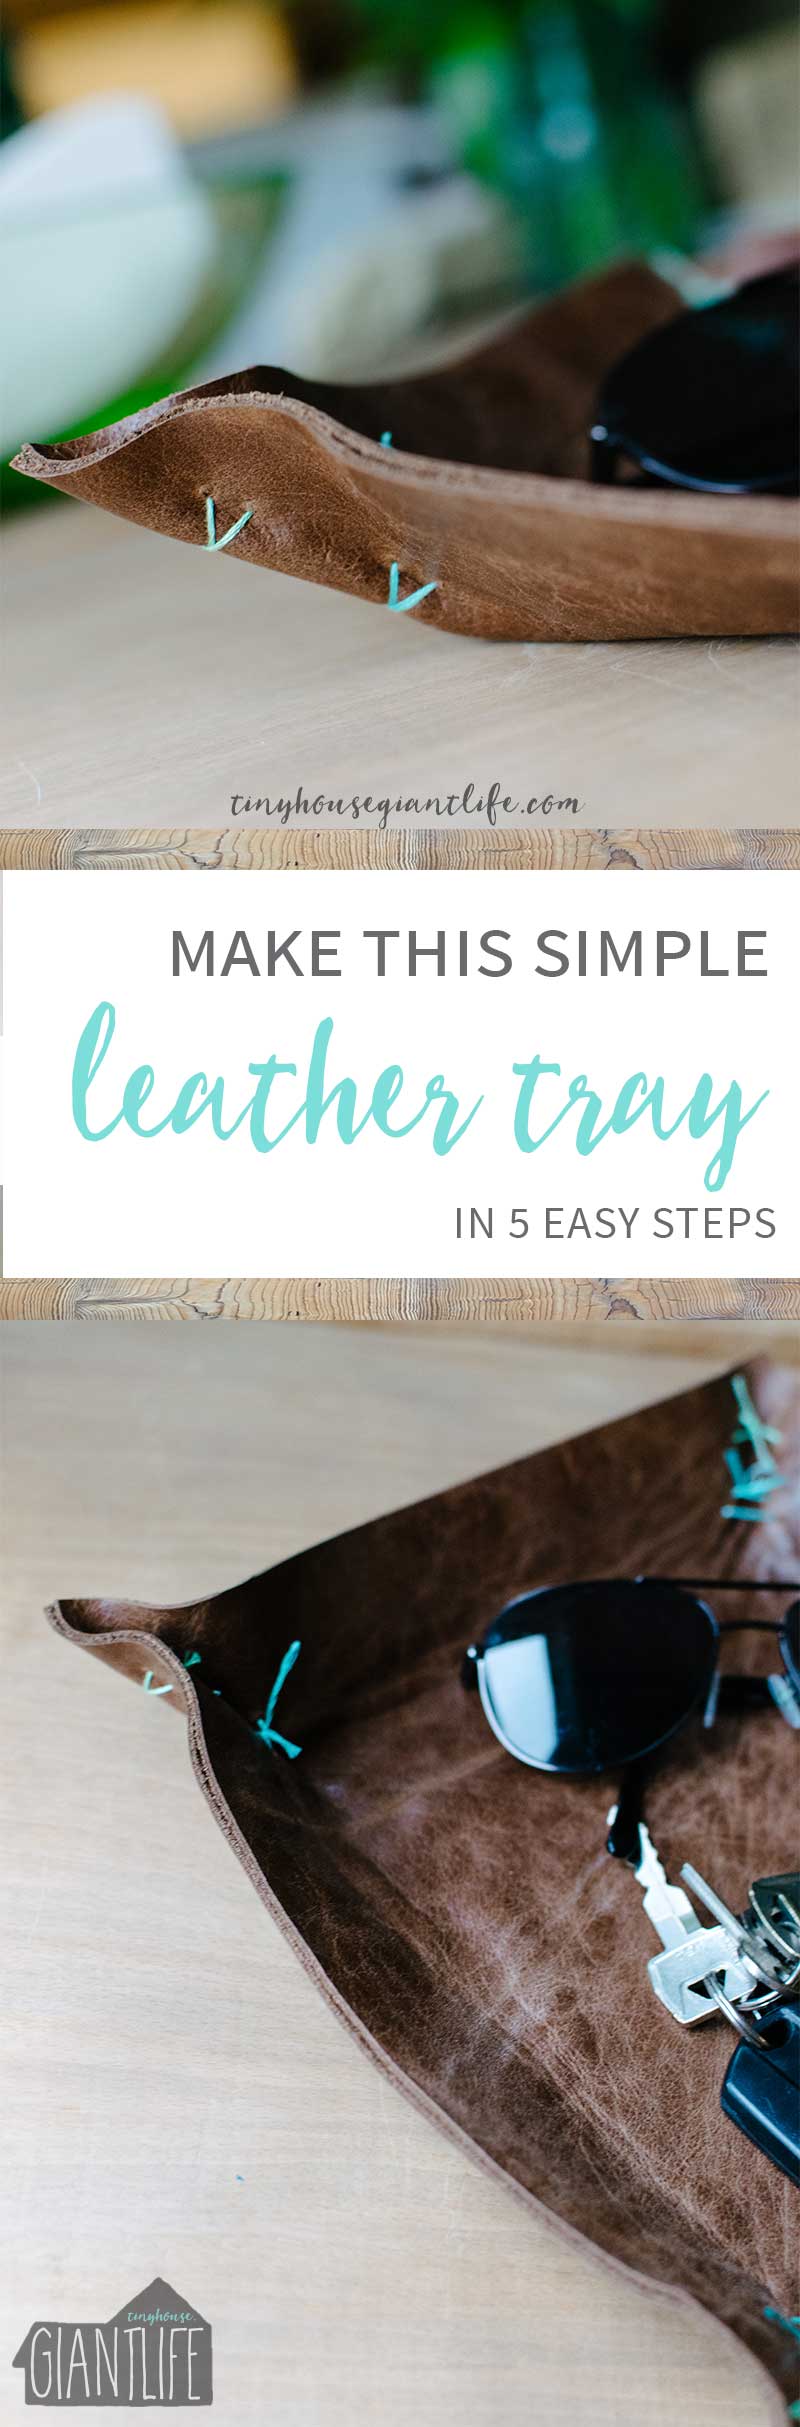
It's super simple, I promise!
We were running back and forth to my husband's Nana's trying to help move her into her new home, somehow keeping up with the six-week one room challenge, and ... I still put this together in one afternoon after getting supplies. If you're interested in a tray for a space in your home (coffee table, entry table, jewelry dish, night stand catch all) this is a DIY just about anyone can do!
And since we are quickly nearing Fathers day , this might be the perfect catch-all for dads night stand or dresser (hint hint).
This post may contain affiliate links.When you click on a link and purchase I will get a small compensation at no extra cost to you, win win. Read the full disclosure here.
Leather Tray DIY Supplies
5 Step Leather Tray DIY
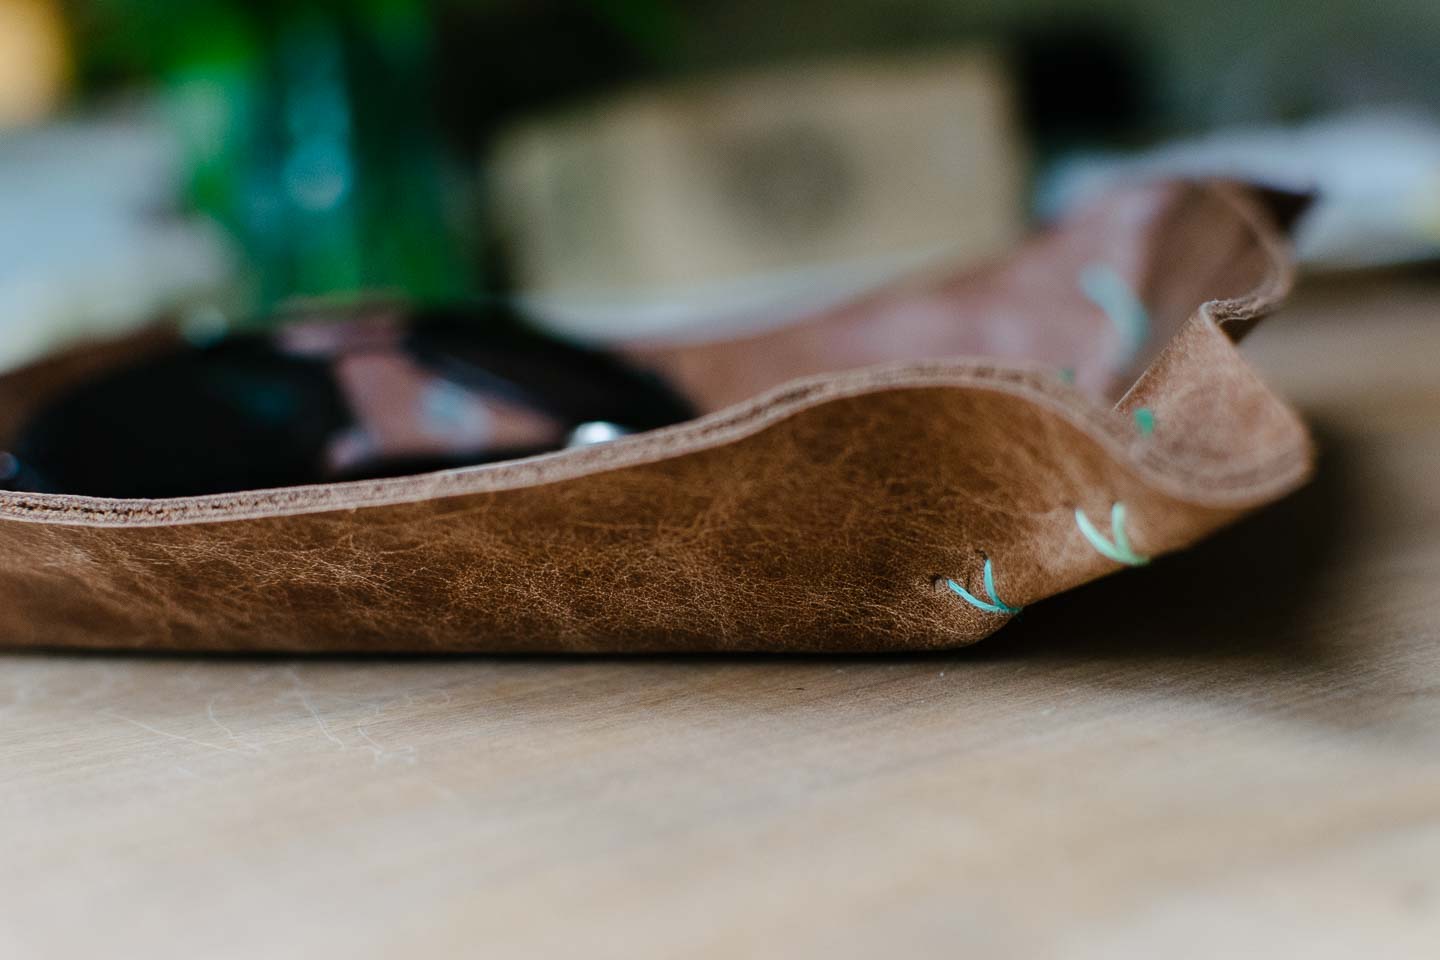
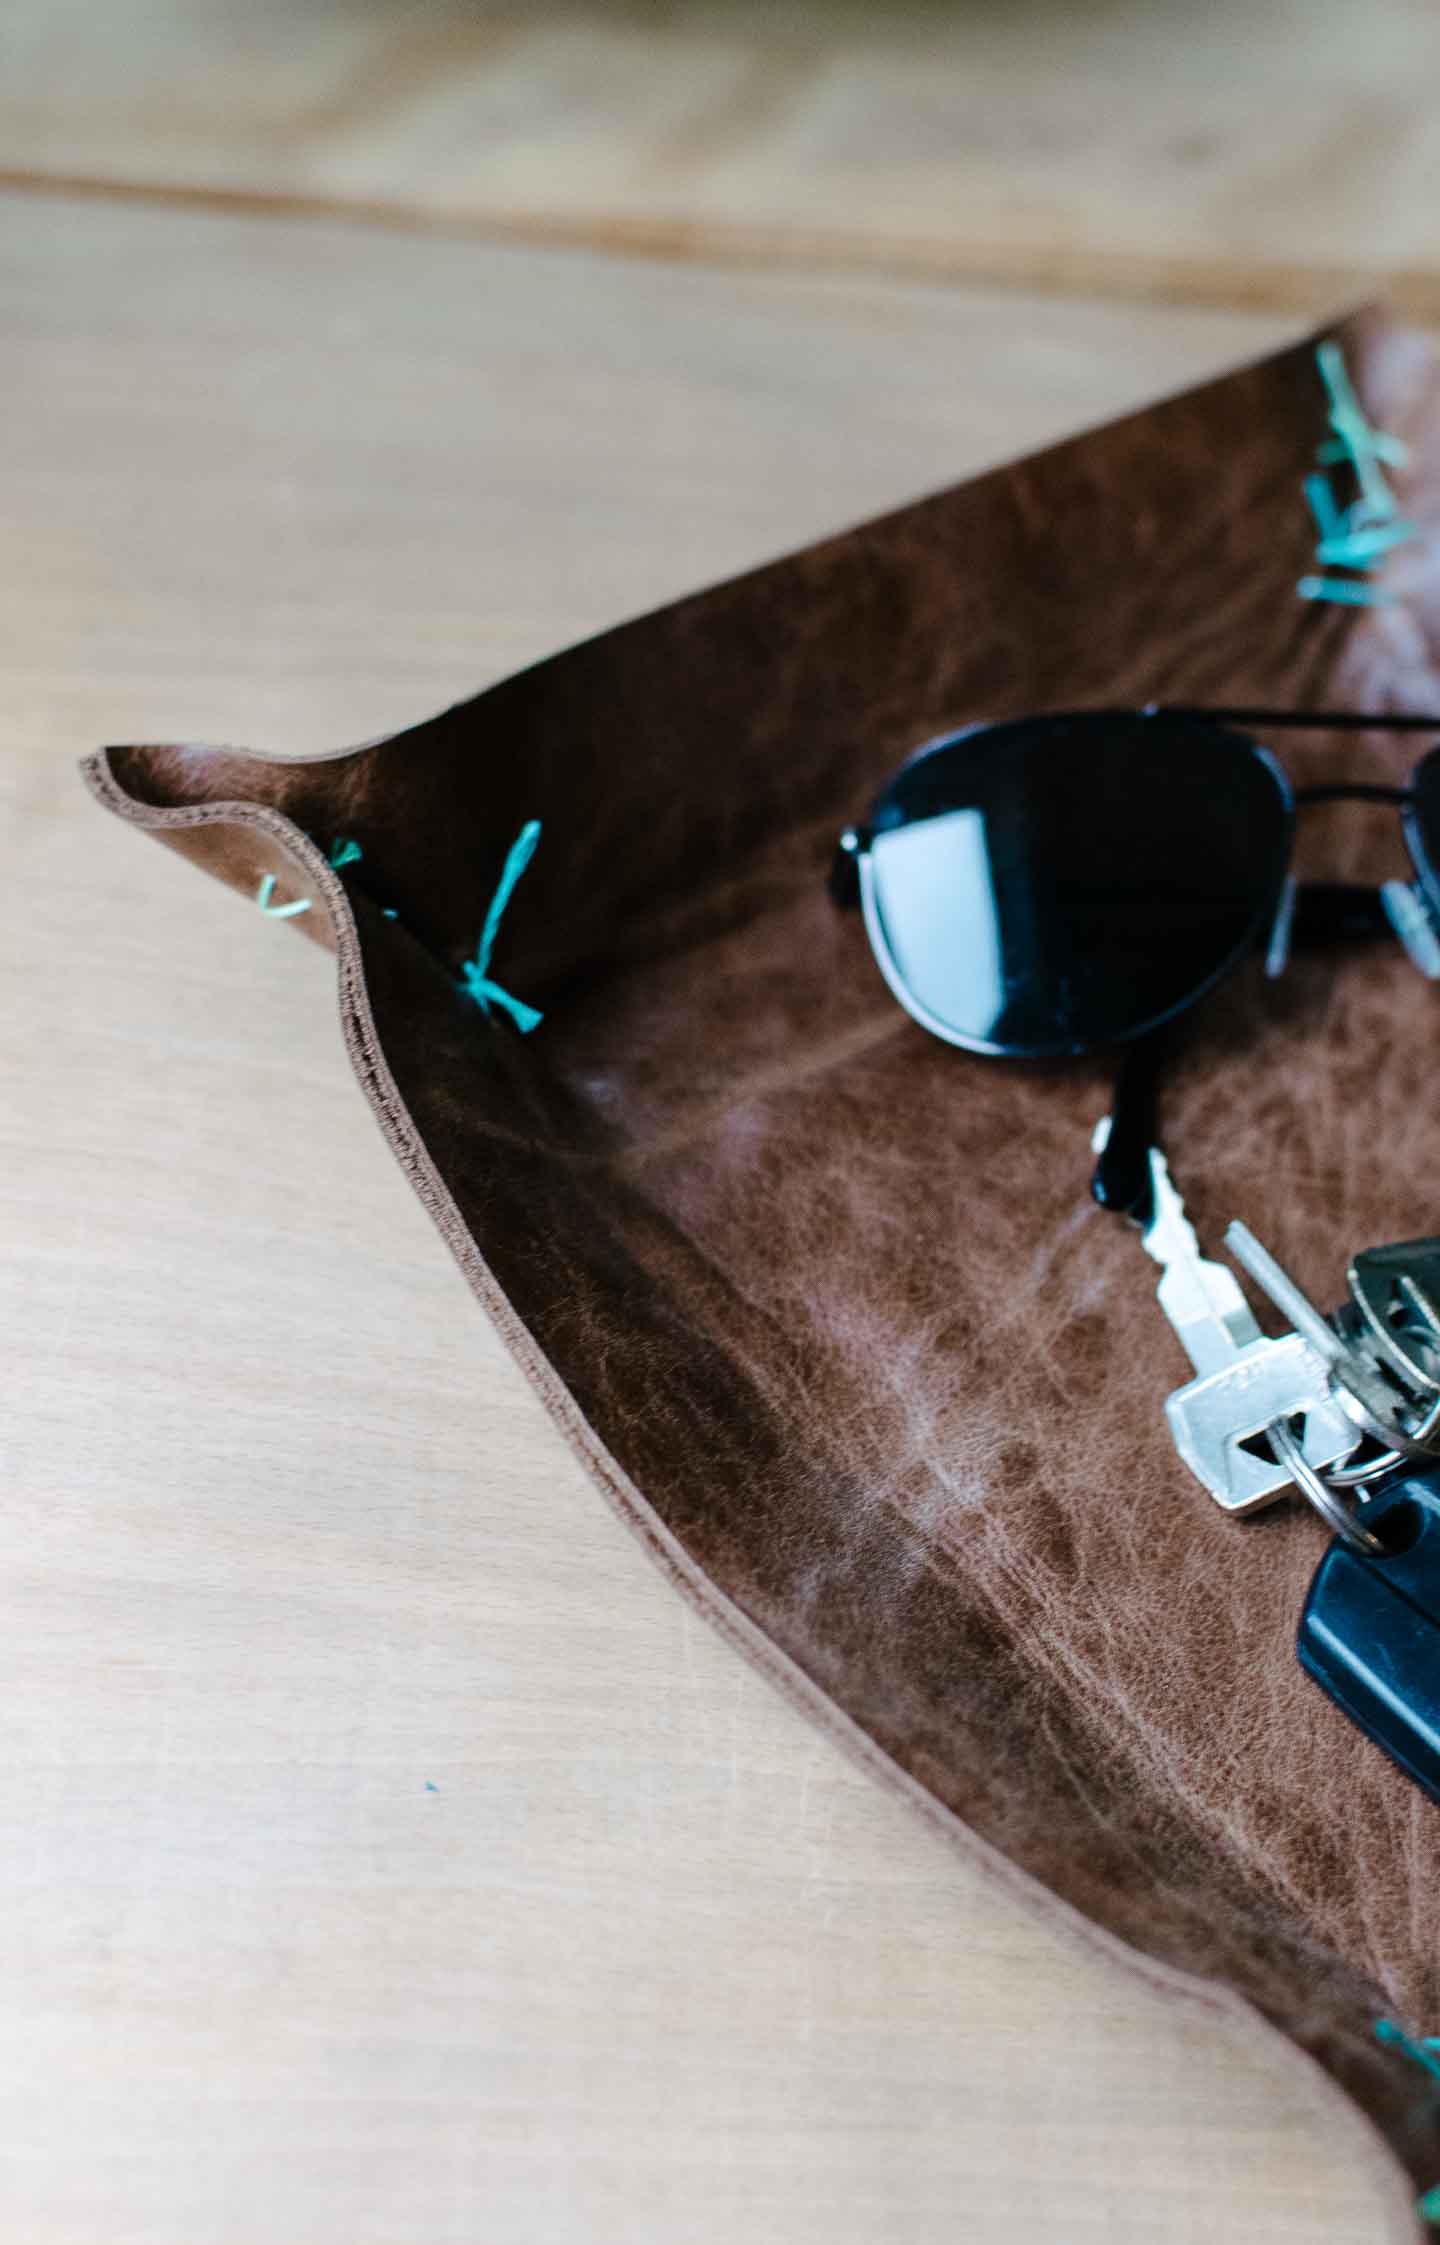
1.Cut out two squares or rectangles in desired size. We used old couch leather fabric cut to 10 x 10 squares. We needed two pieces joined together to give a thicker result (since used couch leather can be very thin).
2. Bond the two pieces together (suede to suede) with a sheet of heat bond following the directions. I had to use the iron directly on the leather and somehow it didn't tan the leather anymore. Some edges didn't bond perfectly but I wasn't worried since we also tied the two together tightly.
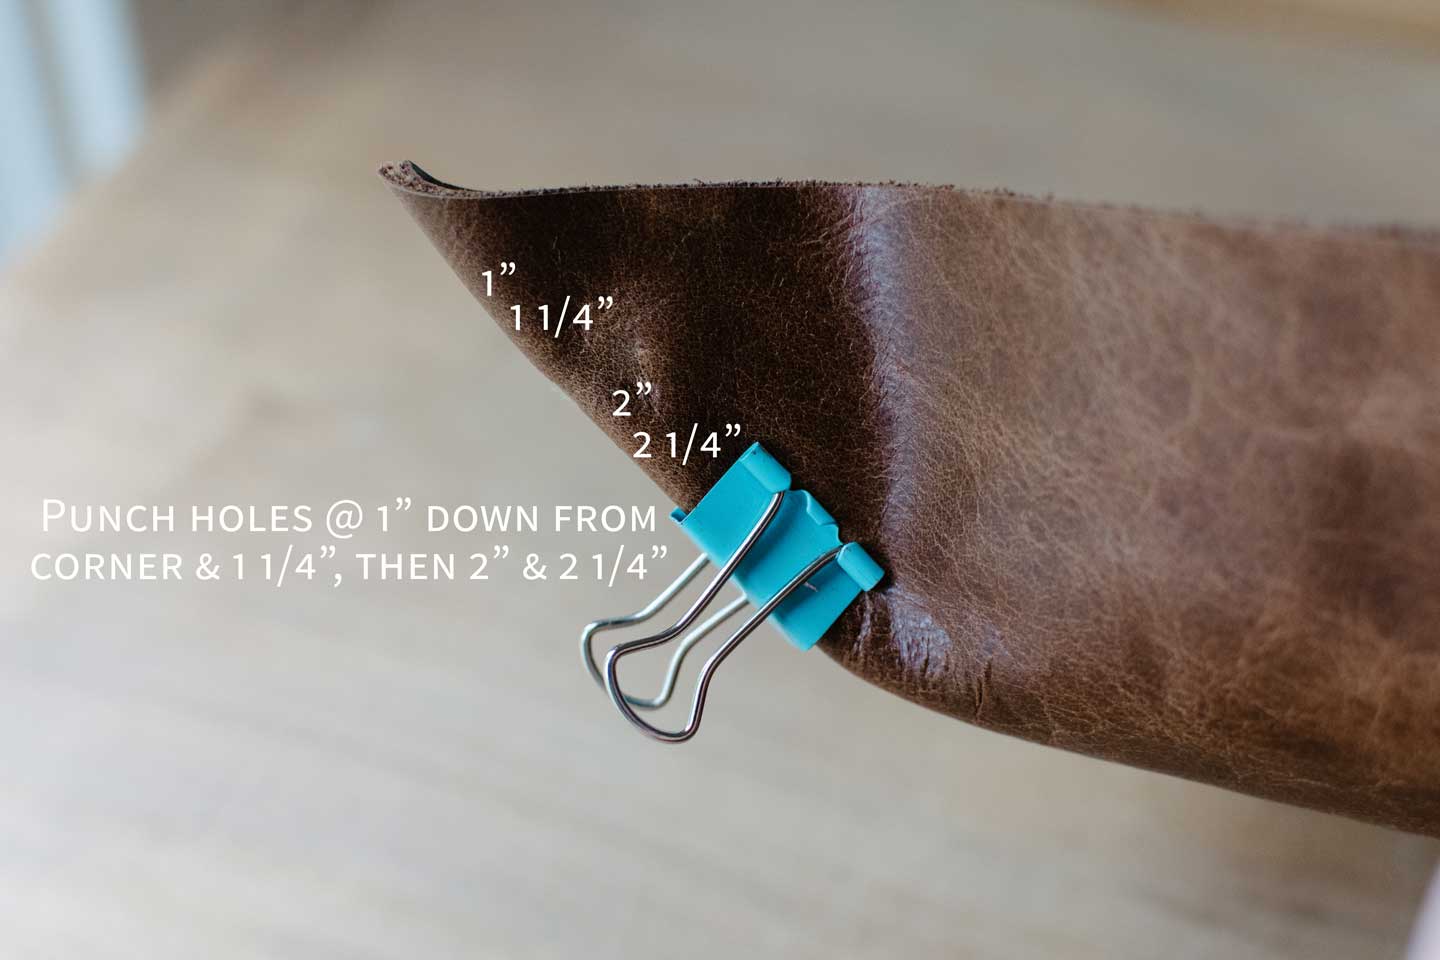
3. Make puncture holes with leather punch by pinching corners and marking 1", 1.5" down and 2", 2.5" down. See Photo Explanation Below.

4. Thread embroidery thread through holes making an X pattern, start from the top of tray.
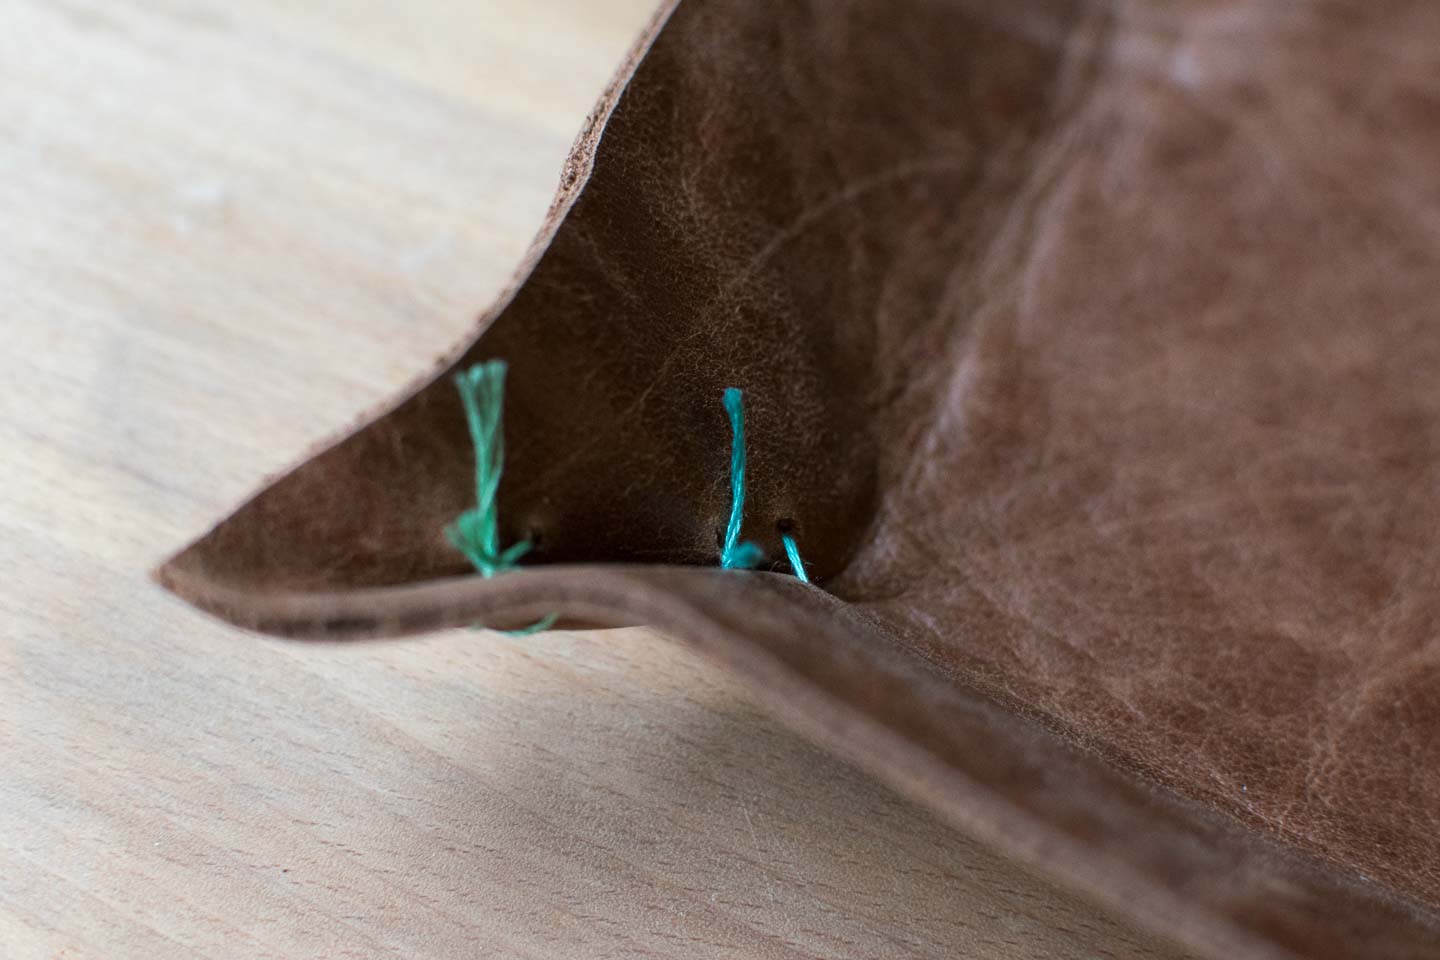
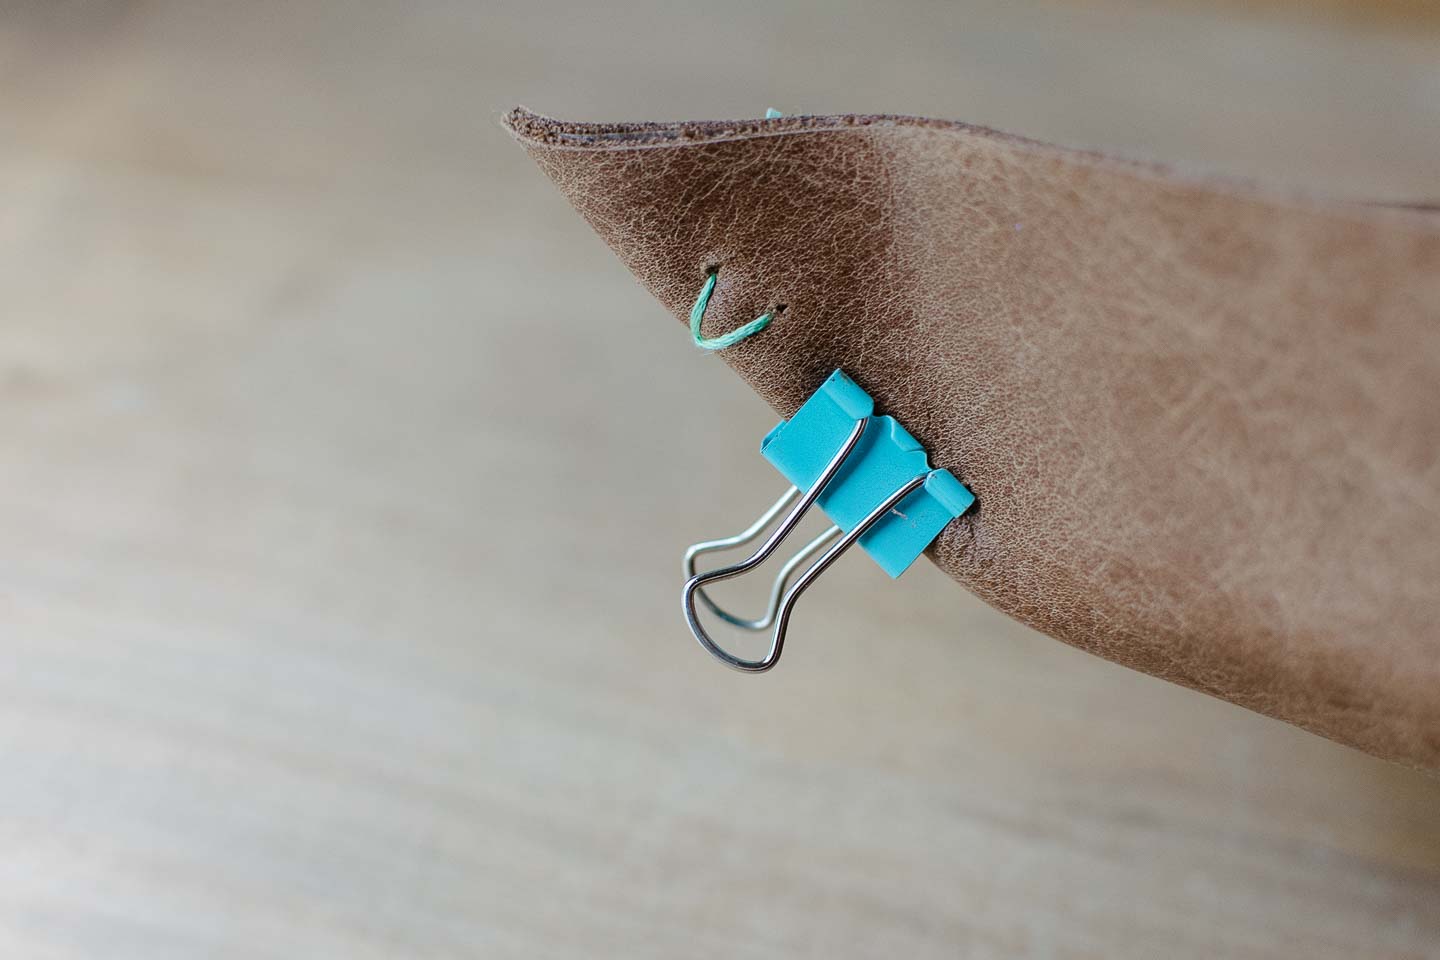
5. Tie off the two top ends of the embroidery thread, making the tie inside the tray and the double X marks on the outside of the tray.
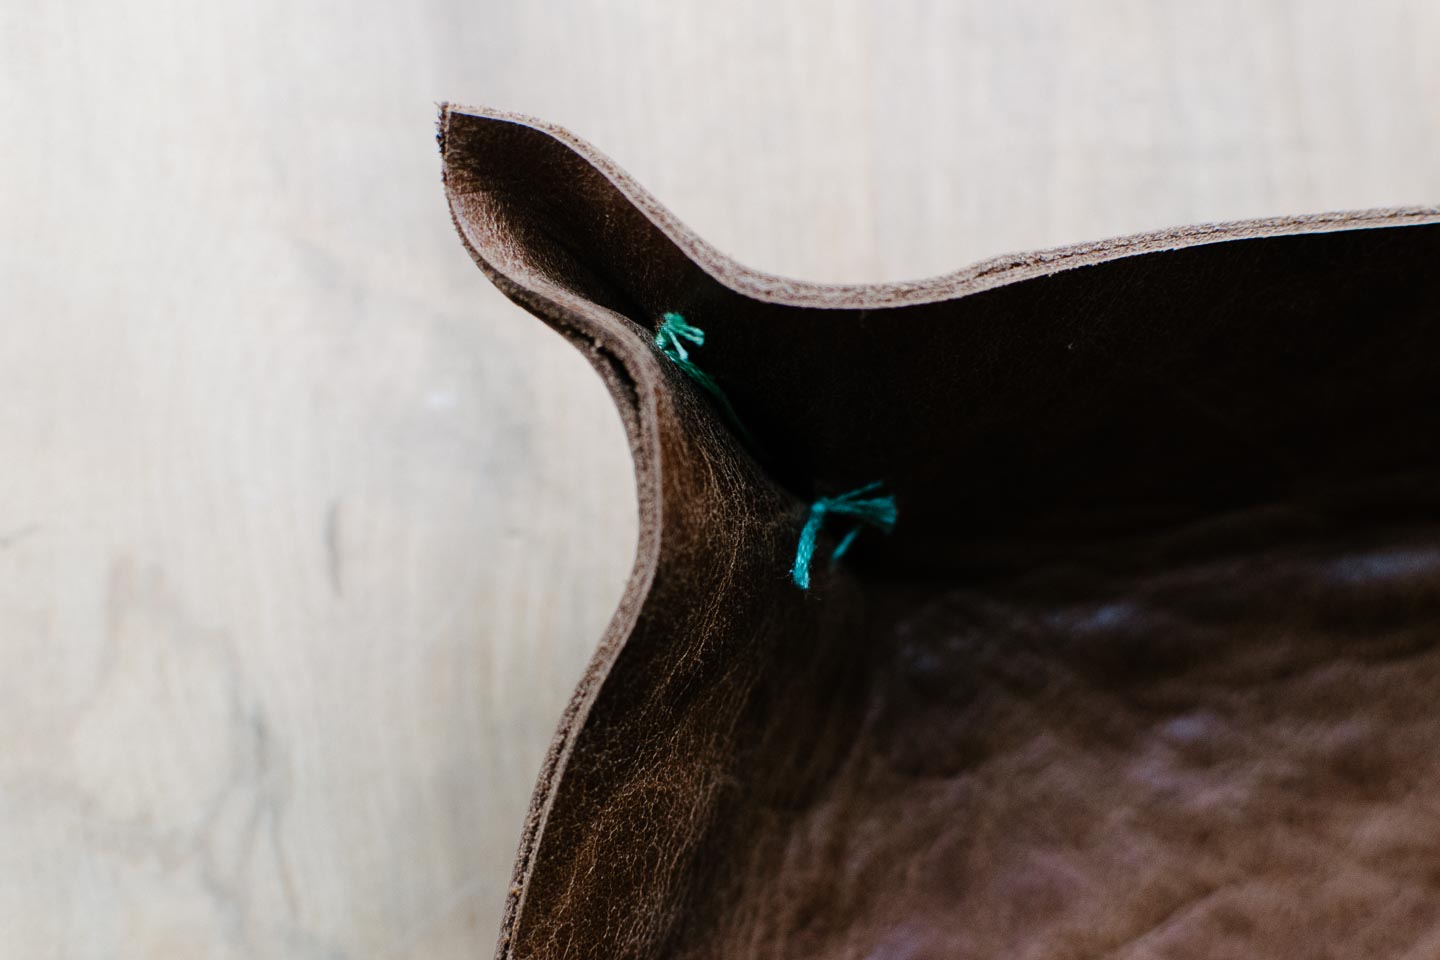


Now, finish steps 3-5 for all the remaining three corners of leather. Ta-da, and you're done!
What colors would you use for the thread?
Thanks!
-Susie