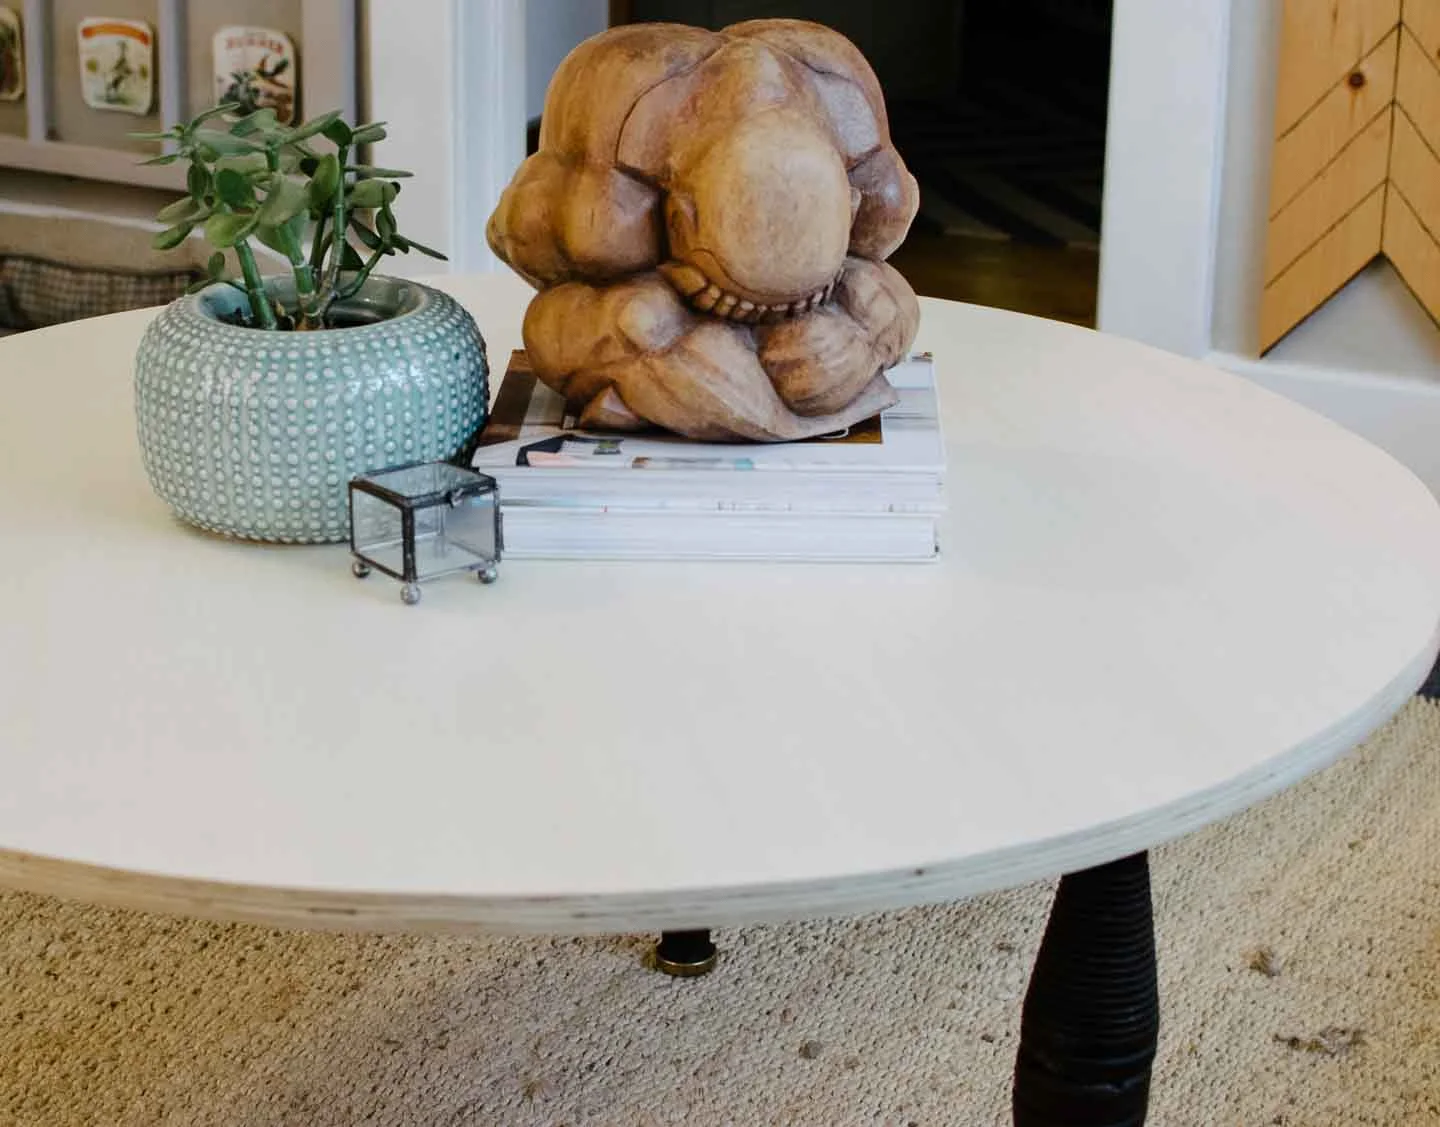
Make This Super Simple Leather Tray DIY
/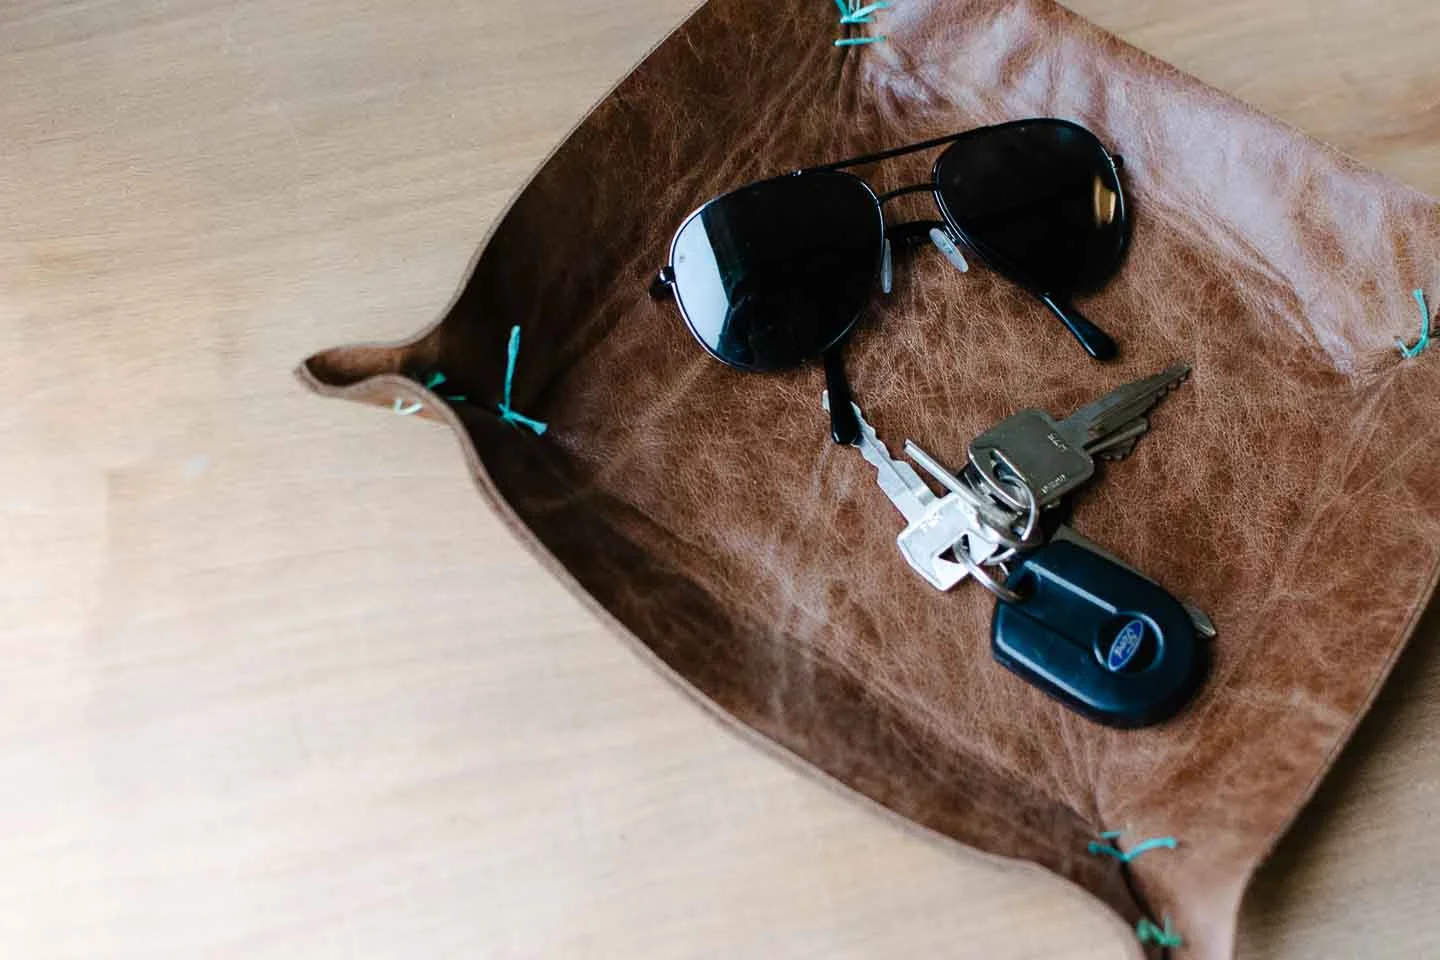
If your interested in a tray for a space in your home (coffee table, entry table, jewelry dish, night stand catch all) this is a DIY you can do!
Read MoreIf your interested in a tray for a space in your home (coffee table, entry table, jewelry dish, night stand catch all) this is a DIY you can do!
Read MoreAnybody else have trouble with decisions when it comes to DIY-ing? For our DIY Coffee table I wanted every idea to be the most original thing that ever existed before I went ahead and started the project.
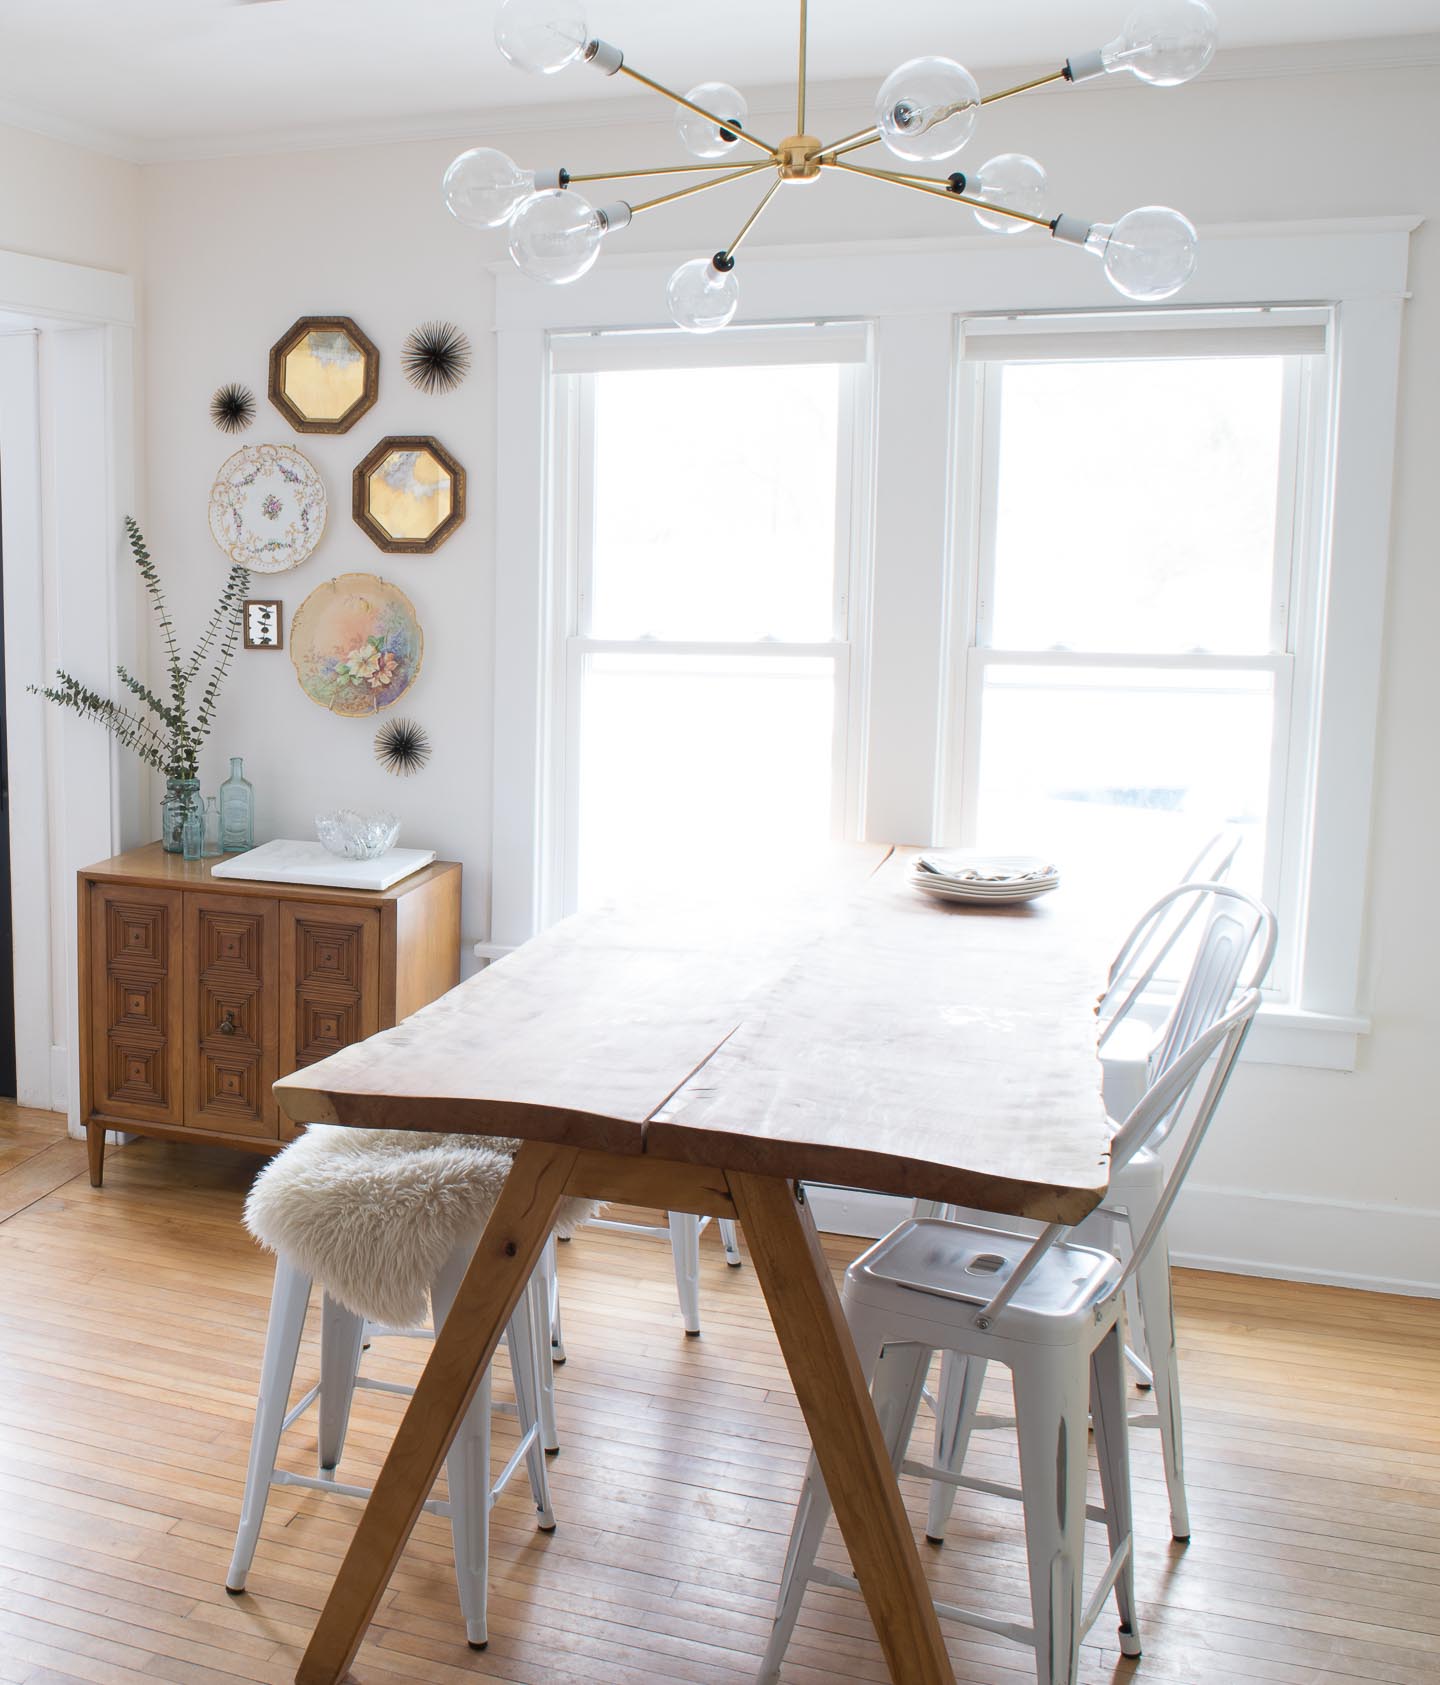
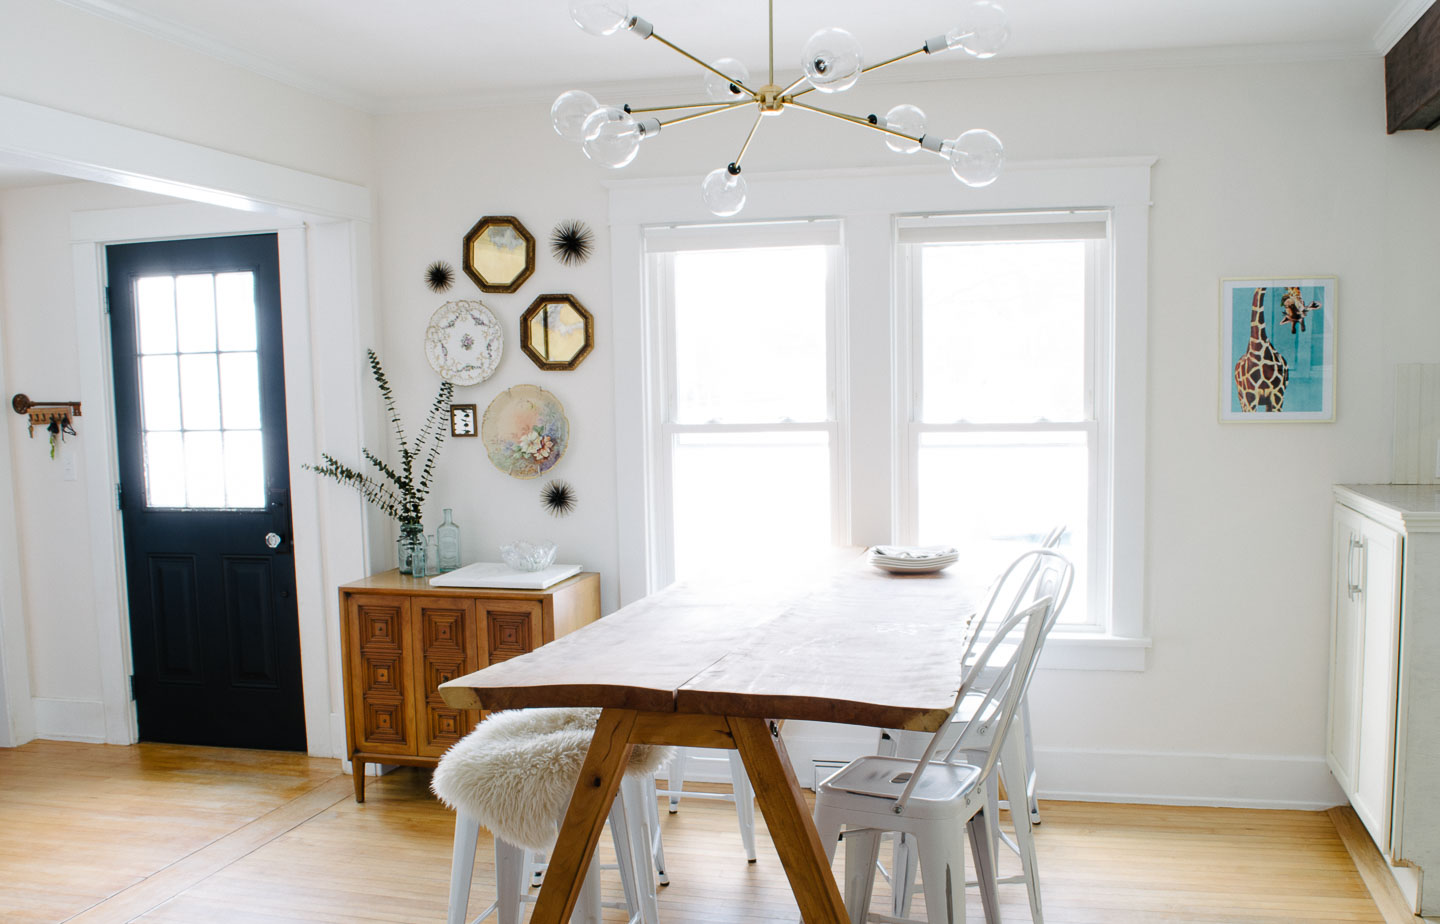
Read More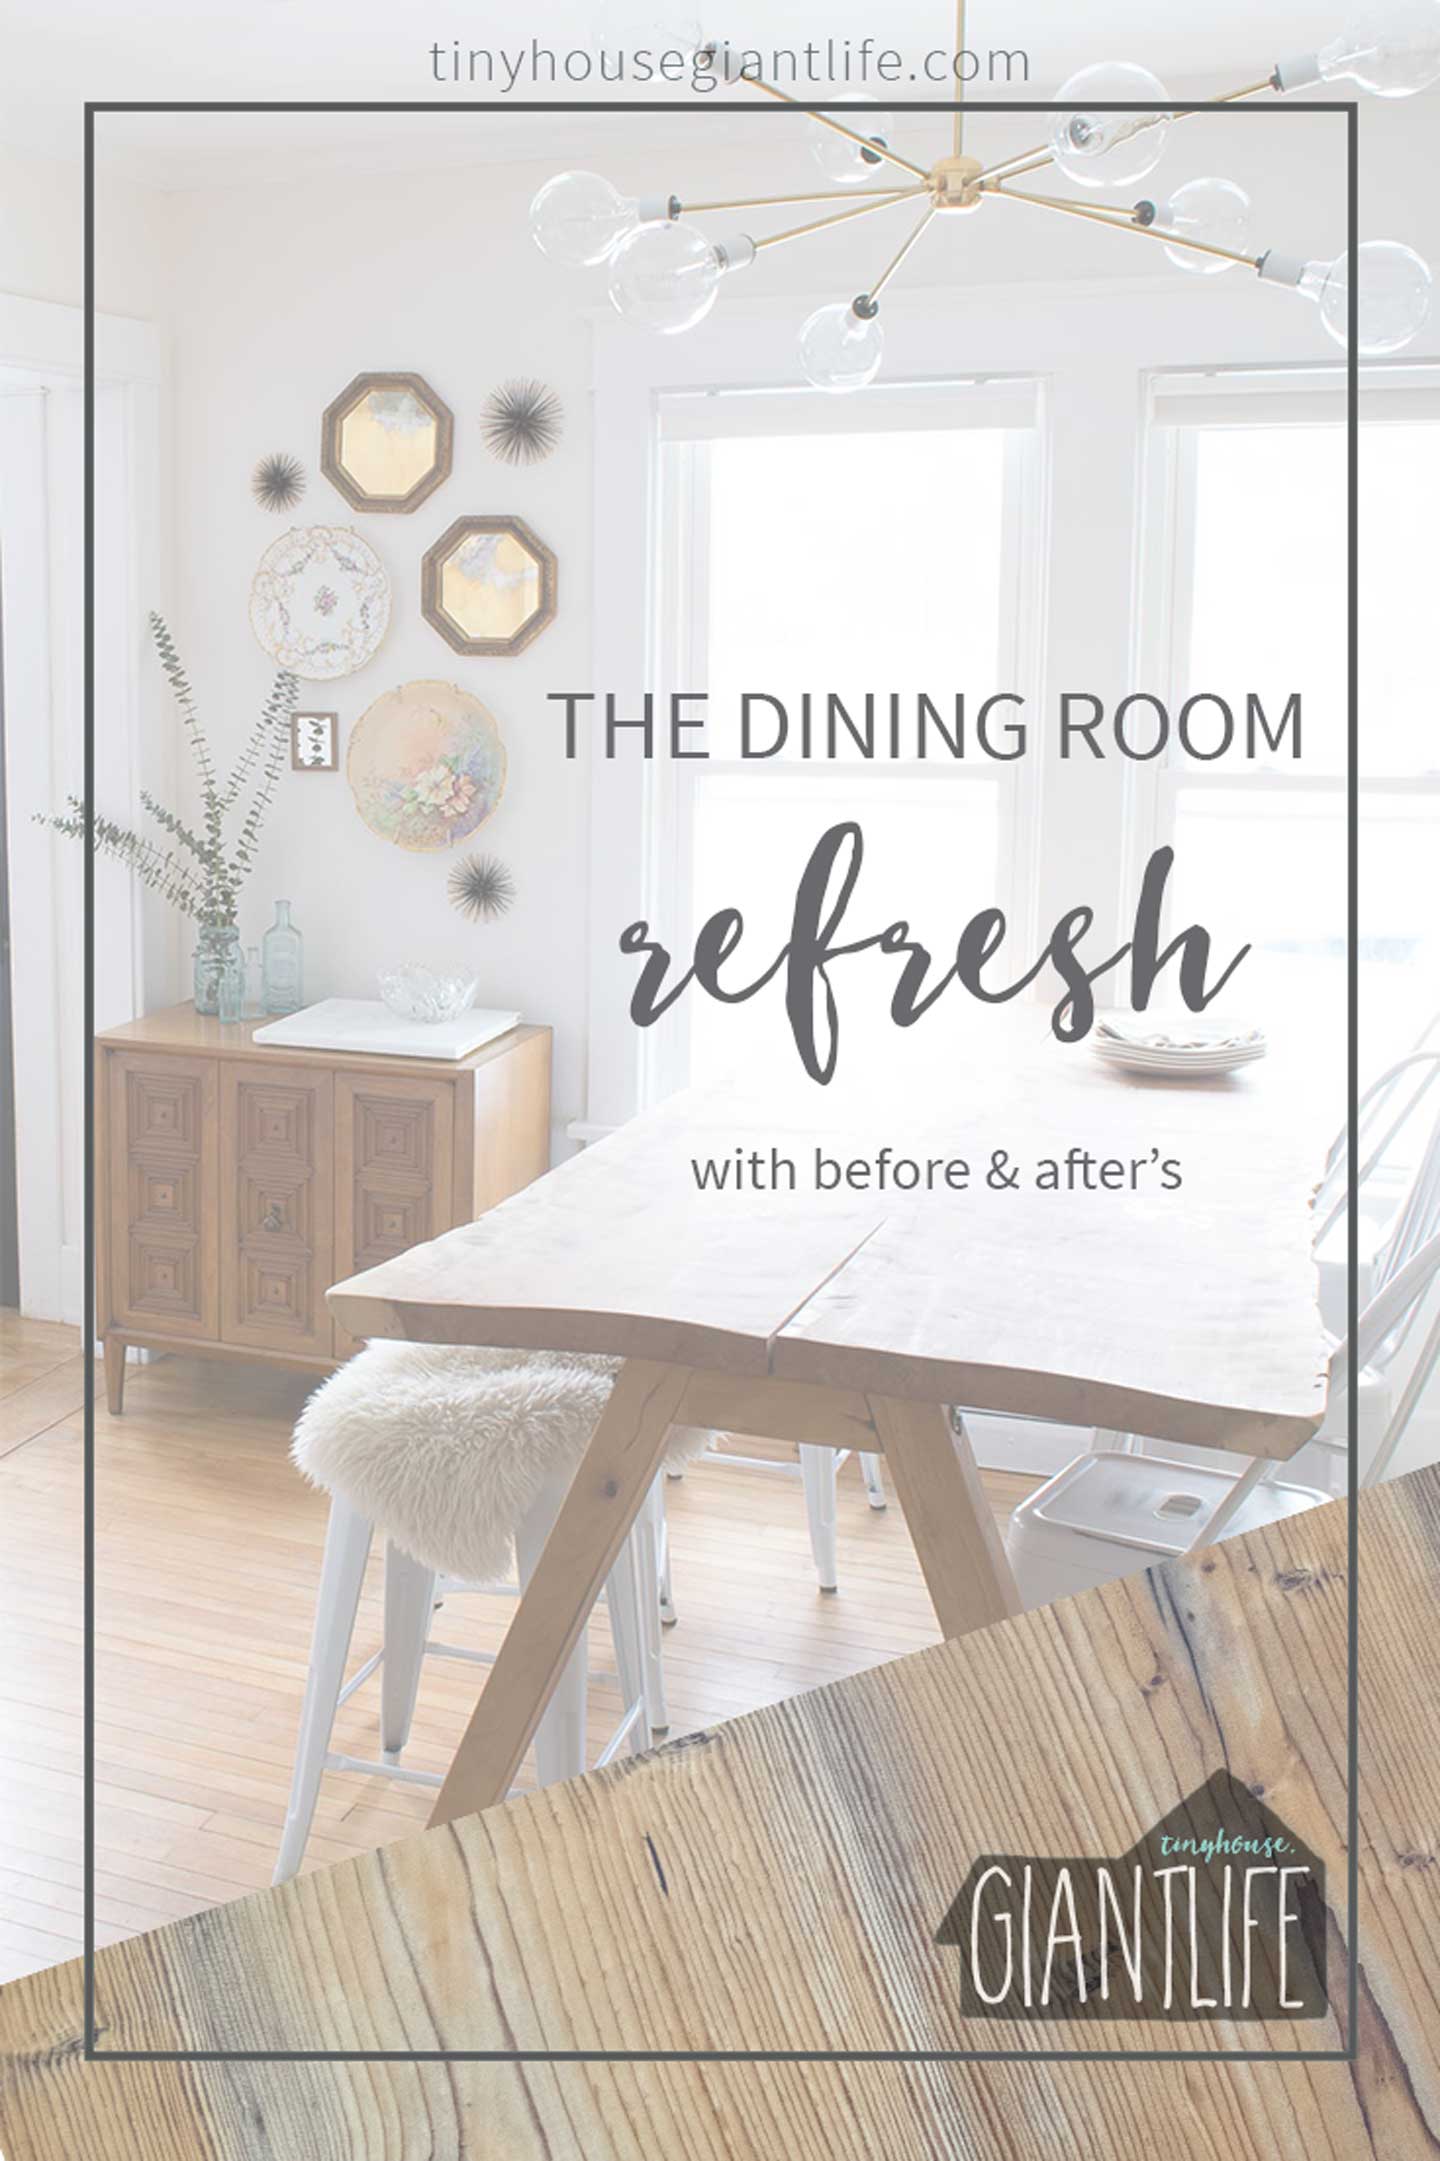 This dining room refresh has been in the making for a few years (to say the least).
If you read our post with the dining room before photos, you're aware we had a phase even before this dining room refresh.
This dining room refresh has been in the making for a few years (to say the least).
If you read our post with the dining room before photos, you're aware we had a phase even before this dining room refresh.
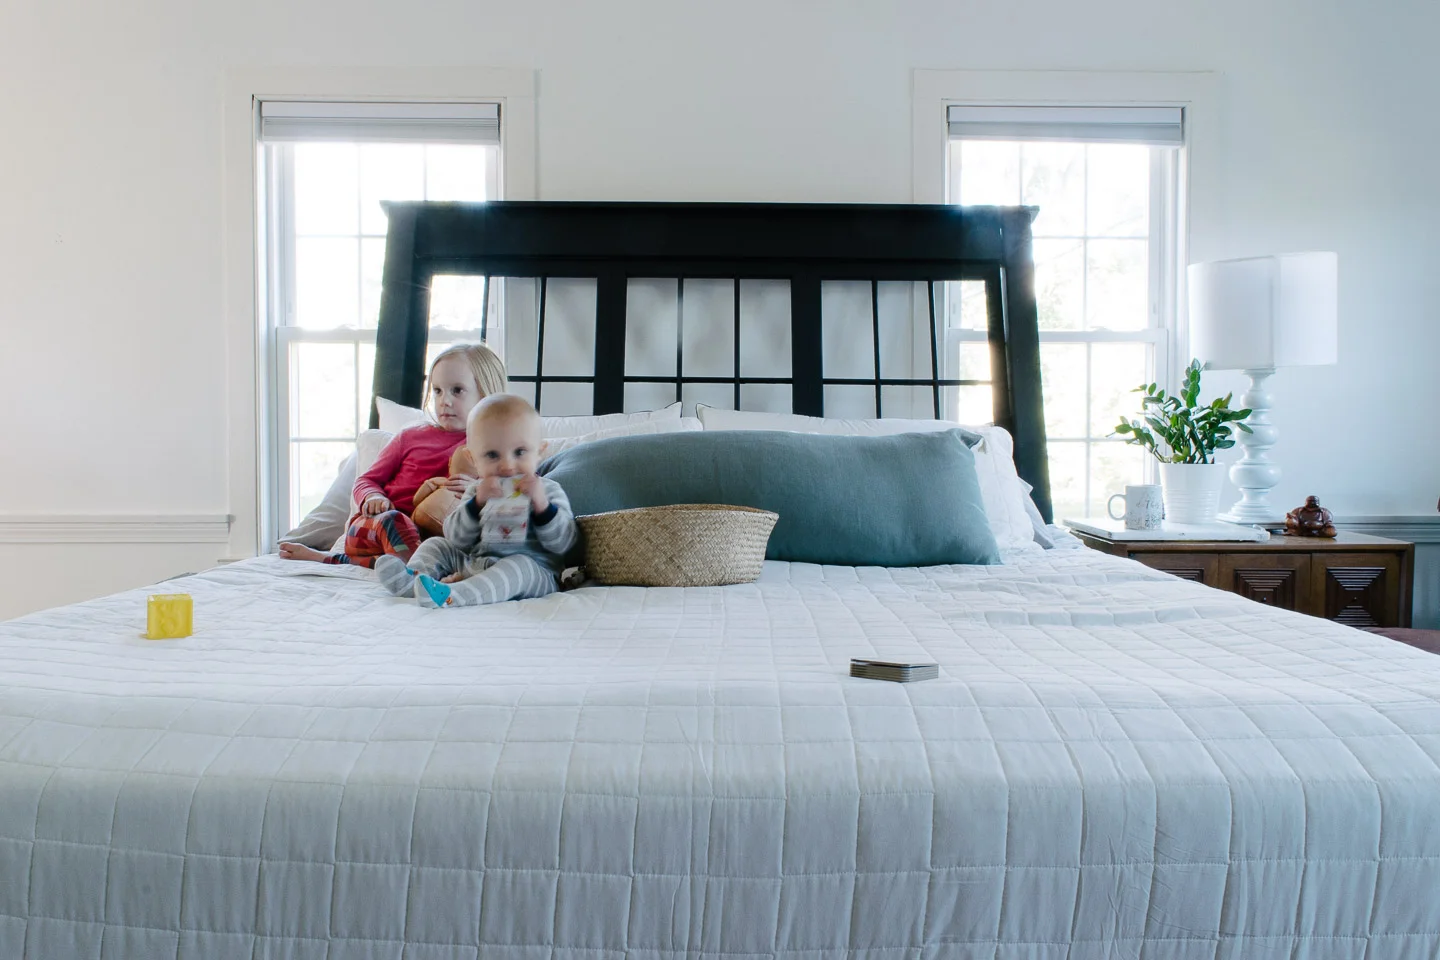
The house has been in constant renovation status for the last 6 years and we have been working hard in 2016 to #finishthatspace.
That being said, nothing ever seems fully complete, but projects we have been wishing and dreaming about, or desperately needed to complete, have been.
We have always tried to think about the timeframe in which our home was built when making design decisions. Sadly for too long we believed this home was originally built in the late 1800's and was just a cabin/cottage originally. In Mid- 2015 on our fifth Anniversary we went on a deep hunt for more information and stumbled upon the truth.
We have one of the first pre-fabricated (brought in from the train station with horse & buggy) bungalow catalog homes in Hadley, Ma. Listed as a MA Historic Commission home; named the Benjamin Denio Home.
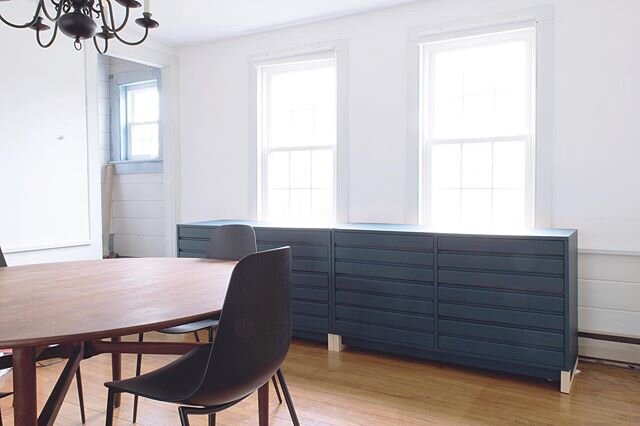
Our craftsman window and door casings were always something we believed had been added to the home in the 20's. It didn't have enough of a traditional bungalow look (enclosed porches added in the 50's, and no front entry to speak of).
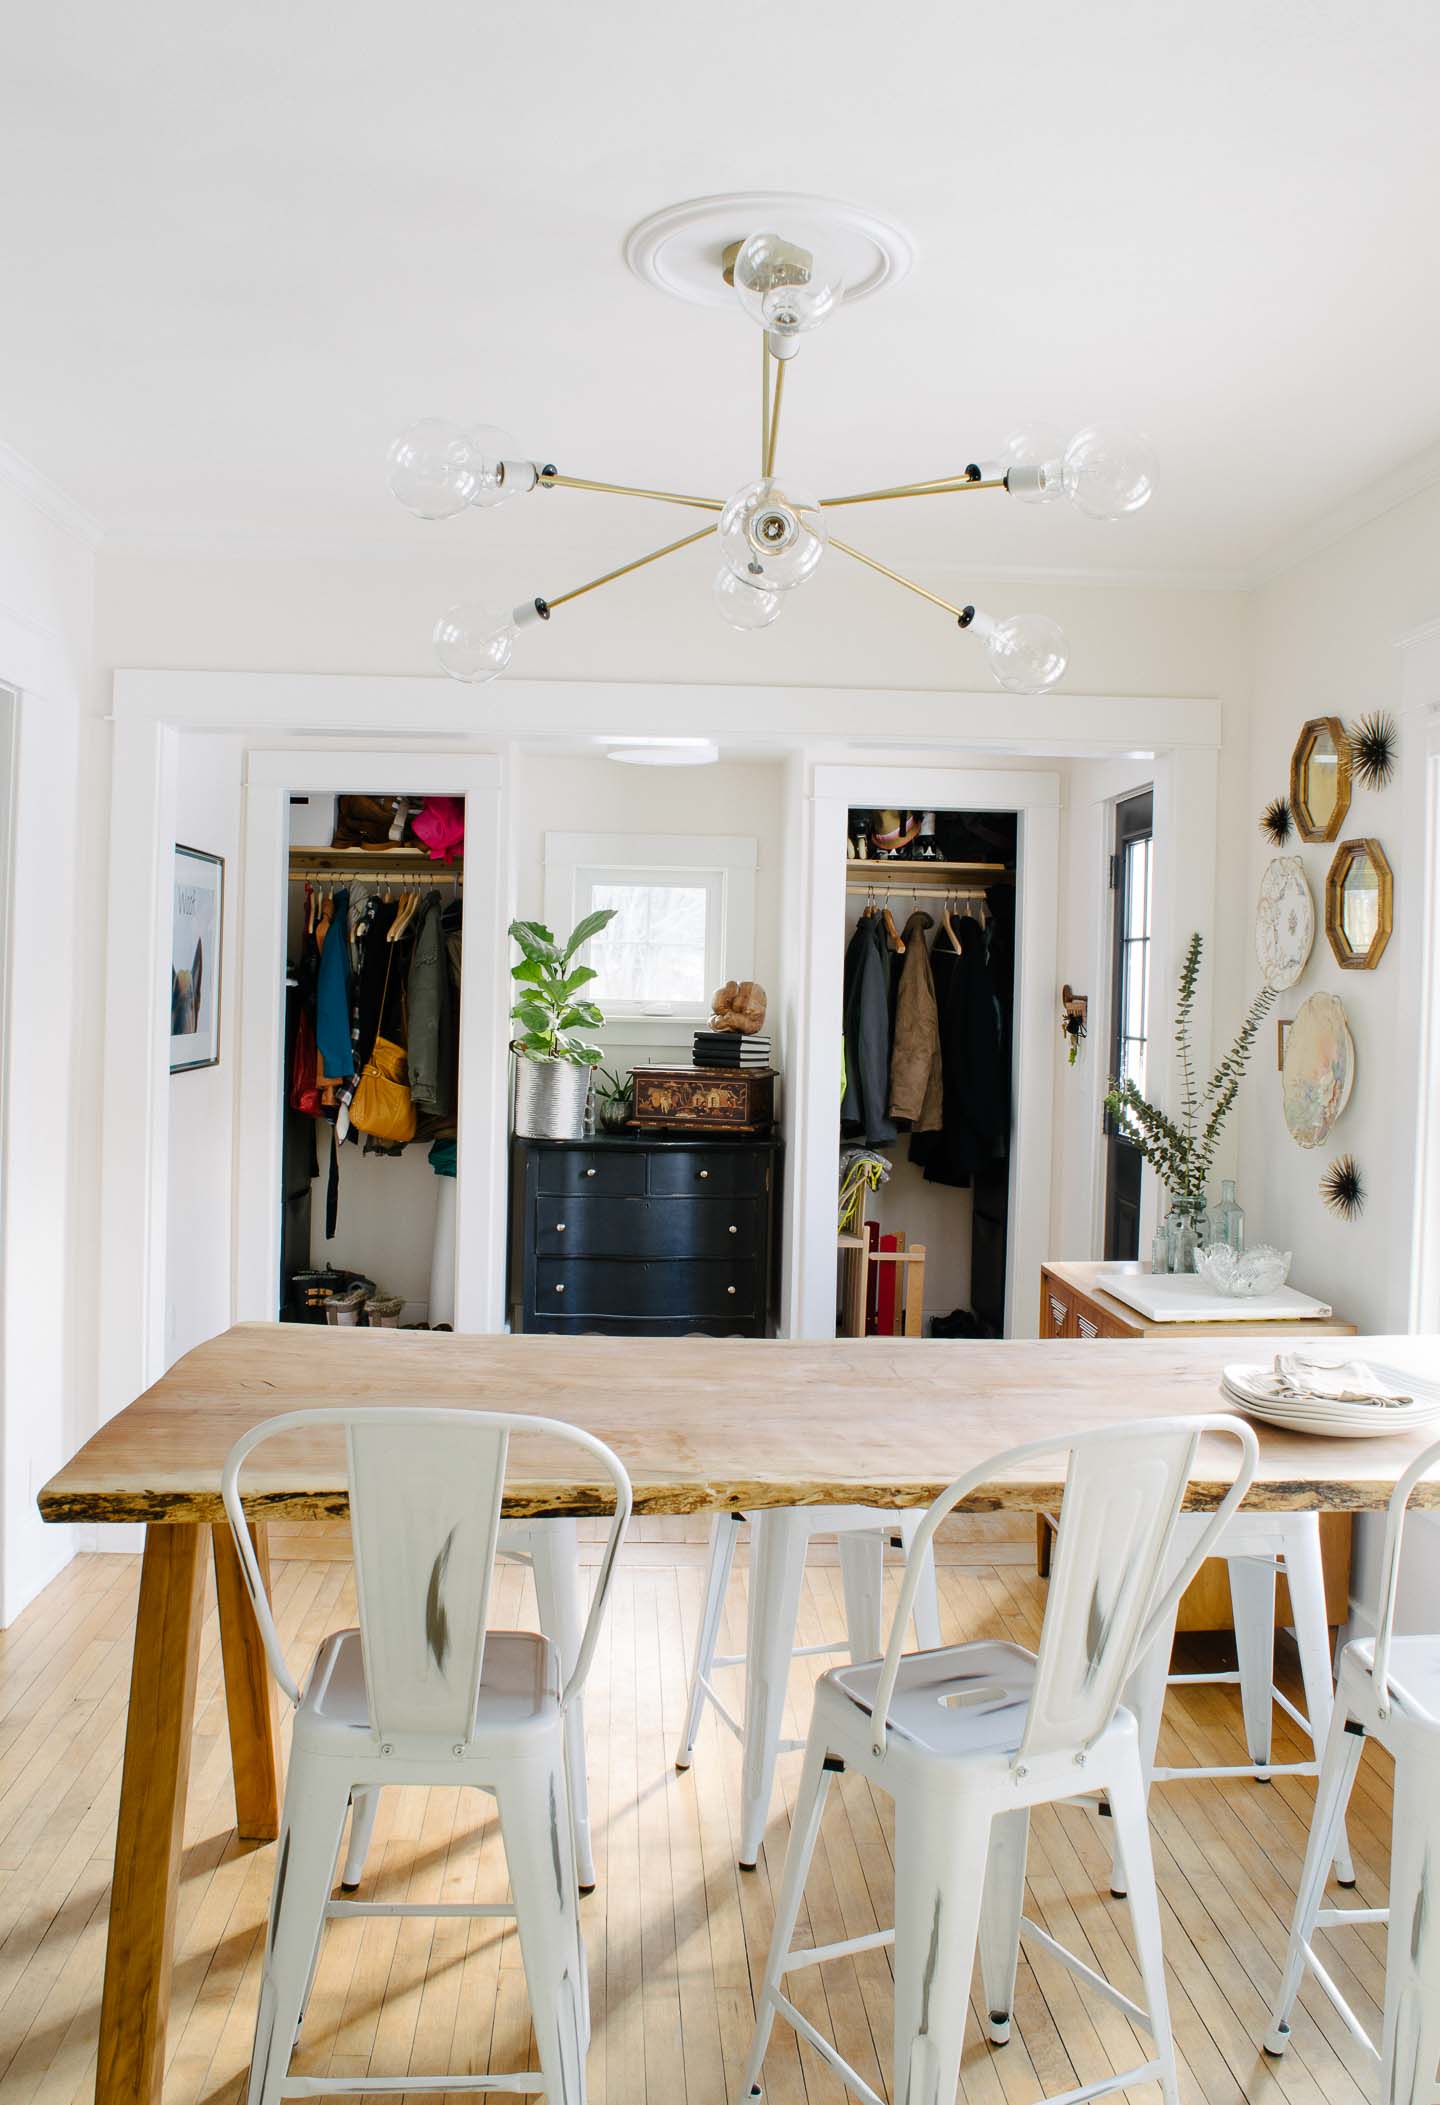
Needless to say, when taking down the wall between the enclosed porch and dining room, we made sure the opening mimicked the current 9' opening in the household.
This post may contain affiliate links. Read the full disclosure here.
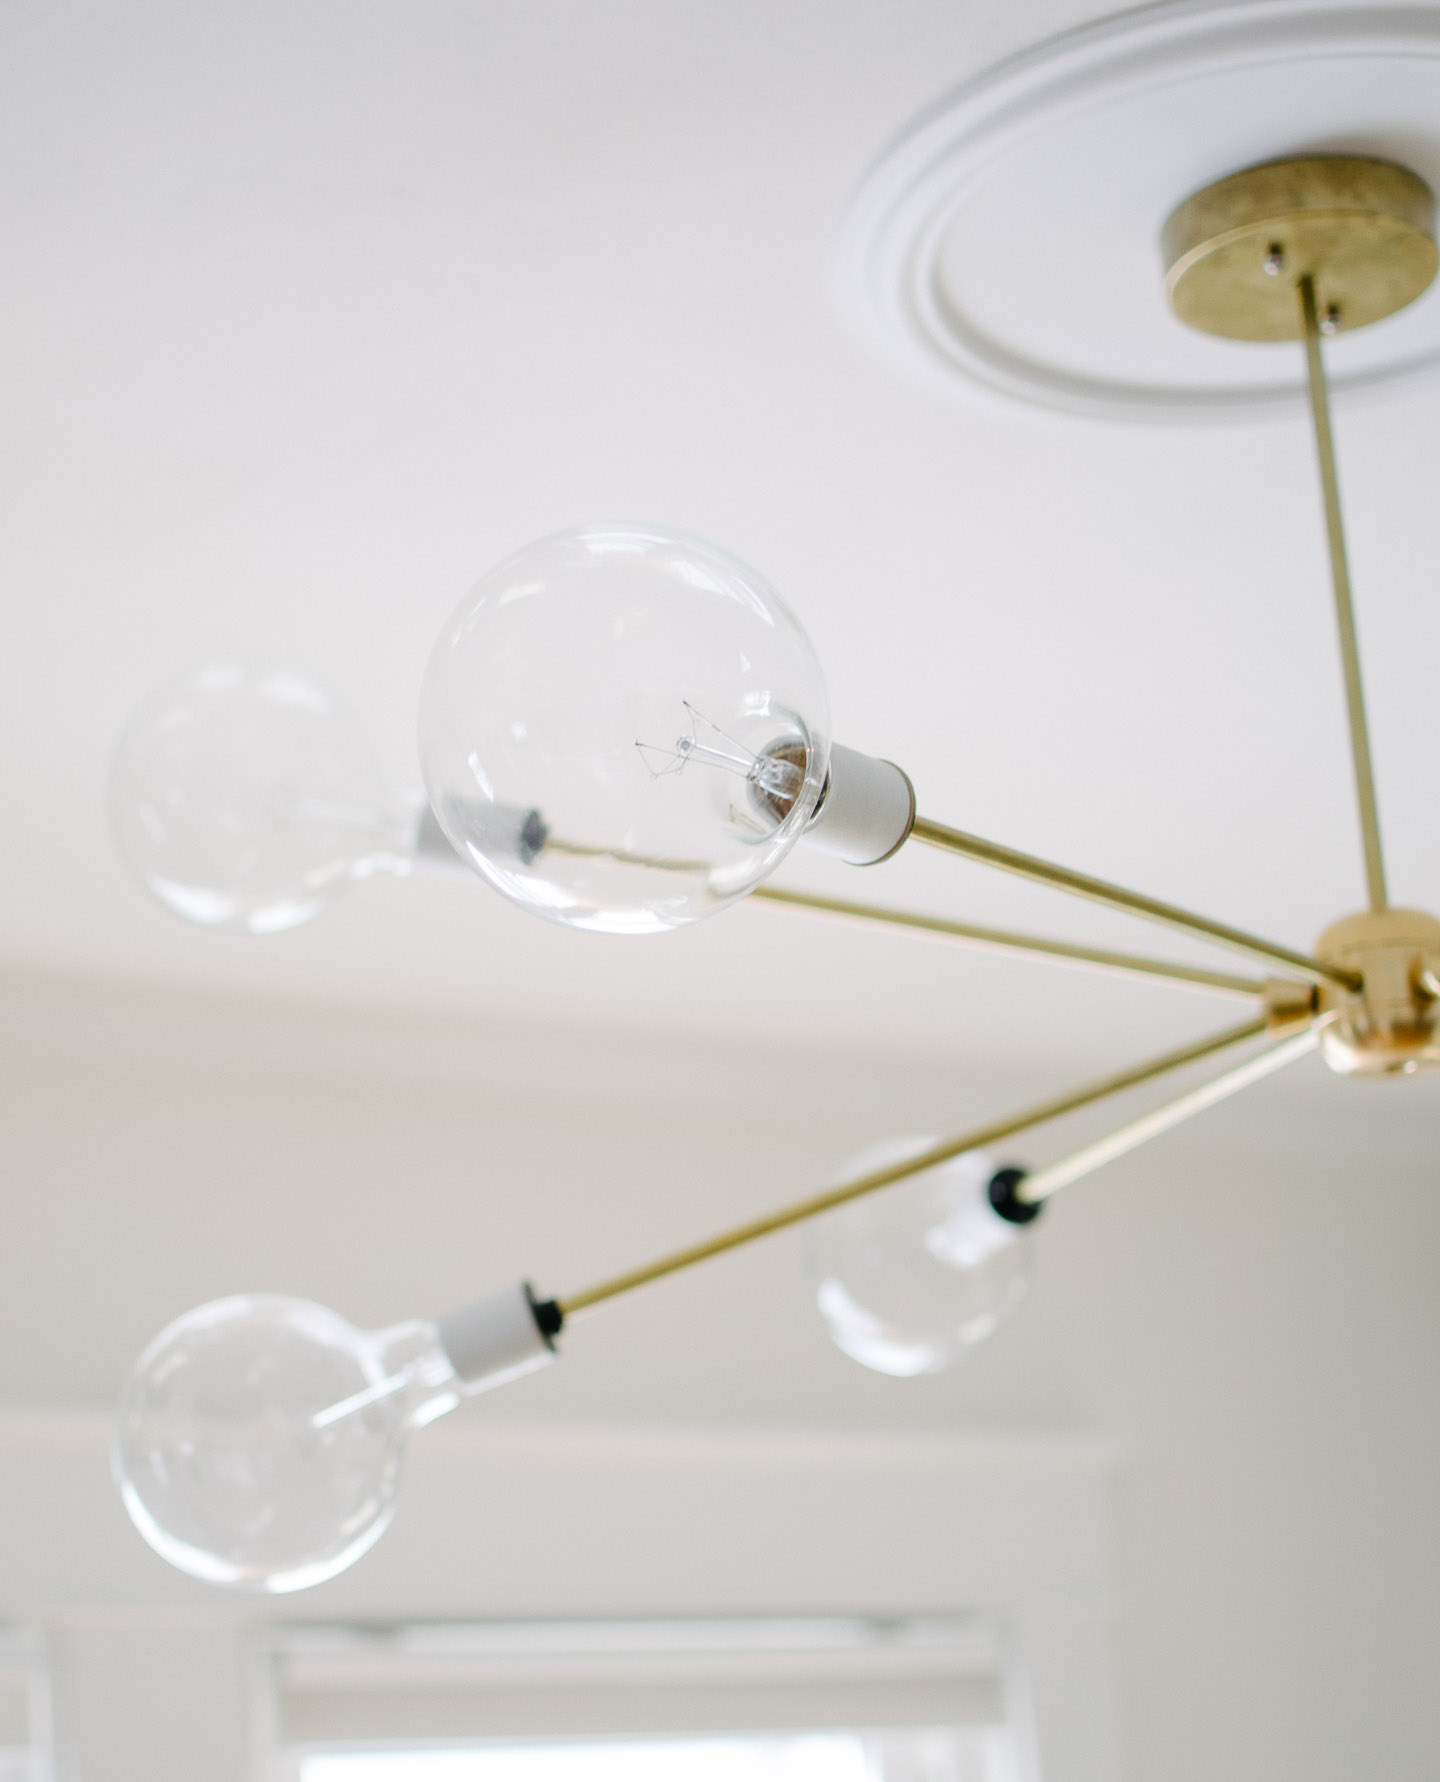
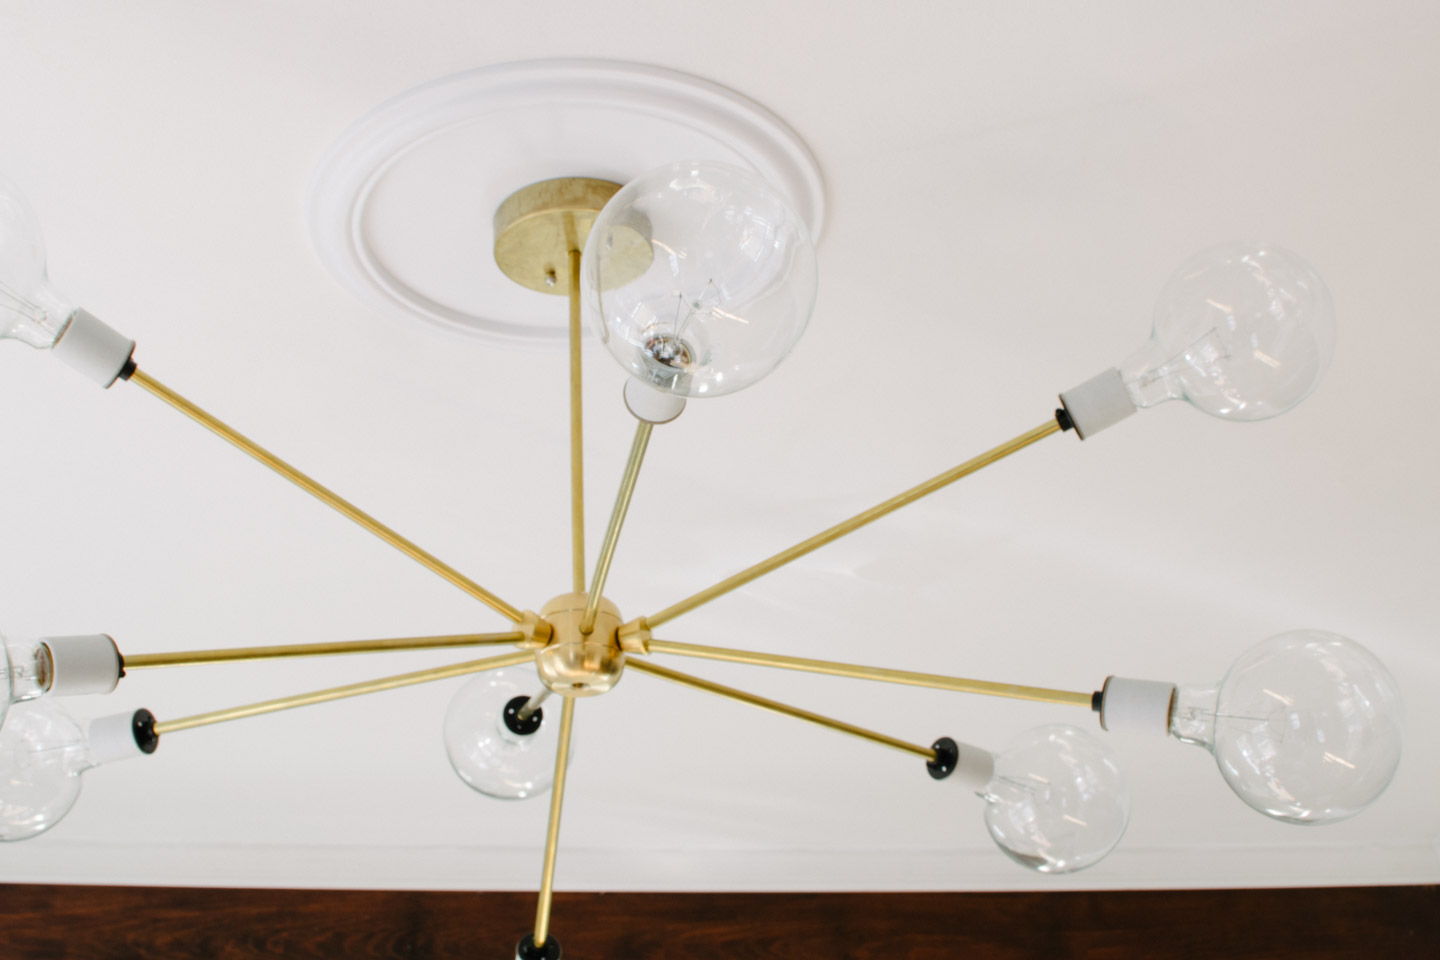
You can read the full tutorial on our DIY sputnik light here.

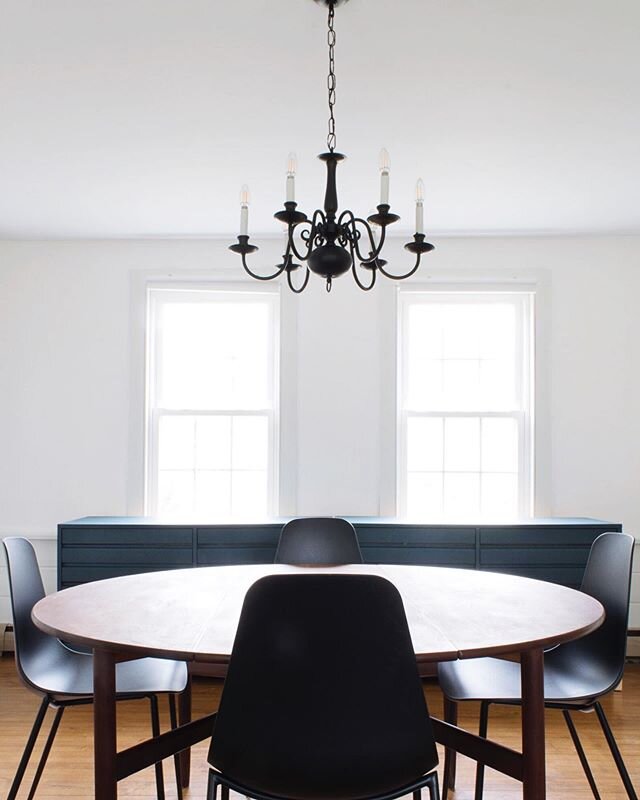
I really wanted a light fixture that would really brighten up this space and provide adequate light when working on projects. We hit the jack pot with this fixture and made it at a price we could afford, the fact that Haverly calls it "bubble light" is just icing on the cake.
Its no surprise to our neighbors that we like blues, teals, and greens. The exterior of our house with its bright paint job and almost matching 67' Chevy Bel Air Station Wagon have explained who we are and where we live too many times to count.
"O yeah your the one's with the teal house... your kinda obsessed with that color huh?"
Or " Yes! You have a matching house and car, with like 5 dogs right?"
Haha, yep thats us. Sadly, minus 2 dogs in the last 6 months....

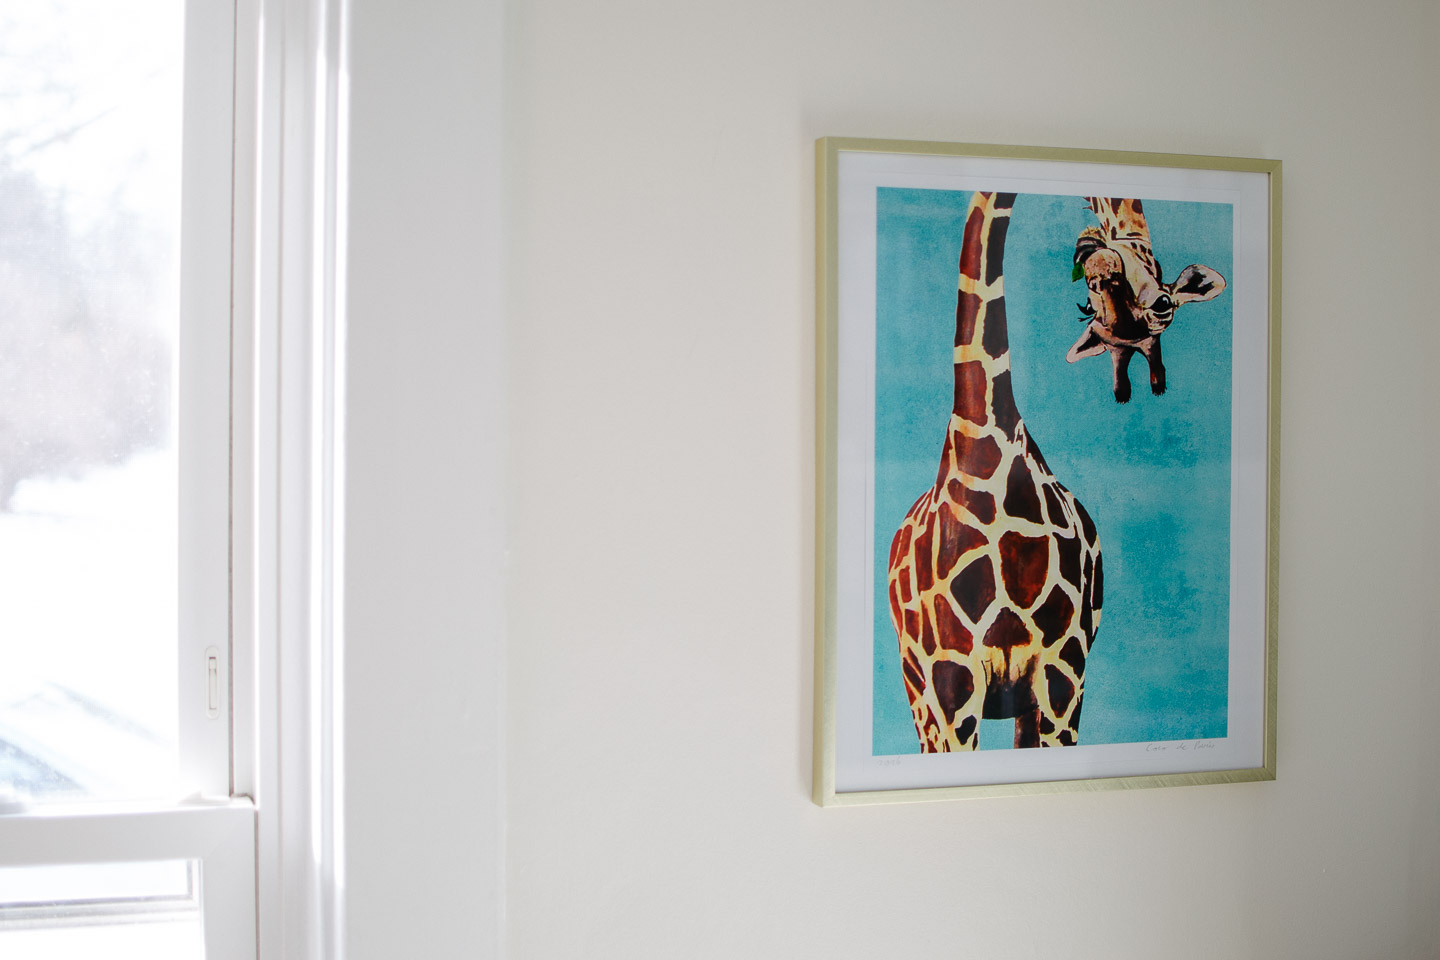
We decided our artwork would need to be a giraffe print somewhere along the line, apropos of who we are as giants. When we saw this teal giraffe print it was a given! What a great way to brighten the space, in our opinion.
When discussing our designs and subsequent purchases we tend to lean towards making sure things are made ethically. By no means are we perfect and only purchase ethically made items, but it is a large factor in whether or not we purchase something.
Putting our money where it counts by sourcing local, small business, USA made, and/or ethically produced products just seems like the right thing to do in our current economy. If that means that we just can't have everything we ever dreamed of, well we have a feeling we will live, and live a more fulfilling life.
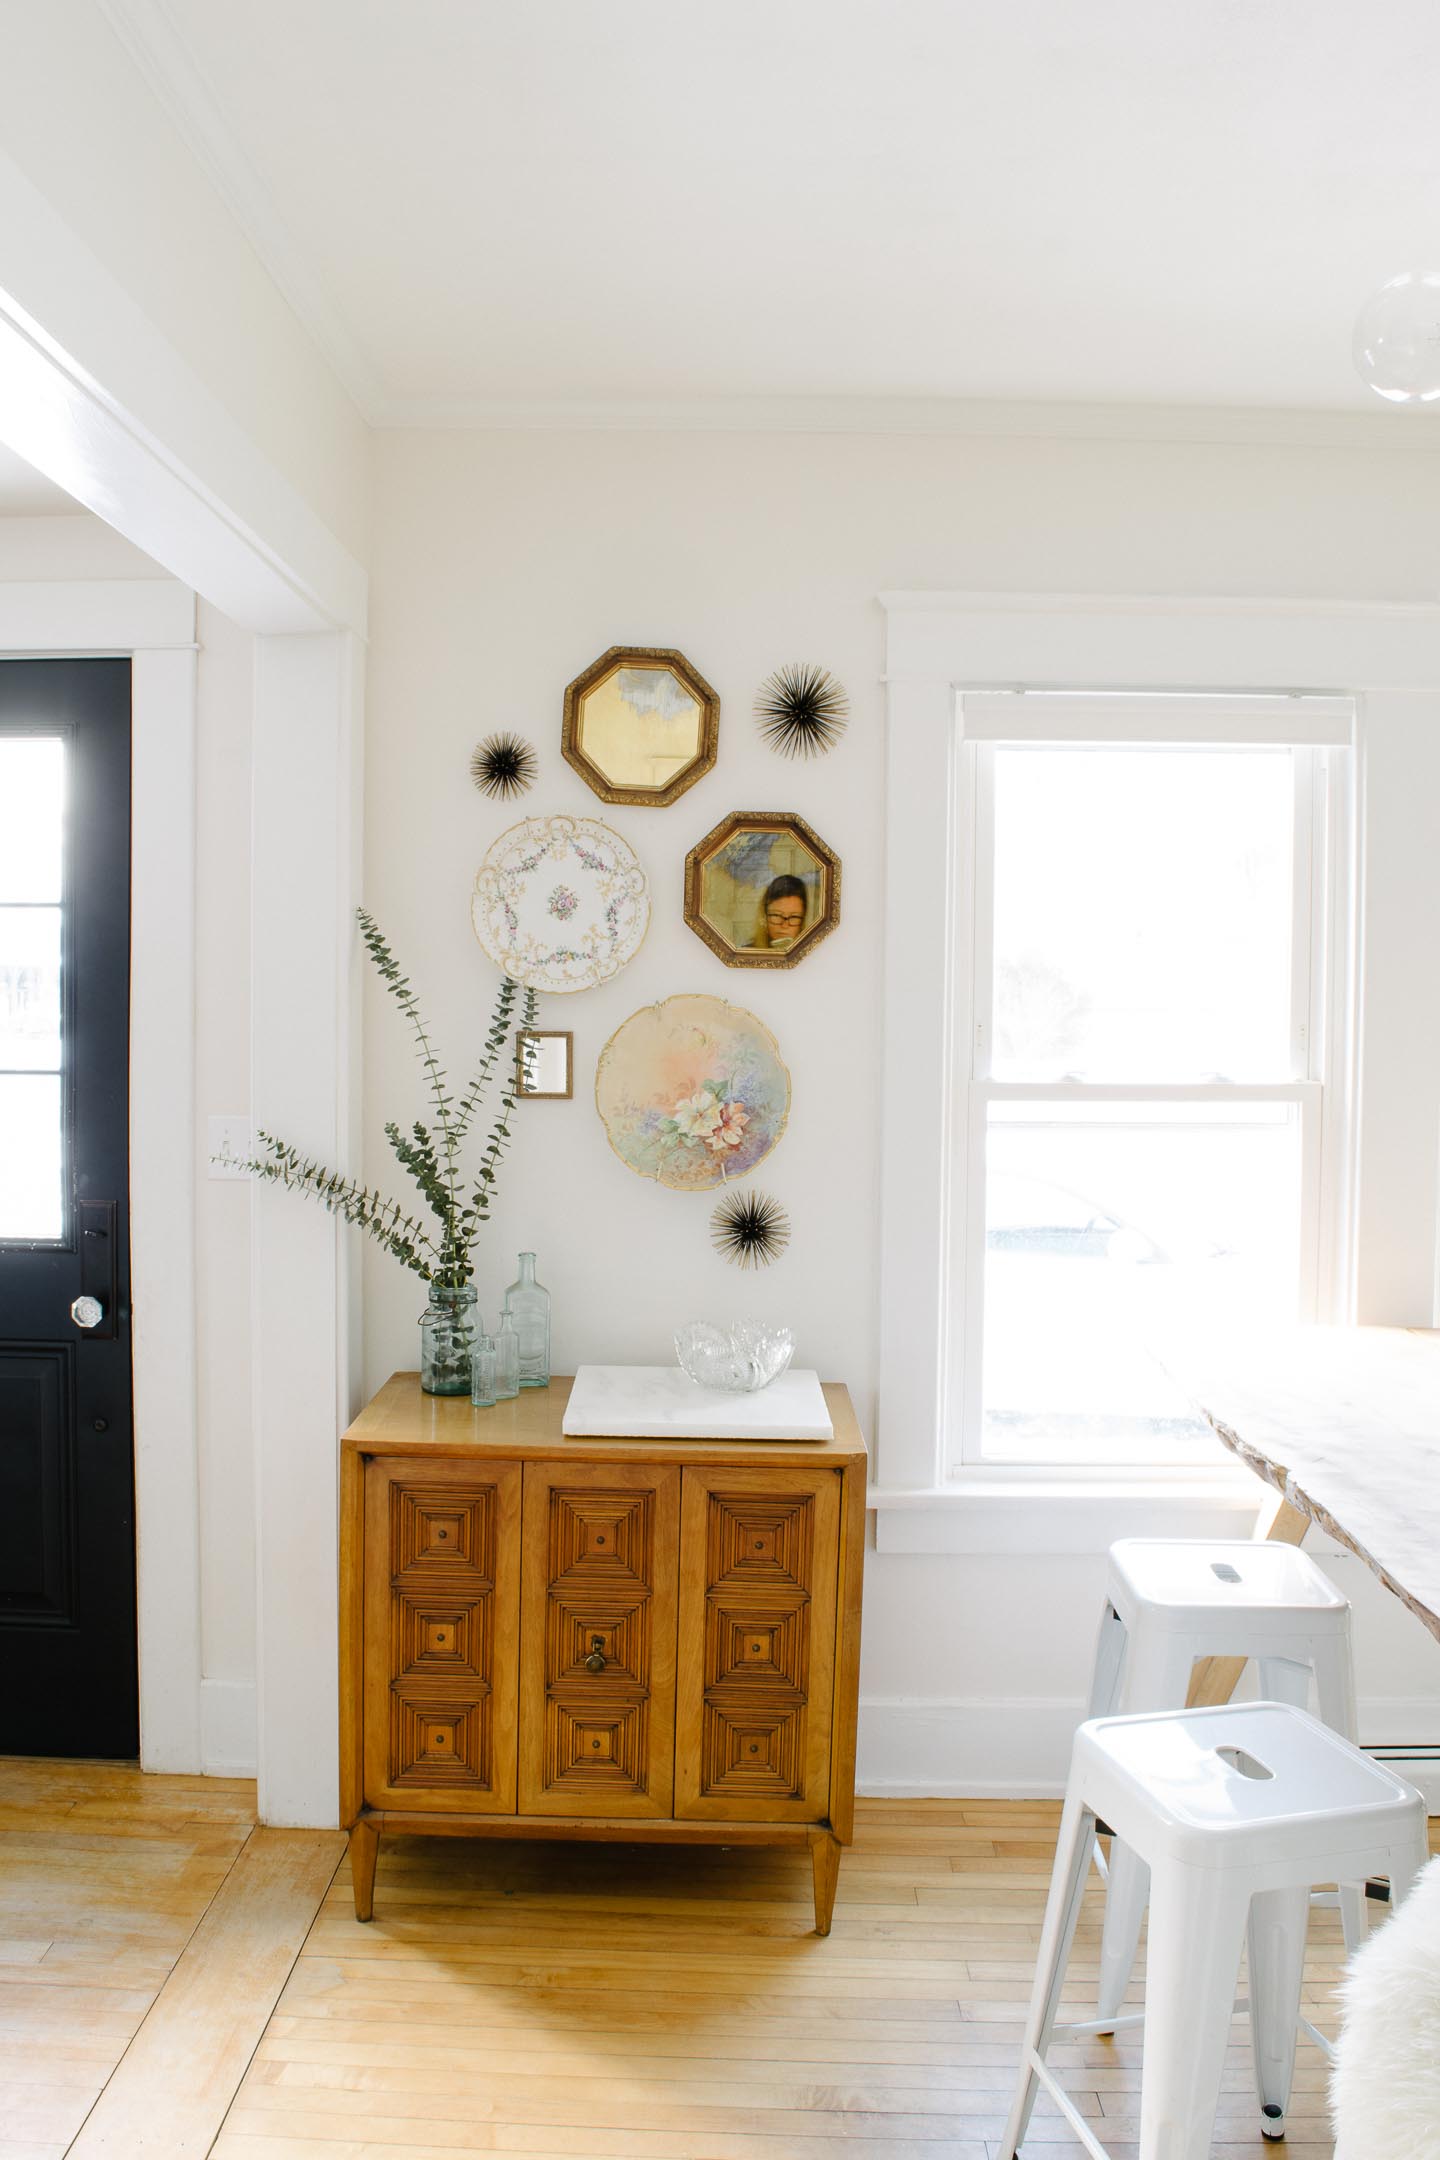
In the case of the dining room this meant DIY-ing a light fixture we could afford because the only ones we found were out of our price point. Ordering the print through Etsy.com and re-using so many vintage finds or heirlooms. It makes us feel great to know the history behind our finds.

I originally picked out this bowl on Etsy because it is so gosh darn cute, but then remembered I had hidden this crystal bowl safely away a few years back. The marble is from a local reclaimed building materials yard and is perfect for serving drinks on top of.


I have an obsession with these antique blue jars my sister used for her wedding center pieces (its a good thing she let me steal hoard like all of them after her big day).
It feels very nice to finally have this room back in order. Of course it will only be a hot second till Mitch, the toddler, or one of the dogs makes a mess of things. Thats just life in a small crazy household.


That white blob on the wall is actually our door bell. When our electrician asked where I wanted it and told me he couldn't get it into the entryway for various reasons. I told him right above the baseboard, he looked at me like I had three heads.
At the end of the day he comes back to me and says "okay it's all finished and I'm never installing another one of those suckers up near the ceiling ever again! It's genius!"
I of course didn't think it was genius at all, just made sense. Why have that ugly thing up high on the wall it doesn't really make it louder?"
The really hard part about having an open concept household is that you can see all the unfinished spaces. So until all the big stuff is done (like closet doors in the entryway), most of the rooms still feel unfinished. Thats why the big push to get a bunch of projects done in 2017, so we can move on with new adventures.
What do you think of the refresh?
This post may contain affiliate links. Read the full disclosure here. Follow my blog with Bloglovin
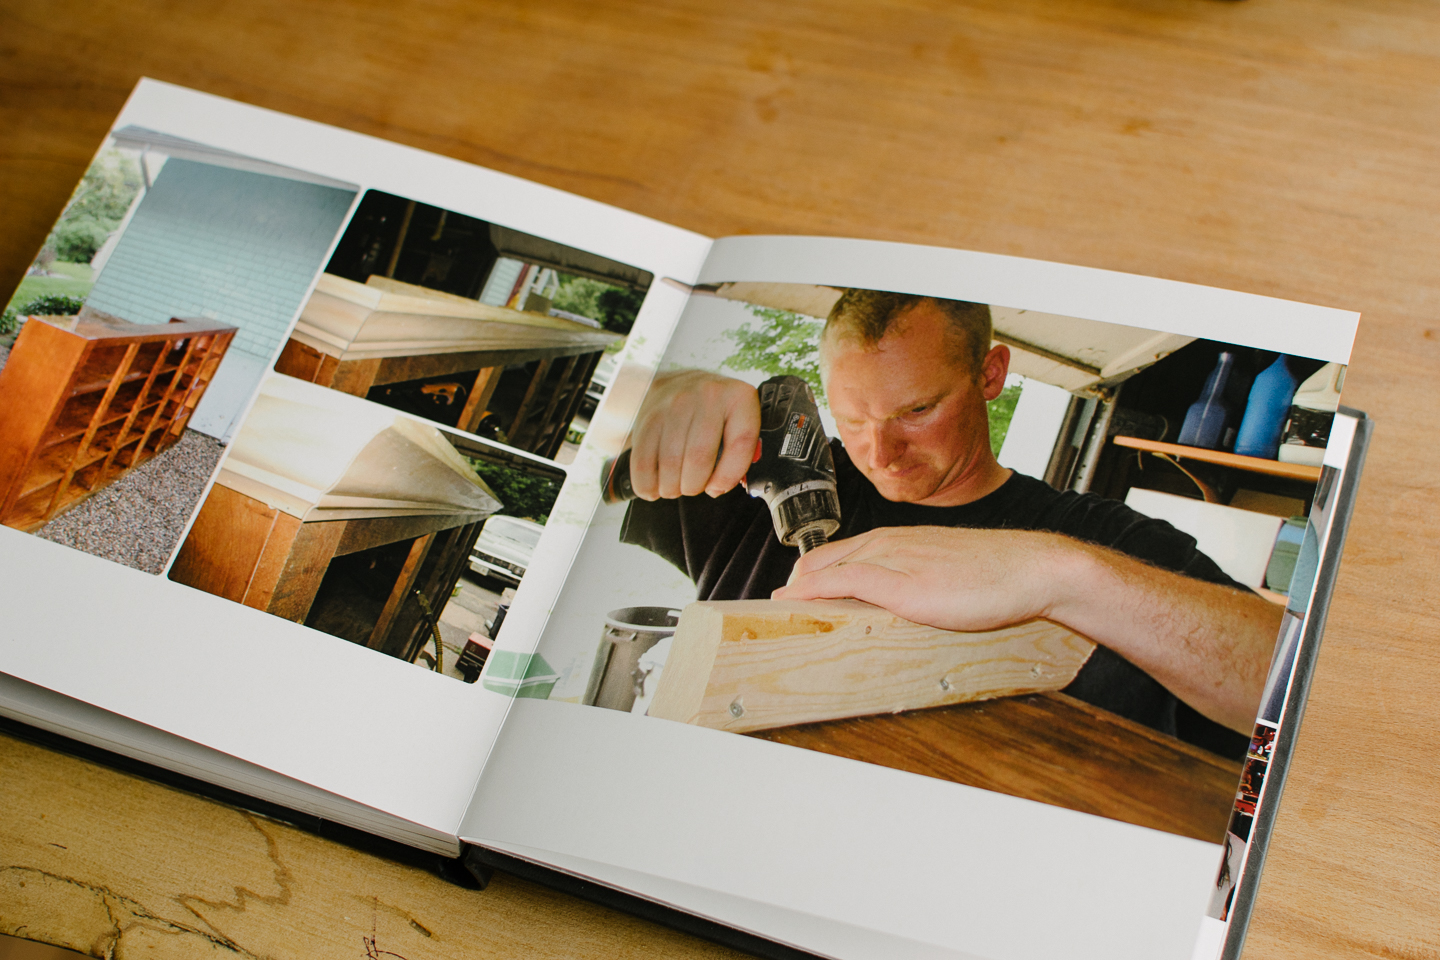
When we found all our inspiration for the dining room it became clear a Sputnik light was a must have for the space.
A Sput-What??? Wasn't that a Russian Satellite?
Our biggest problem was the budget, although we did find a few great looking lights on Etsy for a pretty decent price, we still couldn't swing it and afford some of the other items to be checked off the list for this room. We've been working so hard to #finishthatspace this year and really didn't want to pour all of the funds into one piece, however wonderful it may be.
So, DIY seemed to be our best avenue, and Mitch has some experience with electrical so we soldiered on.
**Disclaimer** We are not electricians and have no prior experience with lighting design. This post gives you a general outline and parts list for this light fixture; you purchase, assemble, and install at your own risk. If you are running a dimmer switch, ensure that your total wattage does not exceed what the dimmer switch can handle. Nine bulbs x 60 watts per, put us well over the dimmer's rating and we ended up changing it out.
Once I had my inspiration pictures in-hand, I went on a virtual search for parts; where does one actually find brass fixture parts you ask? Having never built or thought of building a fixture like this took a bit to figure out. Alas, I found Grand Brass Lamp Parts and they fit my criteria, USA company located close to us in West Haven, CT.
I even found a couple of designer DIY kits you can purchase through them with all the supplies you need to build your own!
When we started adding up all the pieces needed for the project, it became apparent the cost was going to put us up and over $200 for the lot. Thats when the real designing started, my favorite part.
We couldn't afford everything to be brass, so how do we get a high quality piece with some compromise to reduce the overall cost? We started thinking about what it would look like to do both brass and steel like in our mood board inspiration.
Although we really liked the look, it didn't seem like we could find the right male steel rods for the brass center body. We really liked the mix of metals, and how it added some depth to the fixture without becoming too flashy.
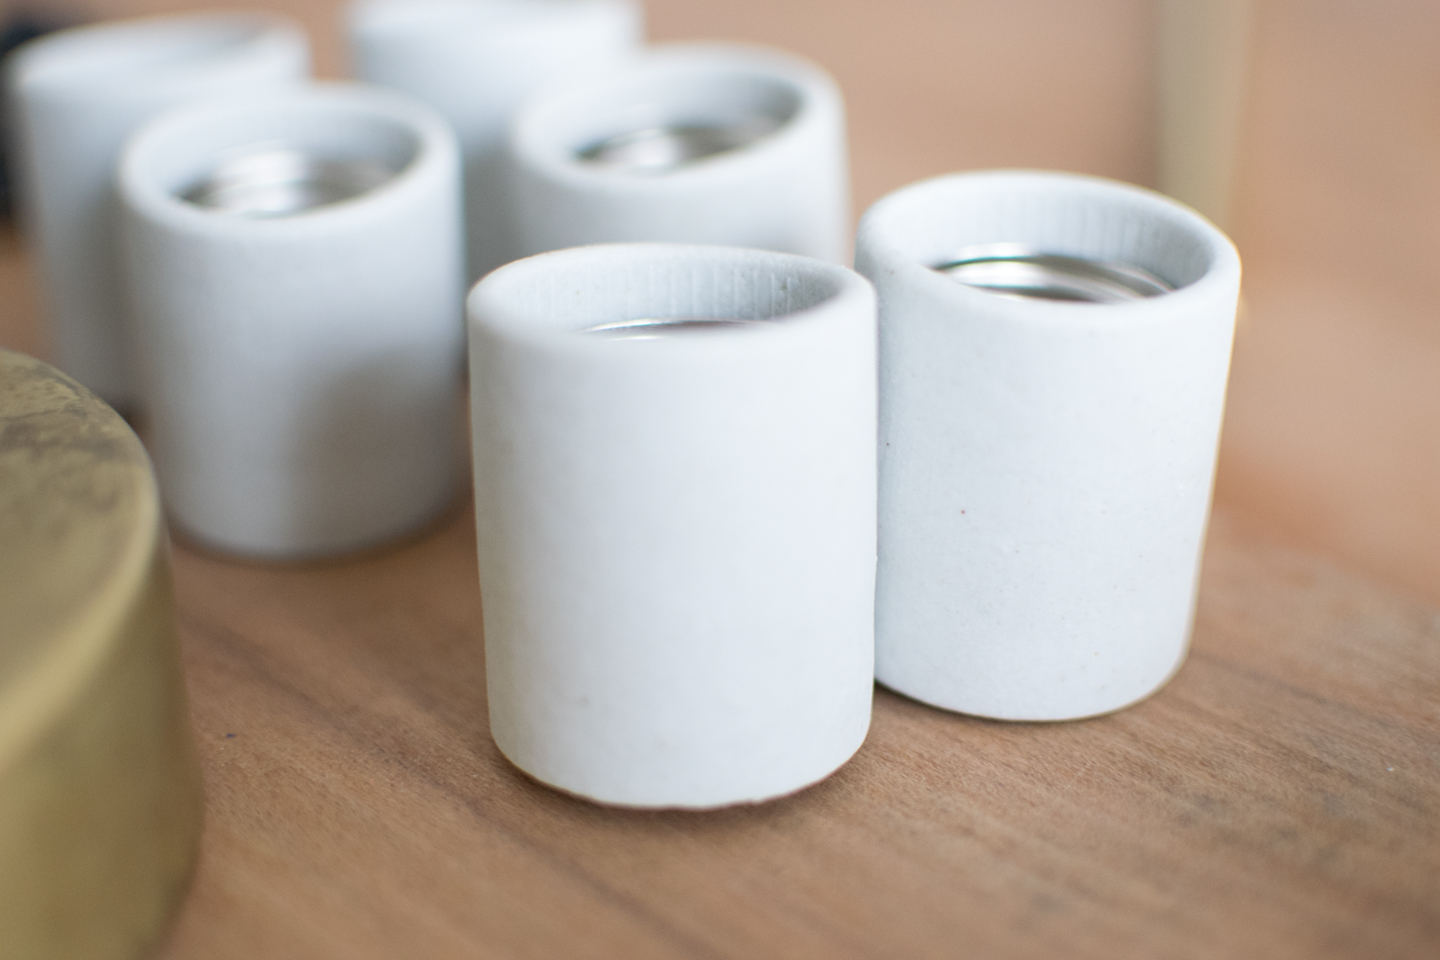
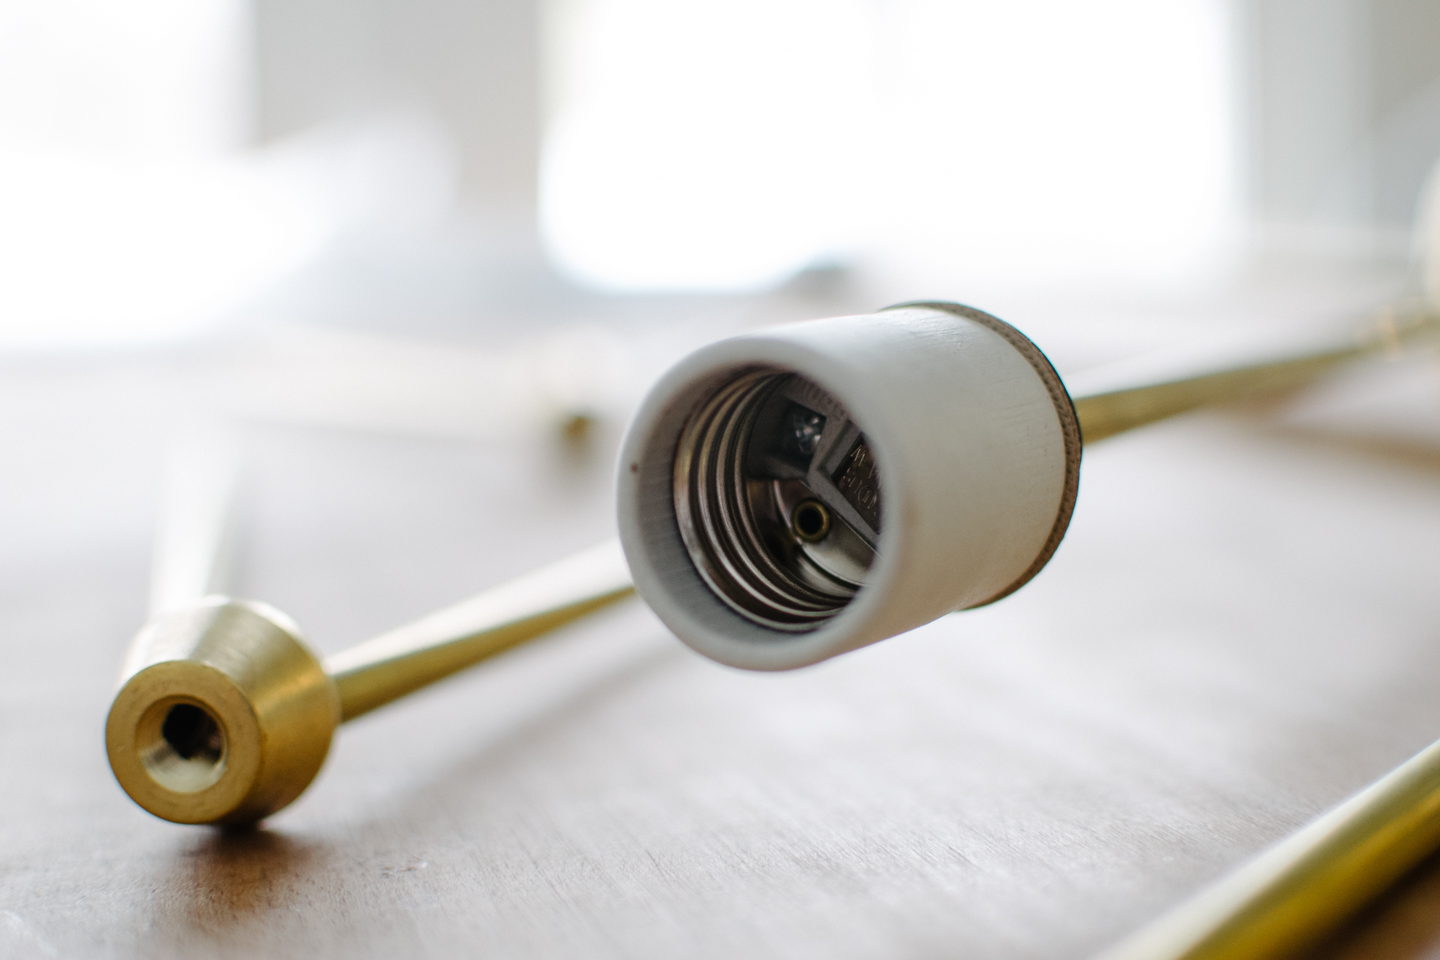
In the end, we figured out a huge part of the cost was going to be the brass socket covers (with 9 of them) and the bare porcelain sockets lent the same depth to the fixture. So it was decided the white porcelain would work well with our cafe stools.
We got the overall aesthetic we were looking for because of the budget constraints we had, now we had our very own light.
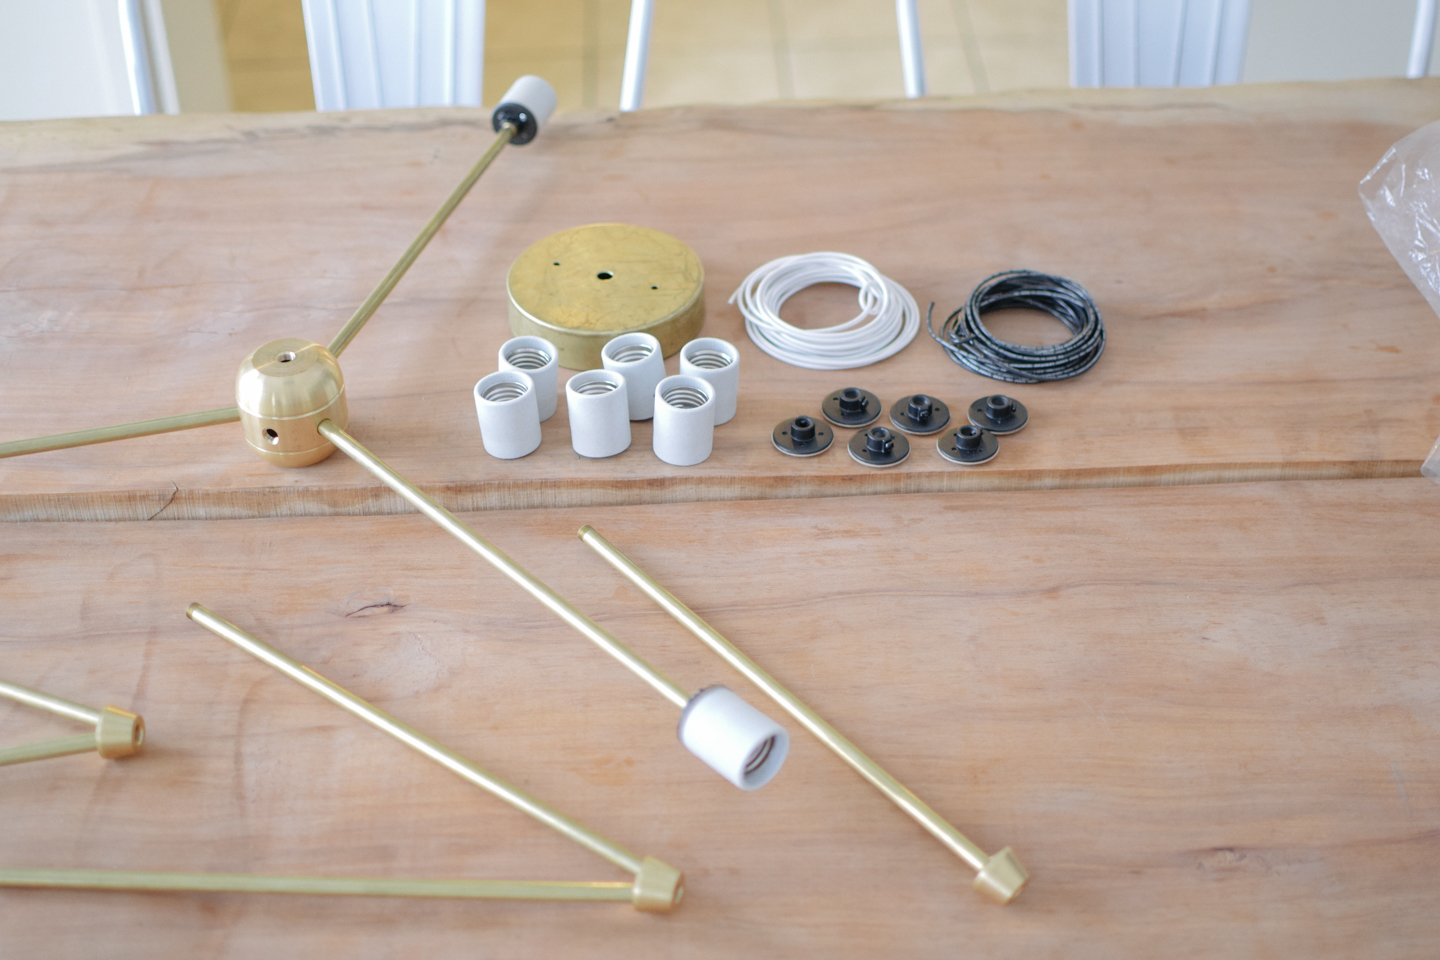
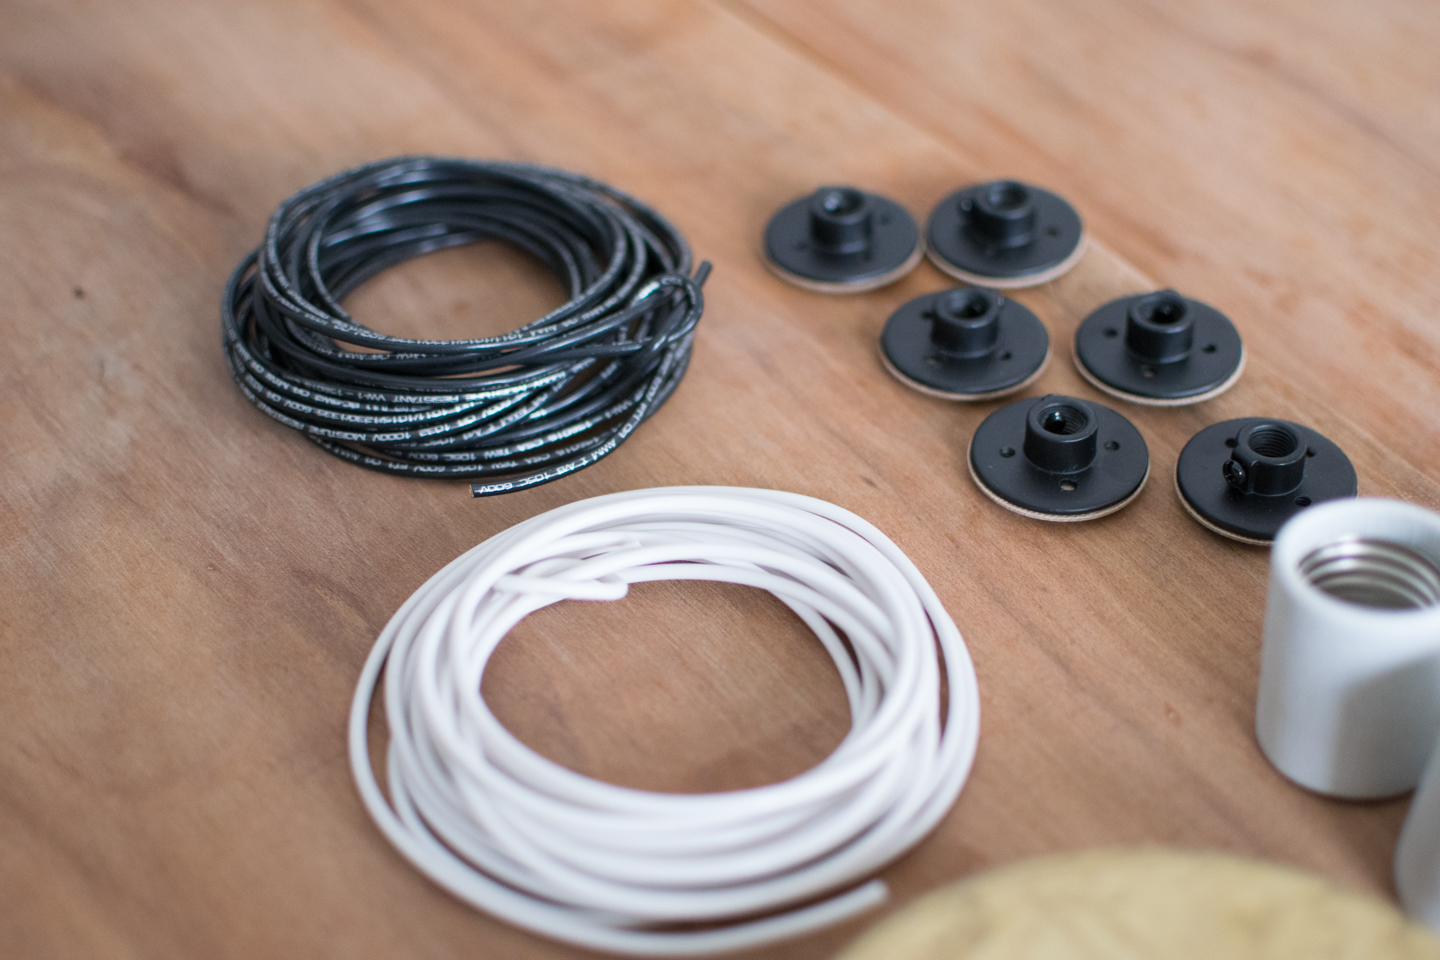
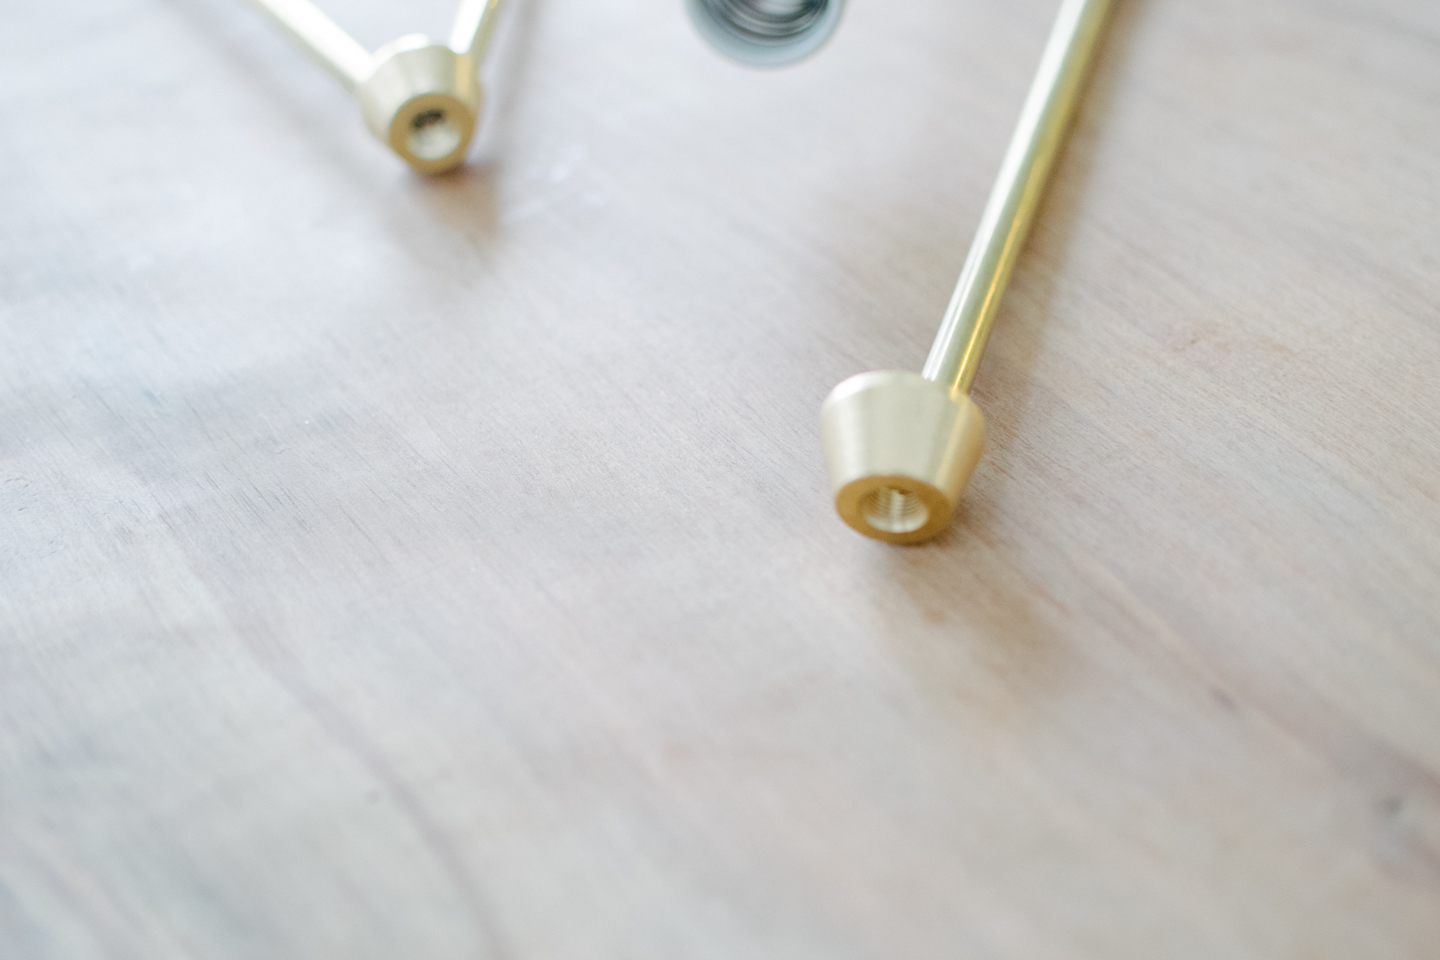
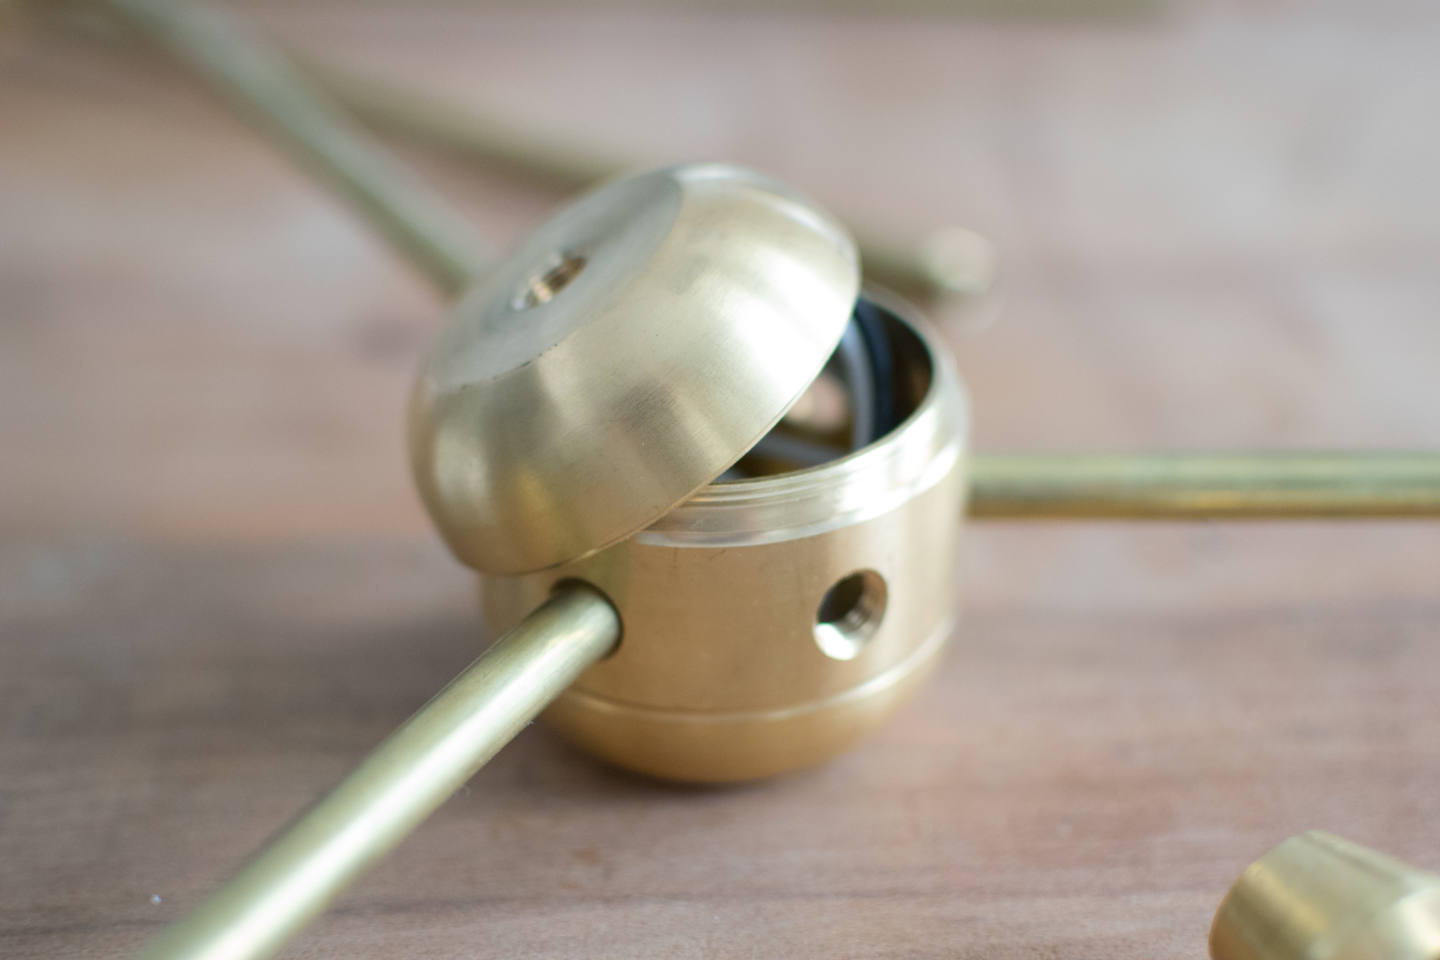
Putting all of the brass together is fairly straight forward; male threads to female threads. Before you connect anything to the main body, get the porcelain sockets wired and the wires run through the piping. Make sure you get all of the wires connected consistently, and leave yourself about an extra 20" of wire that will extend out of the main body. You can trim back later, but don't leave yourself short.
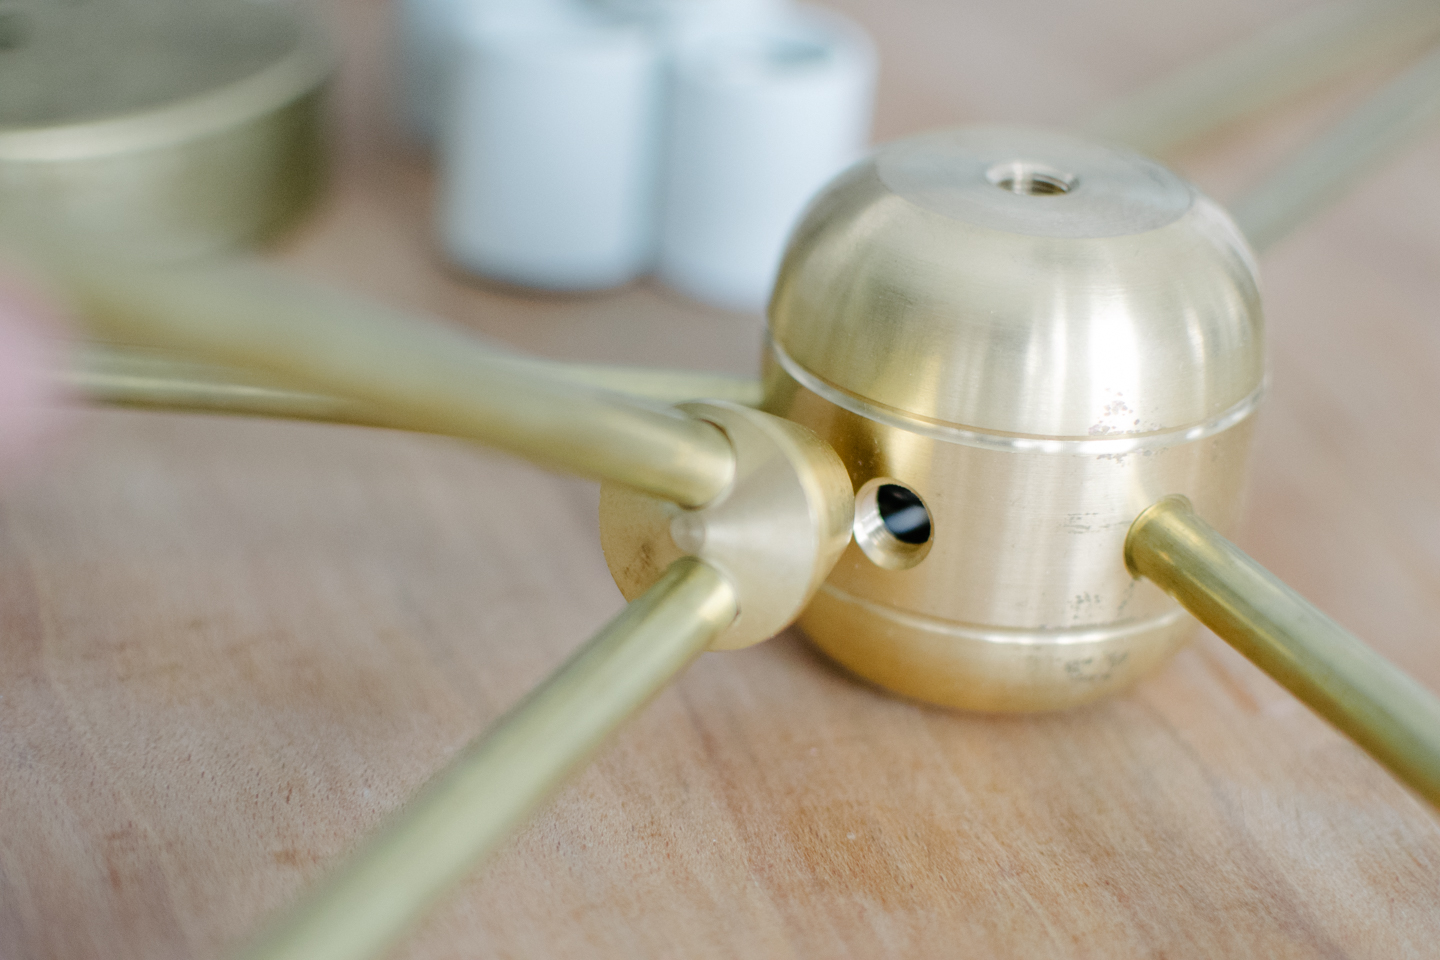
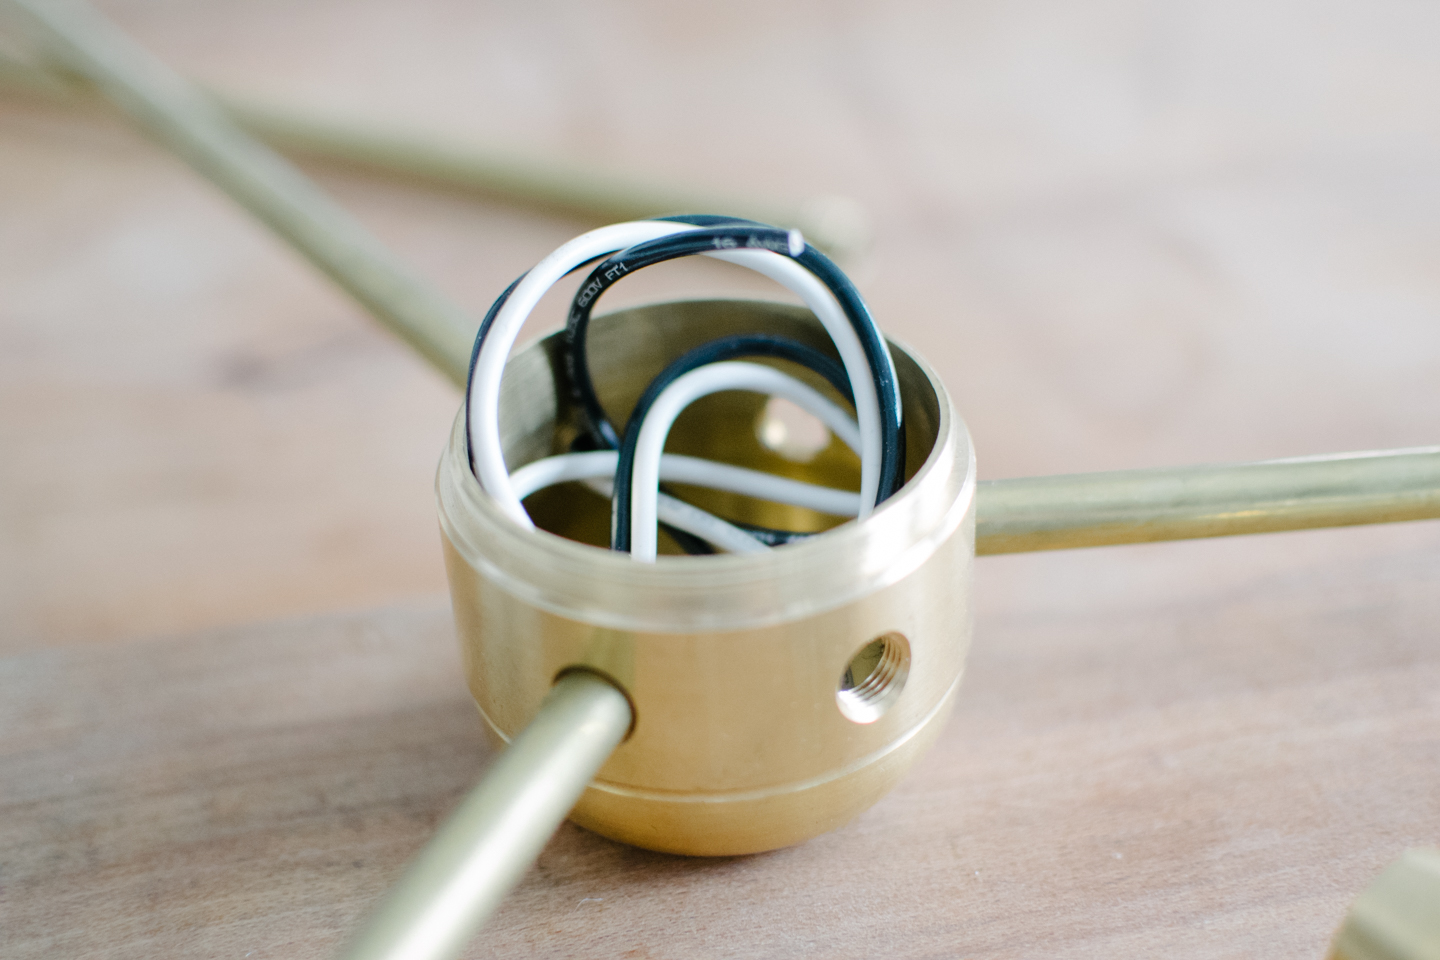
Once you get to the end, you are going to have two wires for every bulb sticking out of the main body. Keep this in mind while designing and adjust for a bigger body, the more bulbs you have. For us, 18 wires was a lot for this size body. We had not a millimeter to spare.
We had so many wires, we could not group them all together. In the end, we ran four total wires to the box, two black and two white; this way we could split the total number of wires we had to group in half.
**Disclaimer actions do not happen as quickly as hyper lapse depicts**
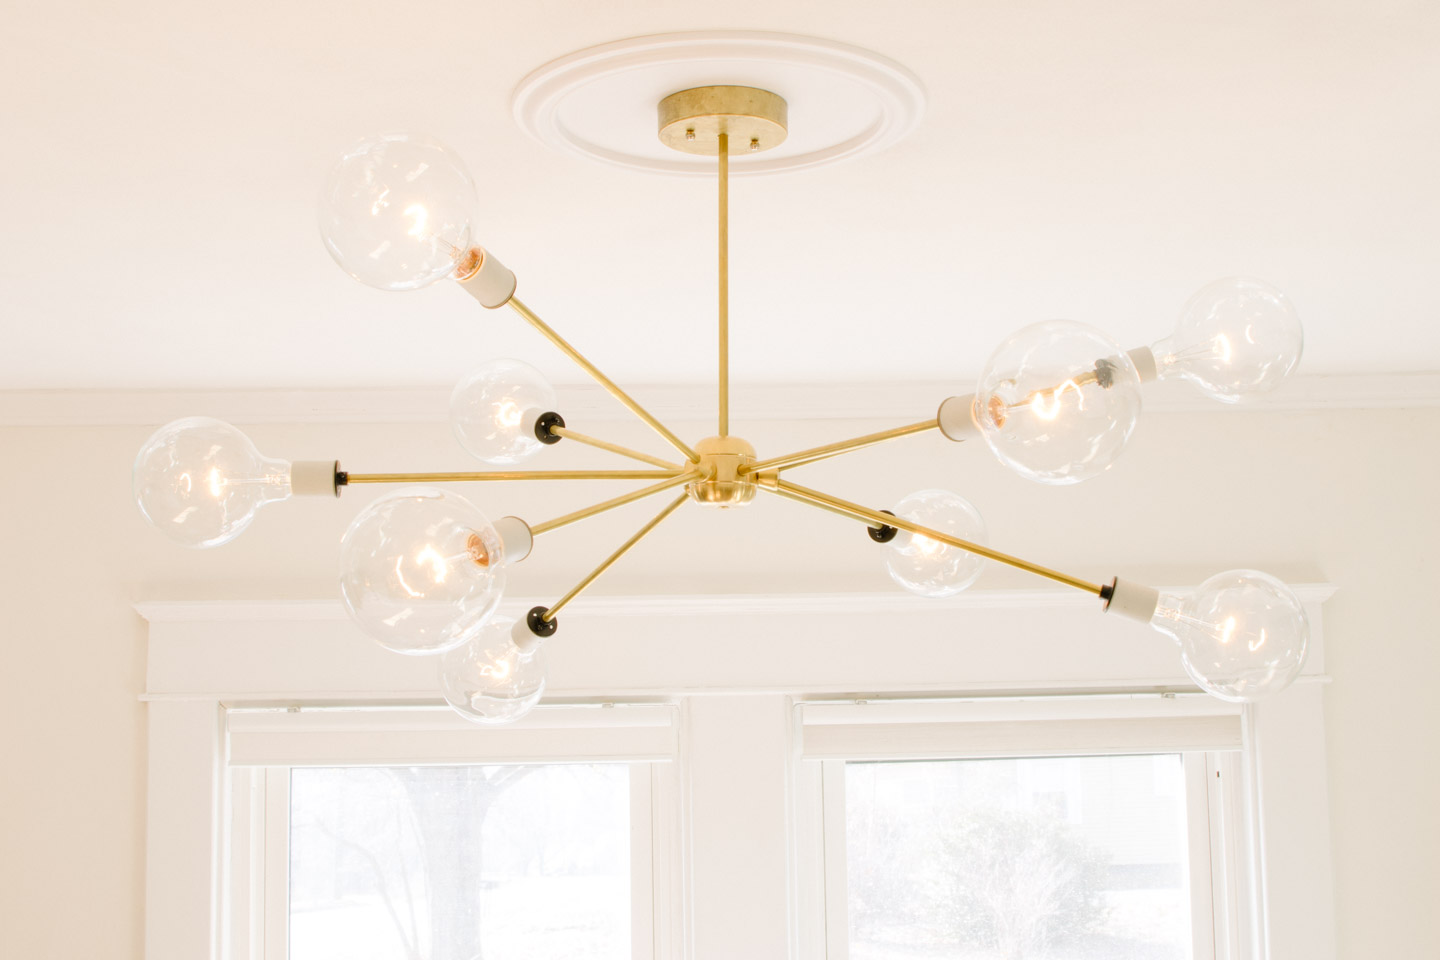
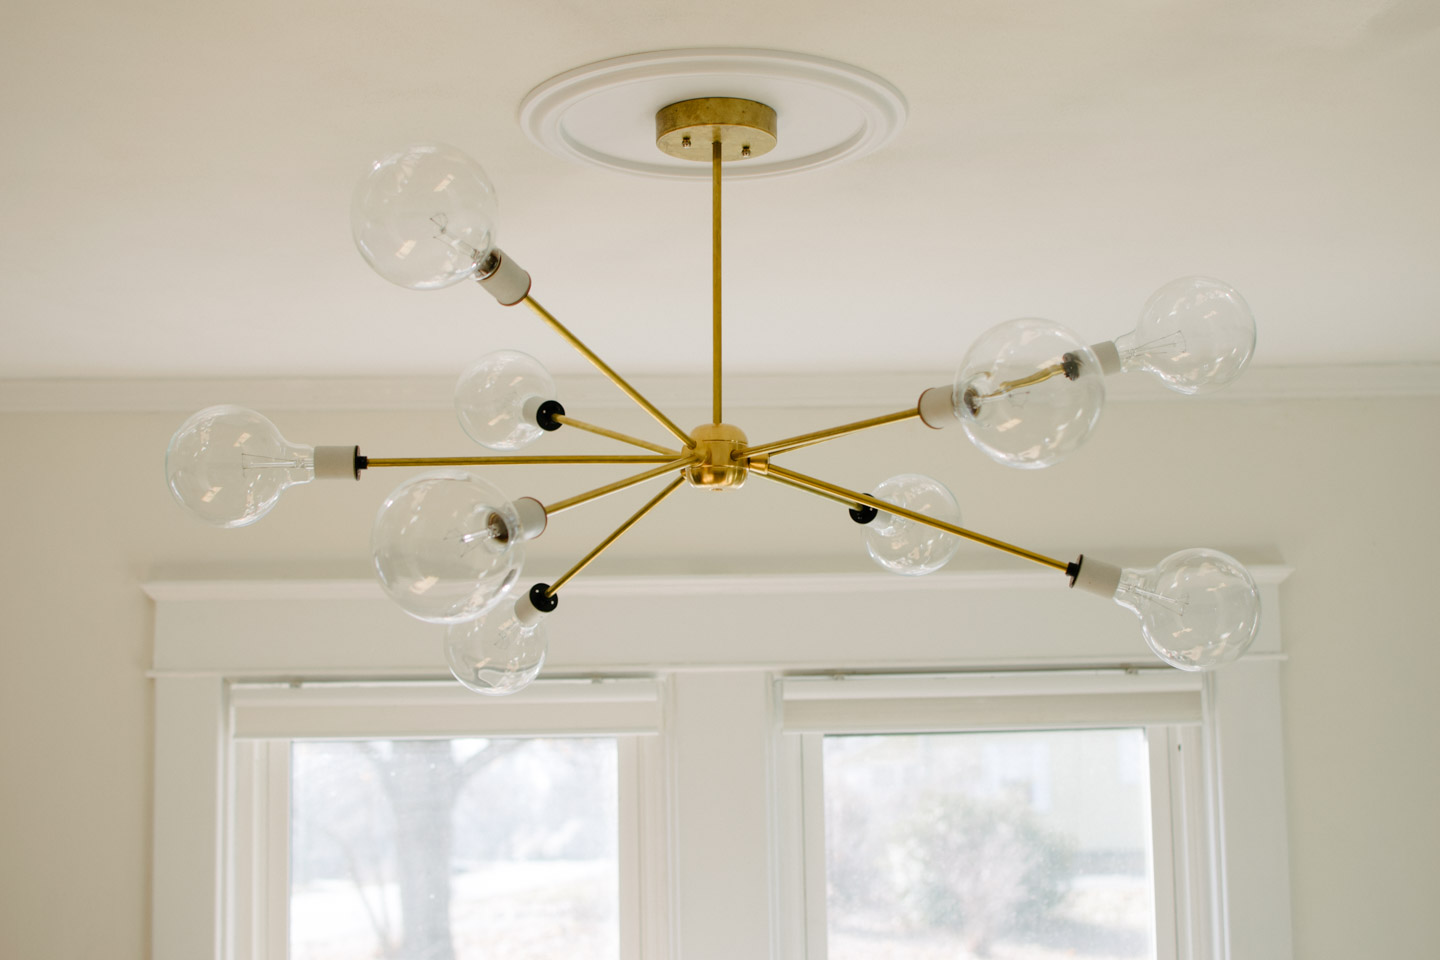
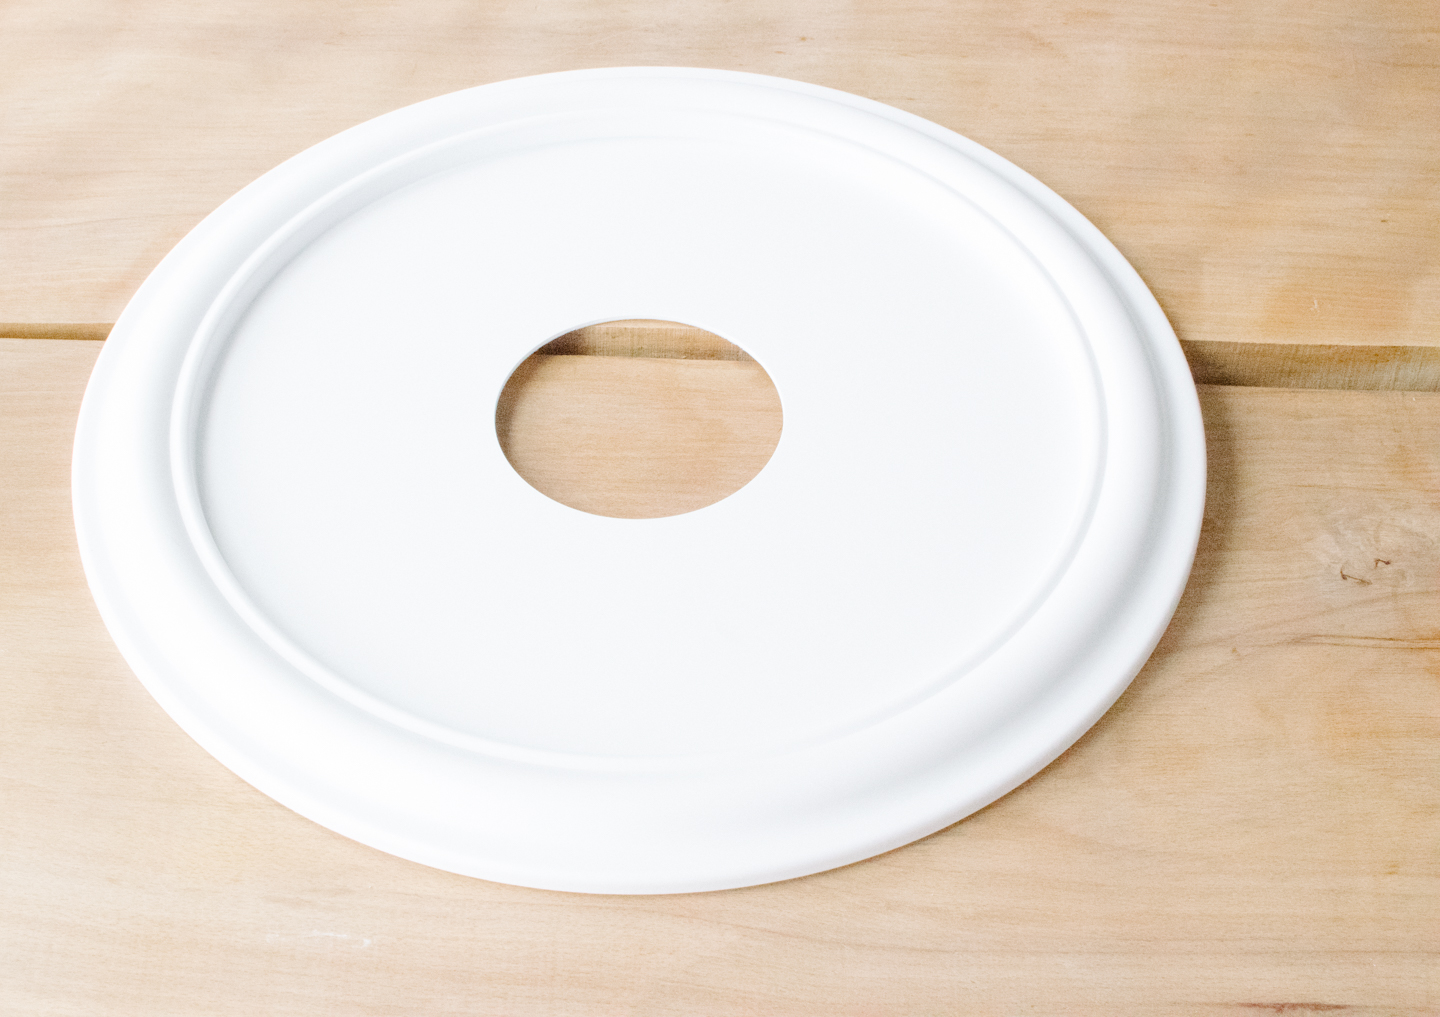
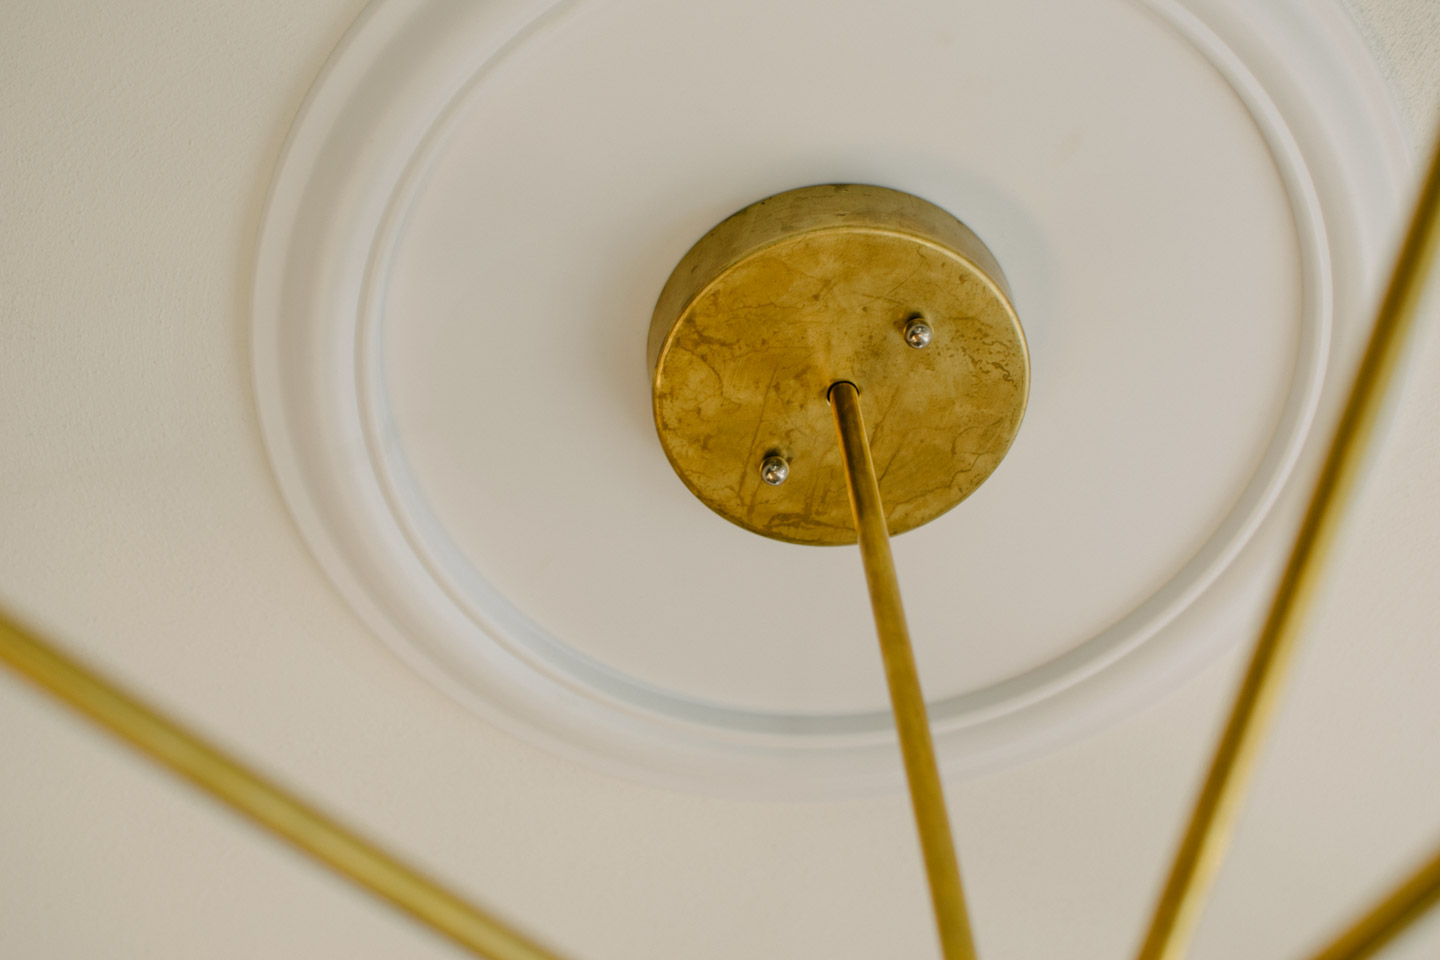
You may have noticed the medallion on the ceiling in these picture's, that became a solution to a "problem" that couldn't have been avoided. Our light was never centered, on anything; not the original opening to the living room, not on the room in either direction, and not on the original window, nothing. So when we decided to spend this money (not to mention time and effort) on a grown up light fixture, we knew it would drive us crazy to not have it centered on the window in the dining room.
Of course this conversation didn't come up until we were ready to order all the parts (which were already adding up above the budget) and the solution ideas were seeming very complicated and therefore expensive.
So if you can imagine, things got a little tense, Mitch and I sitting across from one another at the dining table. (Yeah we do argue about this stuff just like your average homeowner).
A ceiling medallion would seem an easy solution, but generally speaking they are very ornate, or tend to look like your covering something up. I was really, super unsure about putting more detail in such a small room. But in an effort to #finishthatspace, like we said we would this year, I sucked it up and ordered the simplest medallion I could find. We love it, especially what it cost us!
I sucked up drywall and blown-in insulation dust to move the damn light over 4". Although, I am glad we noticed this before going through all of the effort of getting the light up on to the ceiling....I HATE doing things over. So, two trips up into the attic, one to assess how the box was affixed, the other to pull the wire through the old hole and into the new.
Do you think it needs a coat of trim paint? Mitch seems to think we should leave it as is, I'm worried it looks too plastic...
This post may contain affiliate links. Read the full disclosure here.

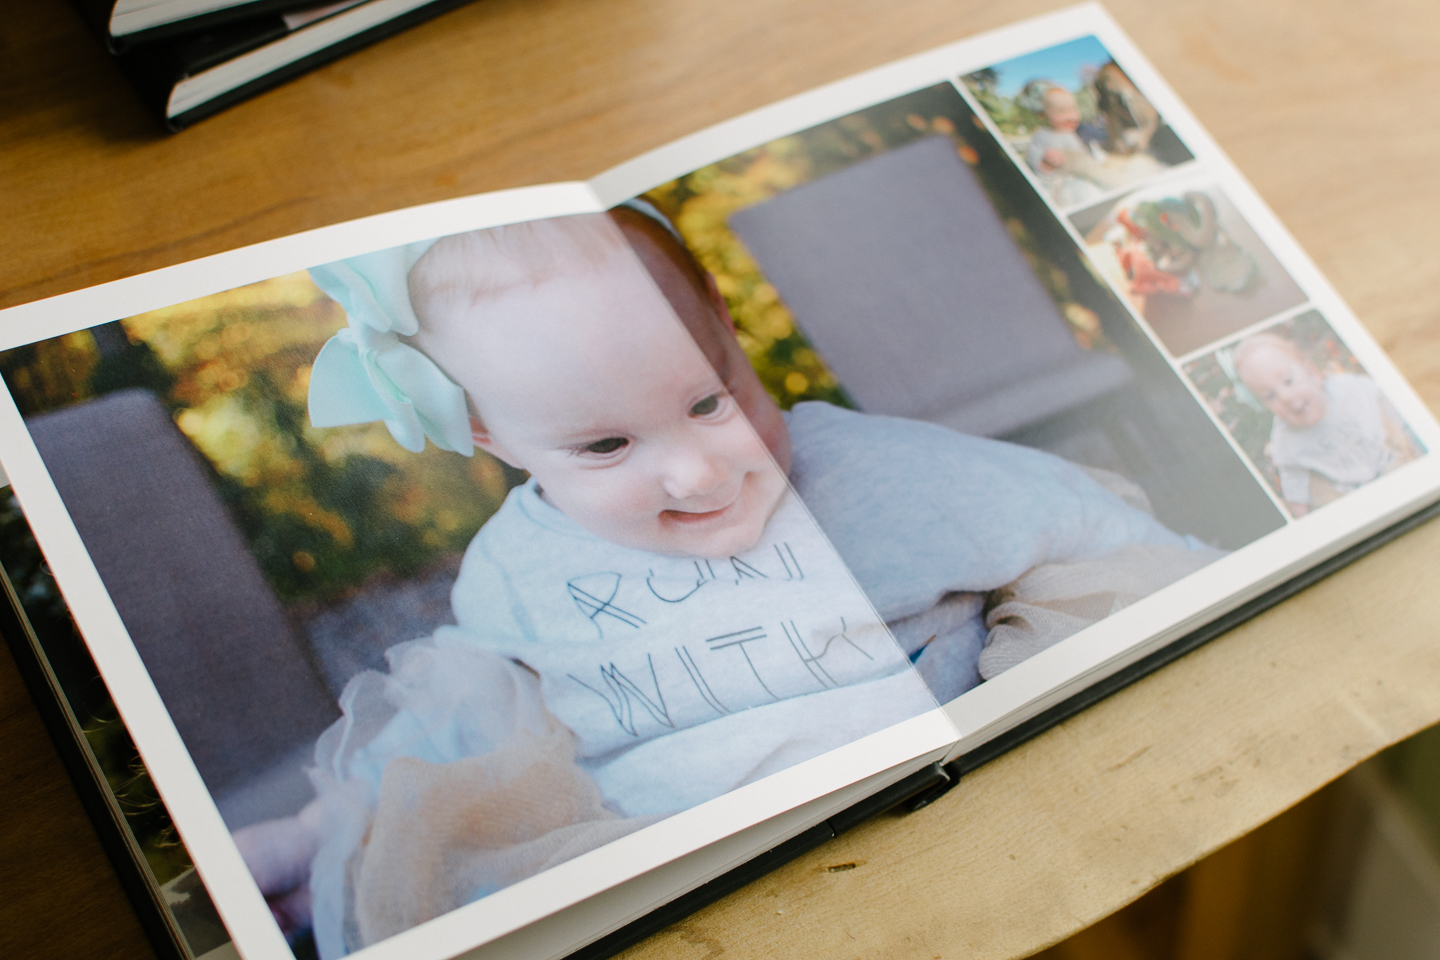
After we had our daughter Haverly (have-er-lee) I started taking photo's like crazy, even borrowed a friends old DSLR for like a year (until she got together with other family & friends and they bought me my own for a 30th Birthday present). I knew I wanted to create the baby's first yearbook and then got to thinking about how much fun it was as a young child to look at photos. But we don't really print photos anymore, just hand the few on our gallery wall. So how would Haverly ever get this same experience?
Mitch even grew up with the same experience, his Nana was big on taking photo's of the boys as they grew. She still currently has a photo album per year for there entire childhood.
So I set out to find a classic photobook, that was cost effective, and didn't have so many options my head was spinning. I stumbled upon MontageBook and the process sold me. Three books later (Our photos pre-baby, 2015's yearbook, and Haverly's baby book) and we couldn't be happier with the results.

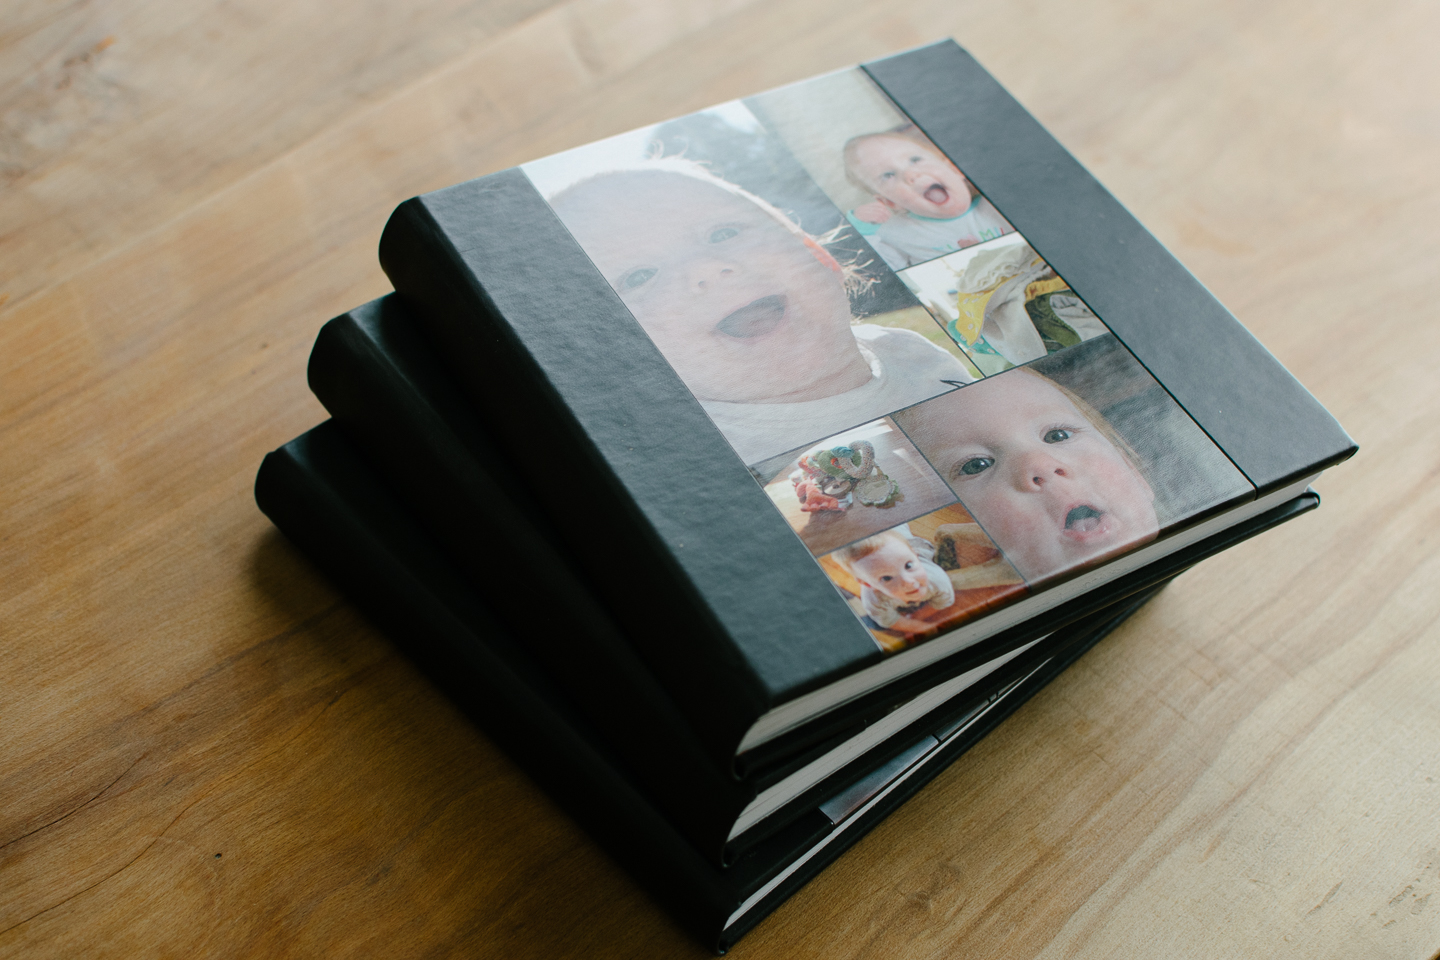
Obviously we like these montagebooks or we wouldn't already have three of them, so making a yearbook in December is becoming a tradition of our's, that way we get the book by Christmas (or shortly after if I've been lazy), and they only take about 3-5 days to be printed and sent out.
If your asking "If its a yearbook wouldn't you wait until after the first of the year to order?" Then you would be correct, thats one way of doing things. We happen to like to review the year at Christmas with Haverly looking at pictures.
Therefore, our yearbook goes winter- winter and includes the previous years Christmas. That means our 2016 yearbook will have 2015's Christmas in it and run right up to the first or second week of December 2016.
I try not to take the yearbook too seriously, because then I'll try to make it perfect and you know how that goes... it never gets ordered and looked at because you can't get it just right. Or you miss the sale opportunity because you can't get it just right in time, so your waiting to order....and waiting.
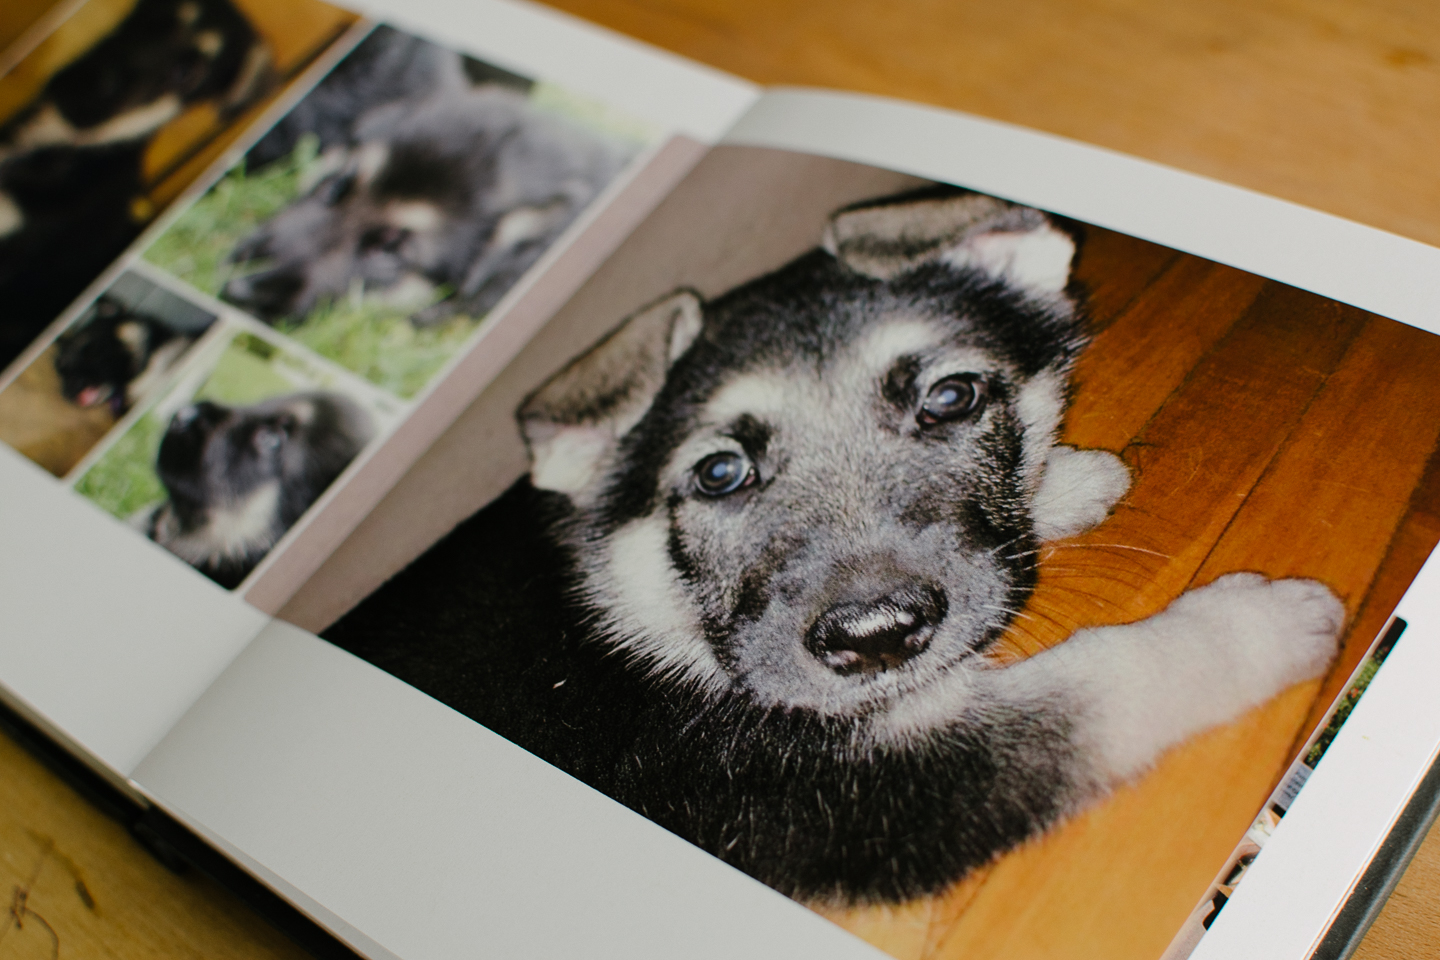
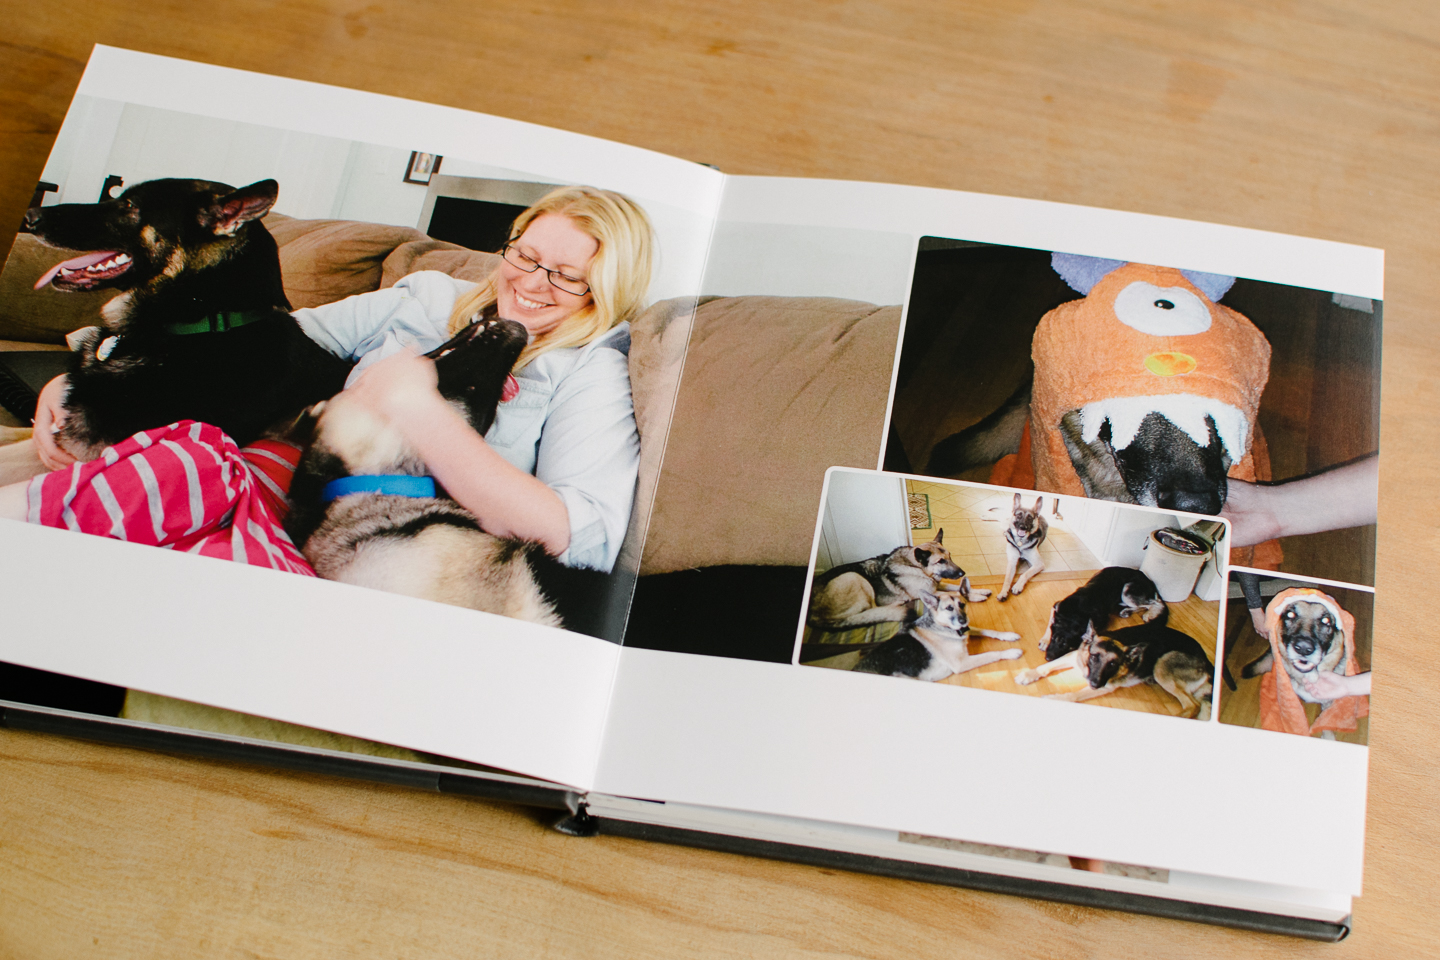
In one of our books we put pictures of the litter our Sadie & Freeway made. Obviously these are not "our" dogs anymore, but we wouldn't want to miss telling Haverly about that time we were German Shepherd Breeders and how much fun it was to experience that.
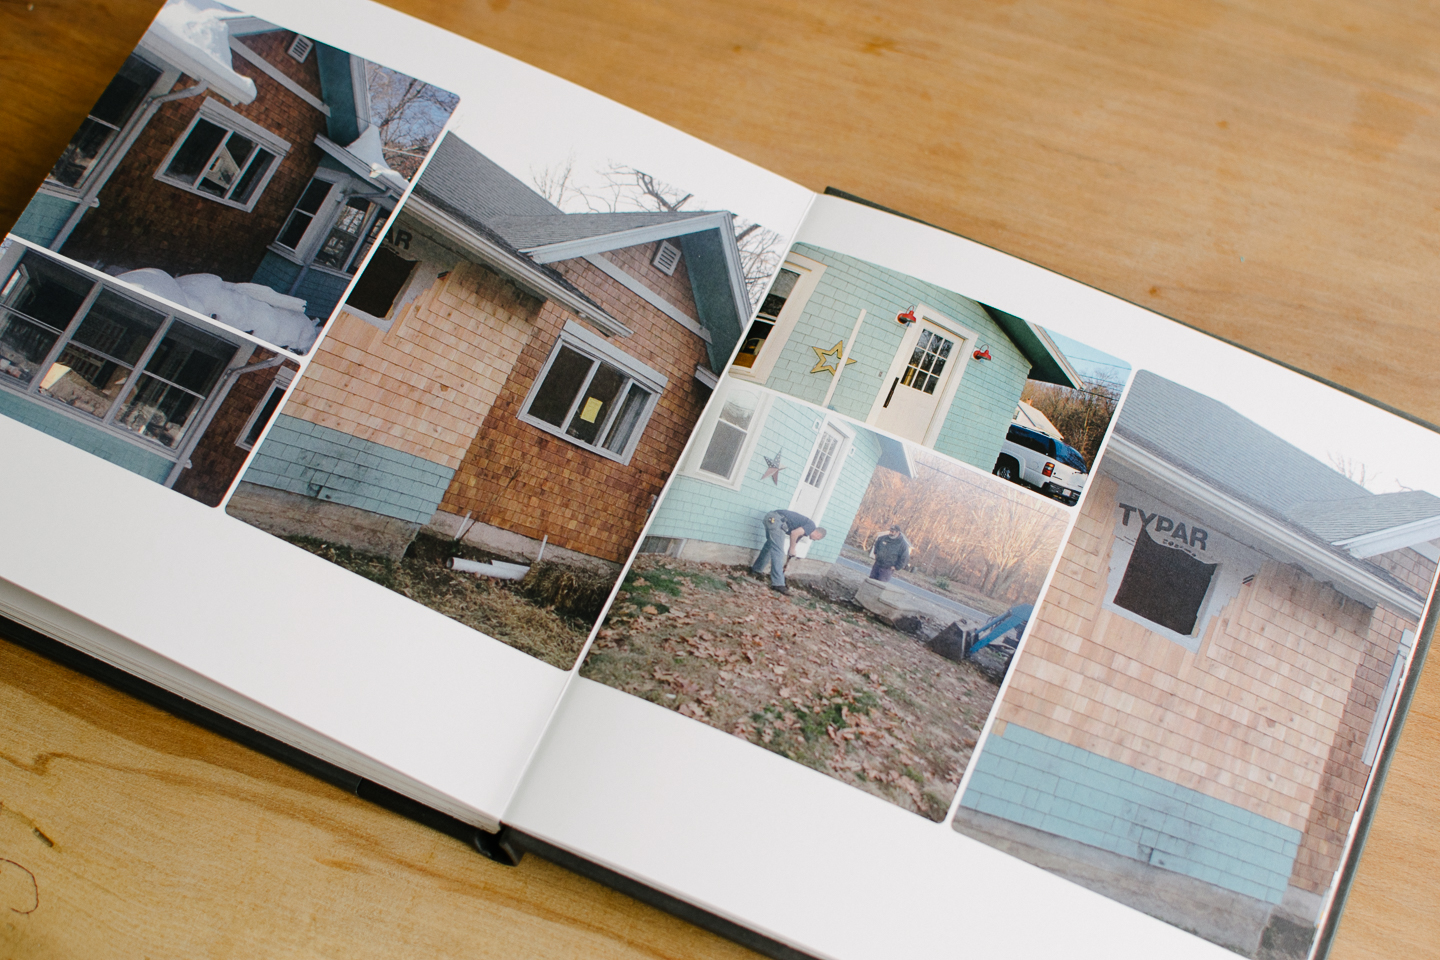
Also, our porch remodel we went through right after Haverly was born (like two weeks after!) It was such a significant time in our lives because it has changed the way we live in this household, we want to remember that.
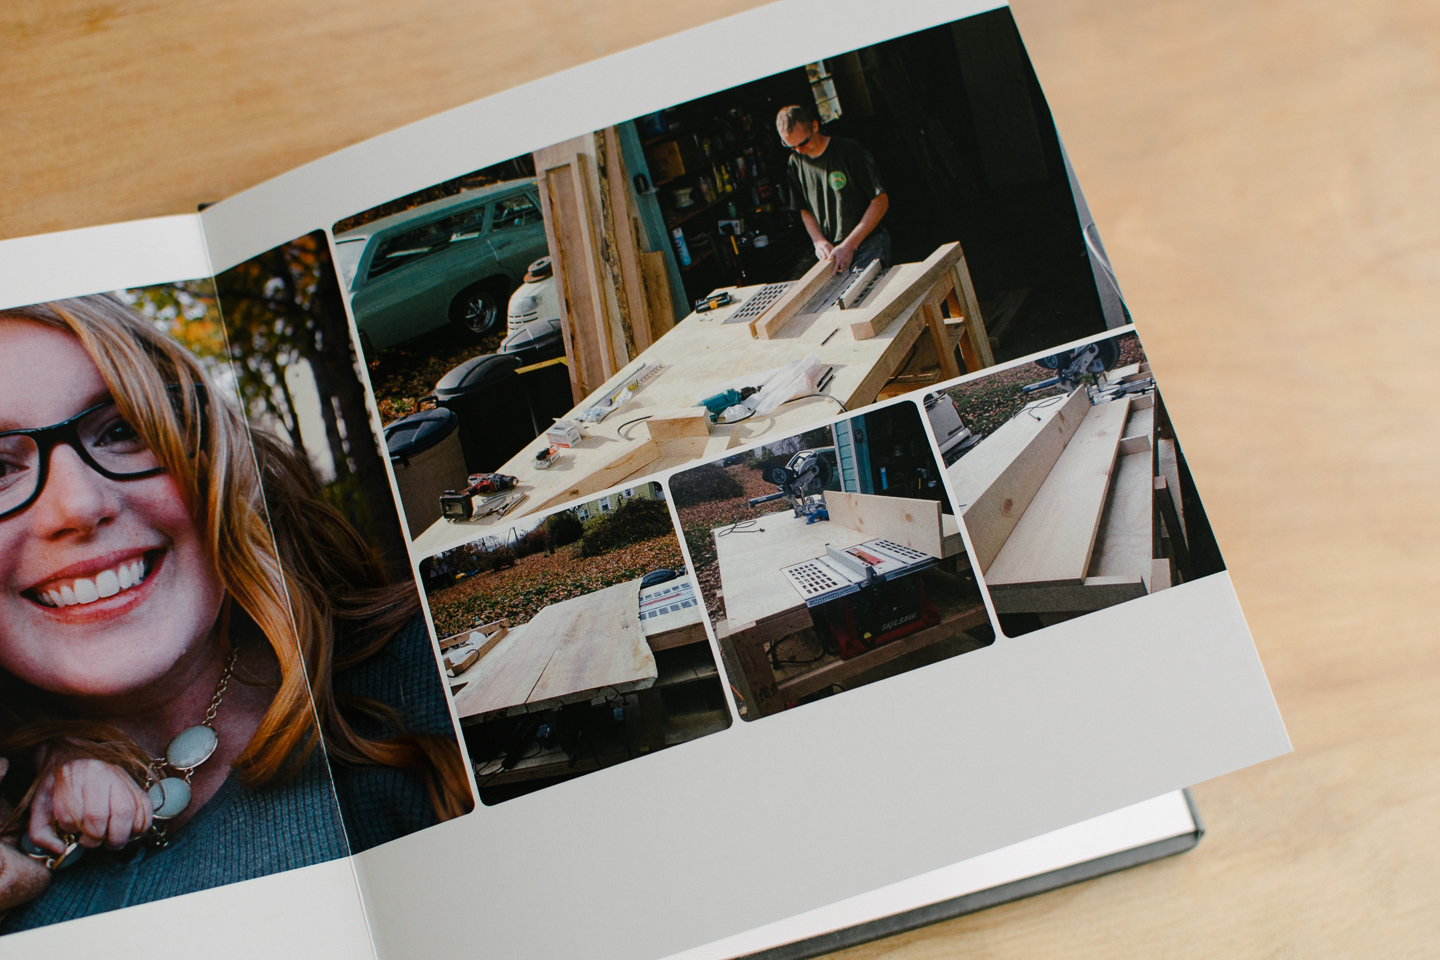
I'm sure as we continue archiving our projects with the blog we may not put as many examples of projects in our yearbooks, but it still is nice for us to look back on some adventures.
This is similar to if you wanted to scrapbook or print and put together a photo album yourself. You can have:
I really wanted to go through all our pictures monthly and create spreads this year, but every month came to an end , and I hadn't done the work. Therefore, I just took all my photos for the year filed by date and start narrowing down from there.
I've been using Lightroom for a few months and couldn't live without it. It catalogs all of my photos and I can create collections, keywords, etc. to keep things organized. I also do all of my edits in Lightroom at this point (I haven't gotten into Photoshop much yet).
I won't go in to too much detail but I will say if your looking for a program that can handle your ever growing collection of photos this is wonderful and at just 10$ a month for it, and Photoshop CC, so you can start editing and creating some amazing photos.
Before Lightroom I just used my apple photos app to manage and organize everything. Without having started this blog I may have always stuck with the photos app, it was just so intuitive and easy to use.
If you don't have a Mac or iPhone and subsequently can't use apple's photos app, Amazon Prime photos has unlimited storage (with your prime membership) and it seems they just updated the app. All my phone's photos get backed up to Amazon as do most of my computers photos. The really nice thing about Amazon's photo storage is that Montagebook.com with pull directly from Amazon so you don't have to upload photos from your computer unless you would like too.
Most of us have used filters in one social media account or another, but they can tend to make our photos look a little fake. I've found a few options that work really well.
Although you could theoretically apply one filter to all of your photos in Lightroom CC , I wouldn't recommend it. Your yearbook will be uniform, but some pictures will just loose there "reality", and the whole point of a yearbook is to accurately depict life correct?
So I use filters for my black and whites, and possibly for a yearbook spread or seasonal section. I would pull all of my outside fall photos and apply a filter , and all my winter with another filter, etc.
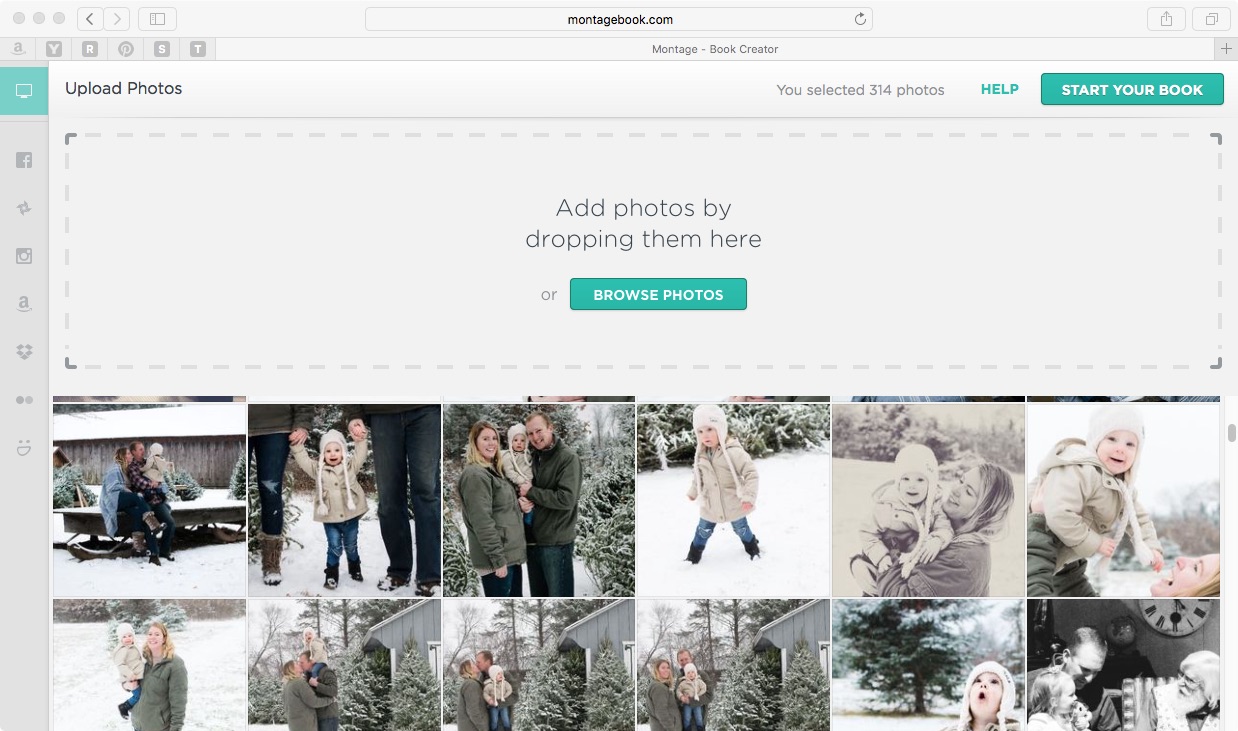
I've found that your uploads from your computer go into Montagebook by date, while subsequent uploads for Facebook, Amazon, or the other apps will not be added in chronological order. They must just get uploaded that way because they were organized chronologically.
Keep that in mind, if everything is mixed and you really wanted it to build in chronological order you will have a lot of moving photos on your hands.
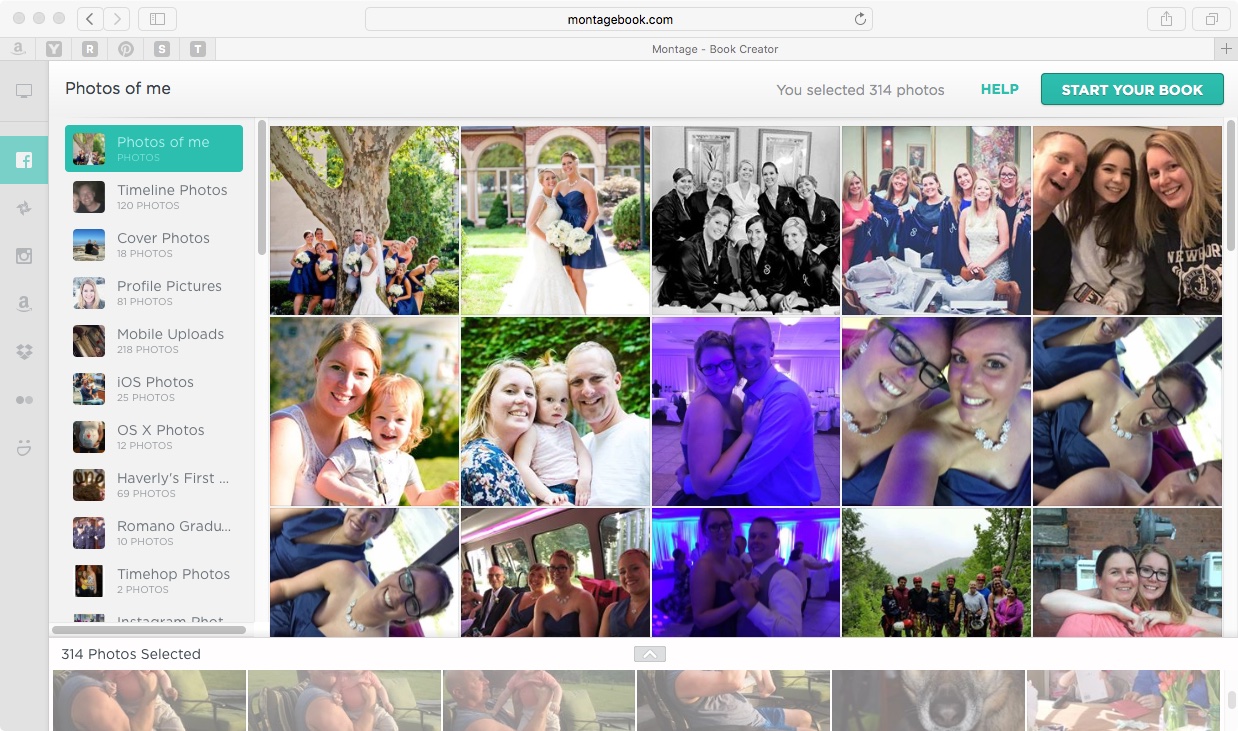
All in all, its really easy to get your photos onto the website, and they will auto create the pages for you to start with.
How can you not fall in love with a simple, streamlined, and fun cover like these? Its really easy to swap out photos .
You can also create a whole other layout to your cover page by just hitting shuffle.
Typically I'll go through and hit the shuffle until I find a cover that is close to complete. Then I go ahead and move a few of the photos in or out.
Voila! A truly unique cover page with all your favorites.
You can choose from a variety of themes for the layout of your photobook (White with gold, color blocking, modern patterns, grunge, geometric, etc). We've personally only ever used the magazine white and portfolio white for their simplicity and professional look.
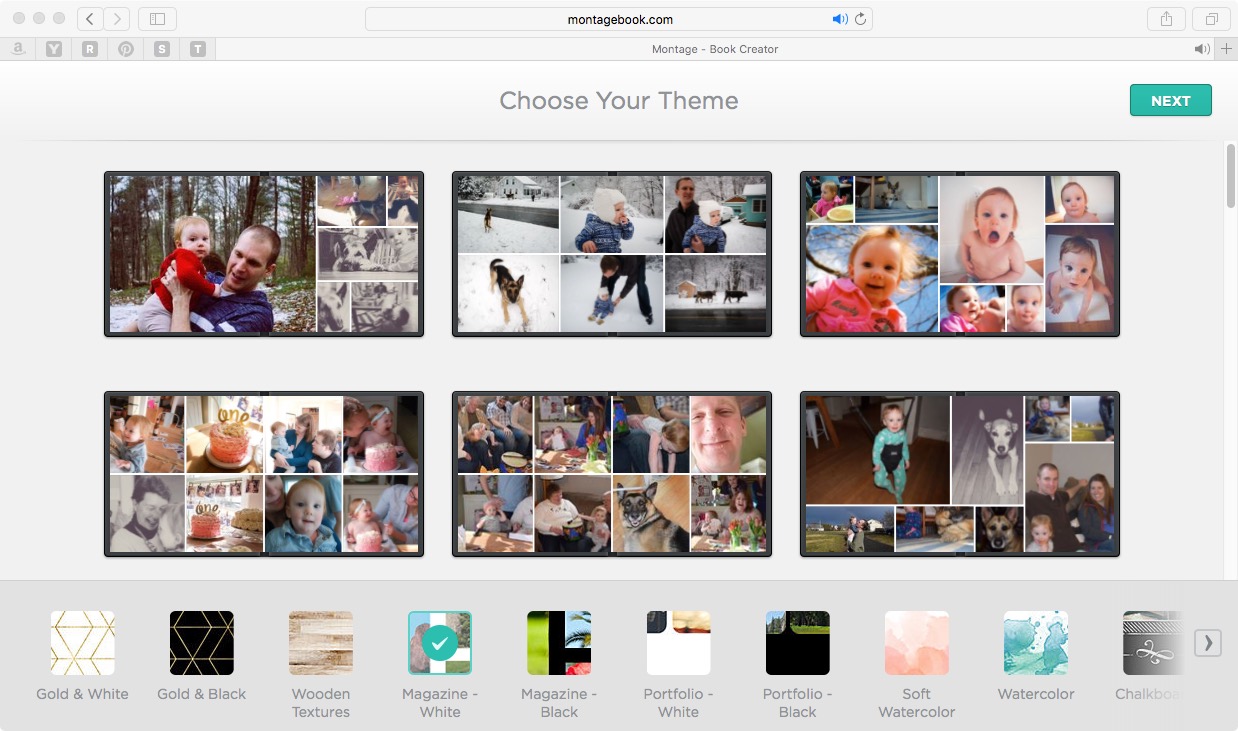
The white space in this portfolio white can really help your photos pop
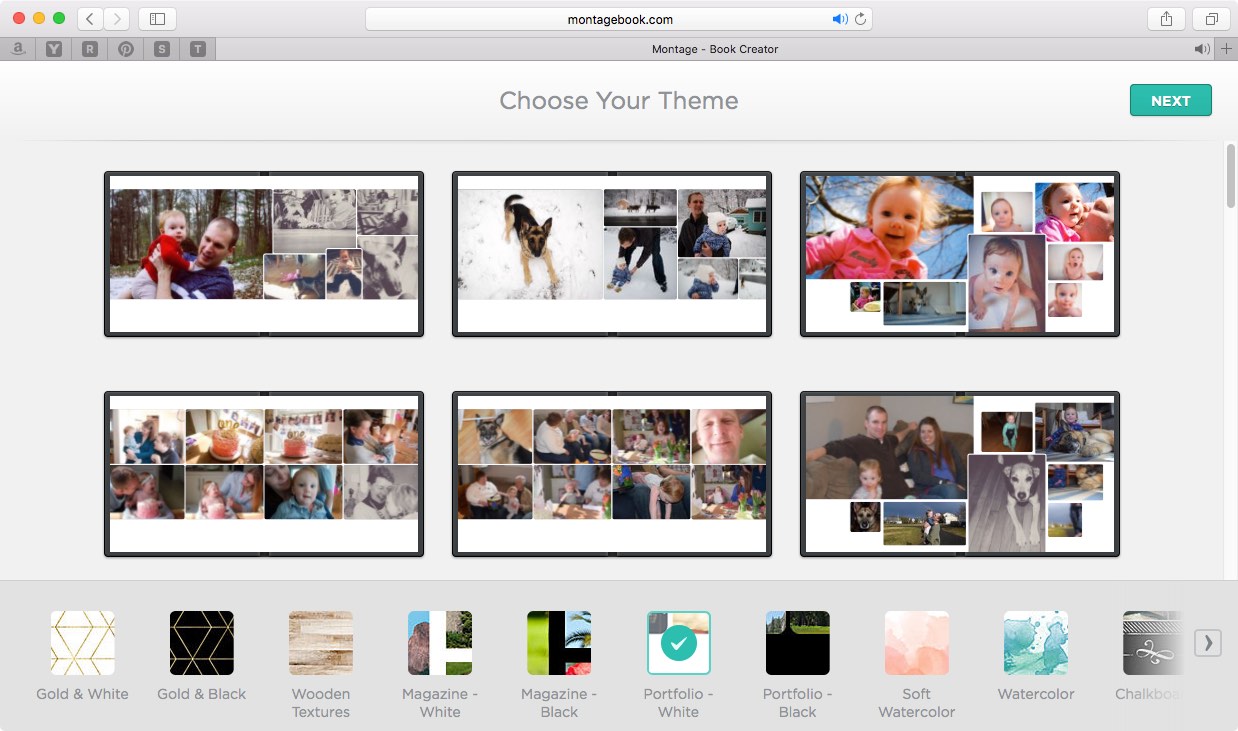
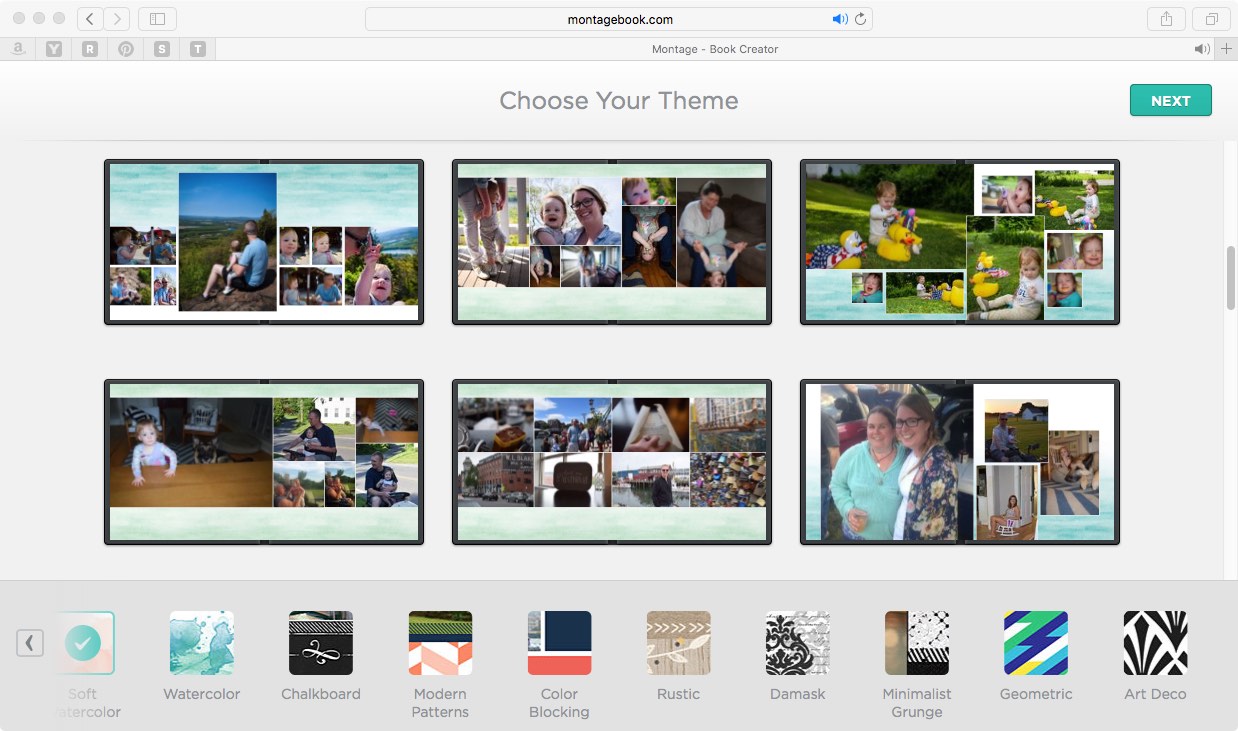
But a background can be nice if you are doing something specific like a baby book. Below the watercolor theme is really fun, especially for summer photos.
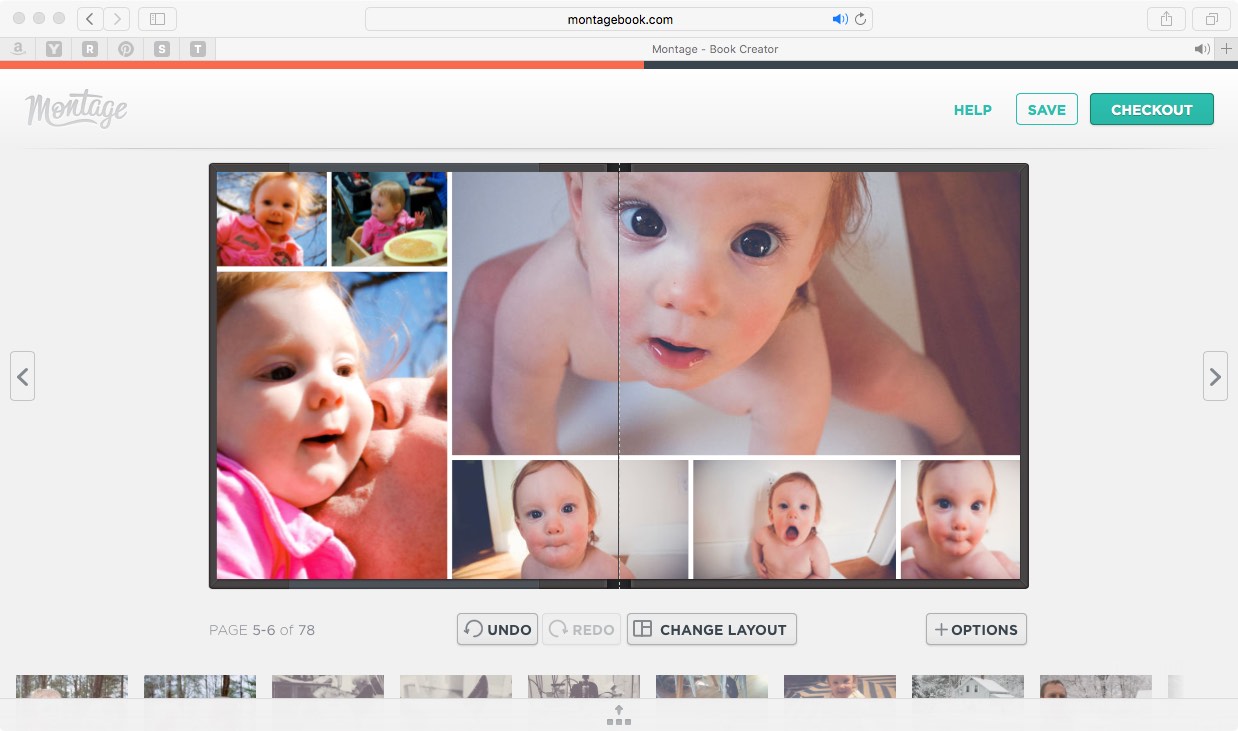
Heres the first pages straight from the app doing its thing:
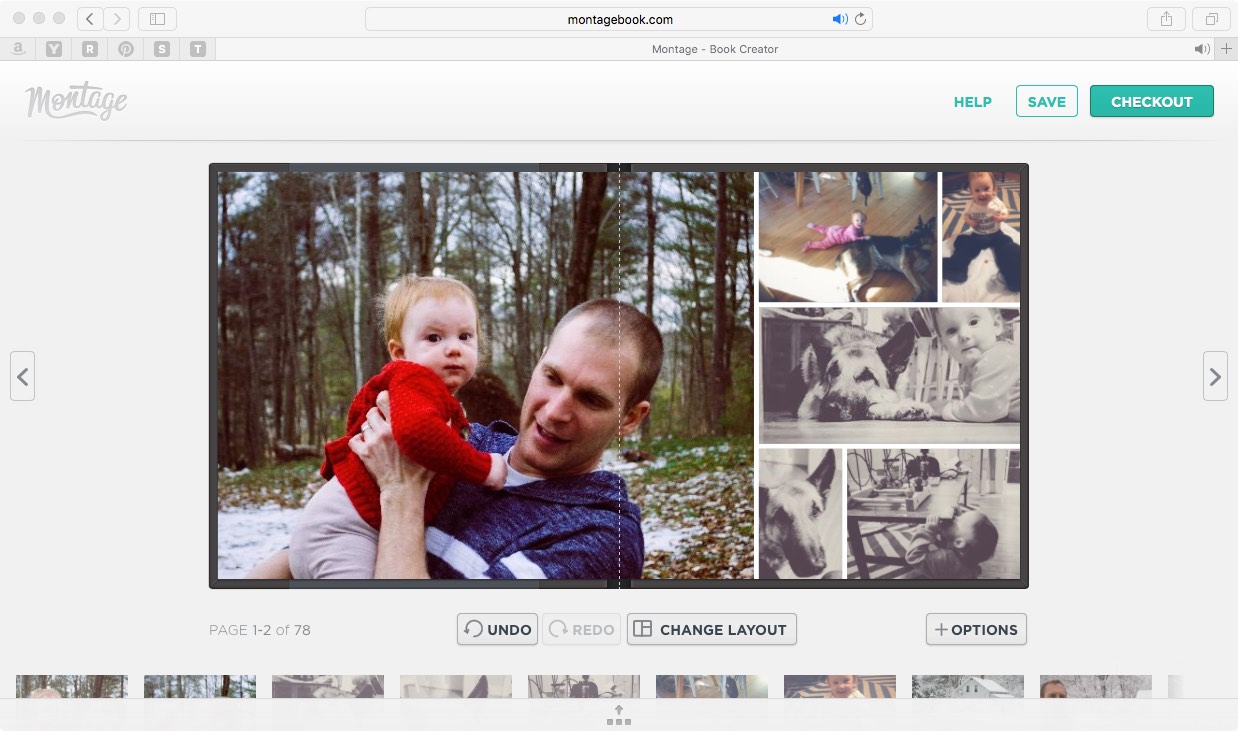
This page should be relocated it's off chronologically but not by much. Montage book even makes that change simple and easy. You can grab thumbnails of the pages and move them around.
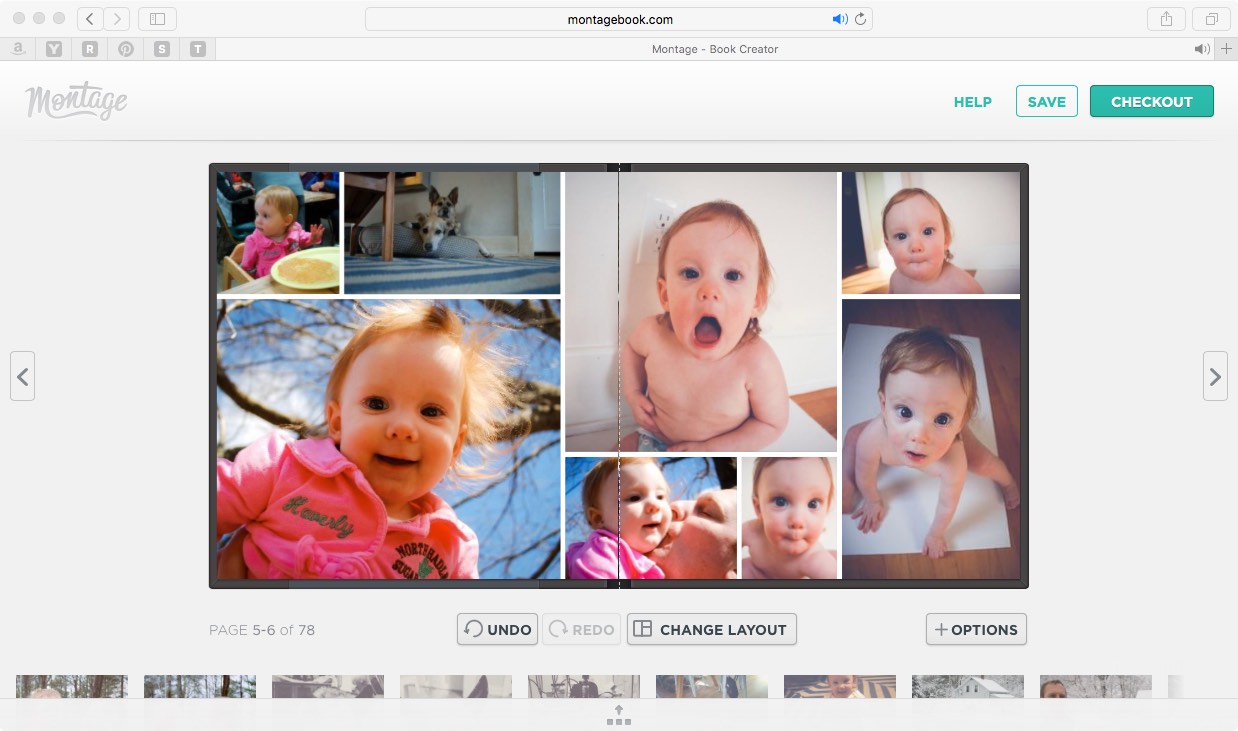
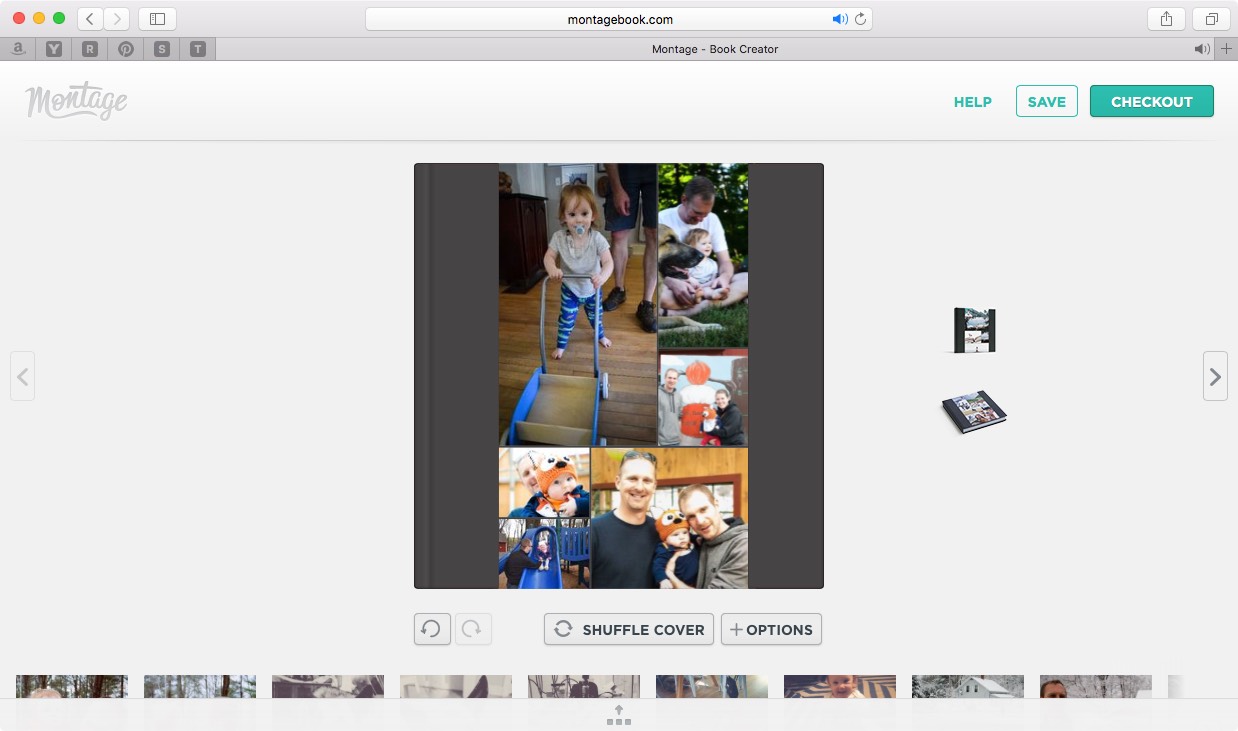
Here is a winter scene from last year, MontageBook took all of the photos and made sure they were together. Not much I would have to do to edit something like this.
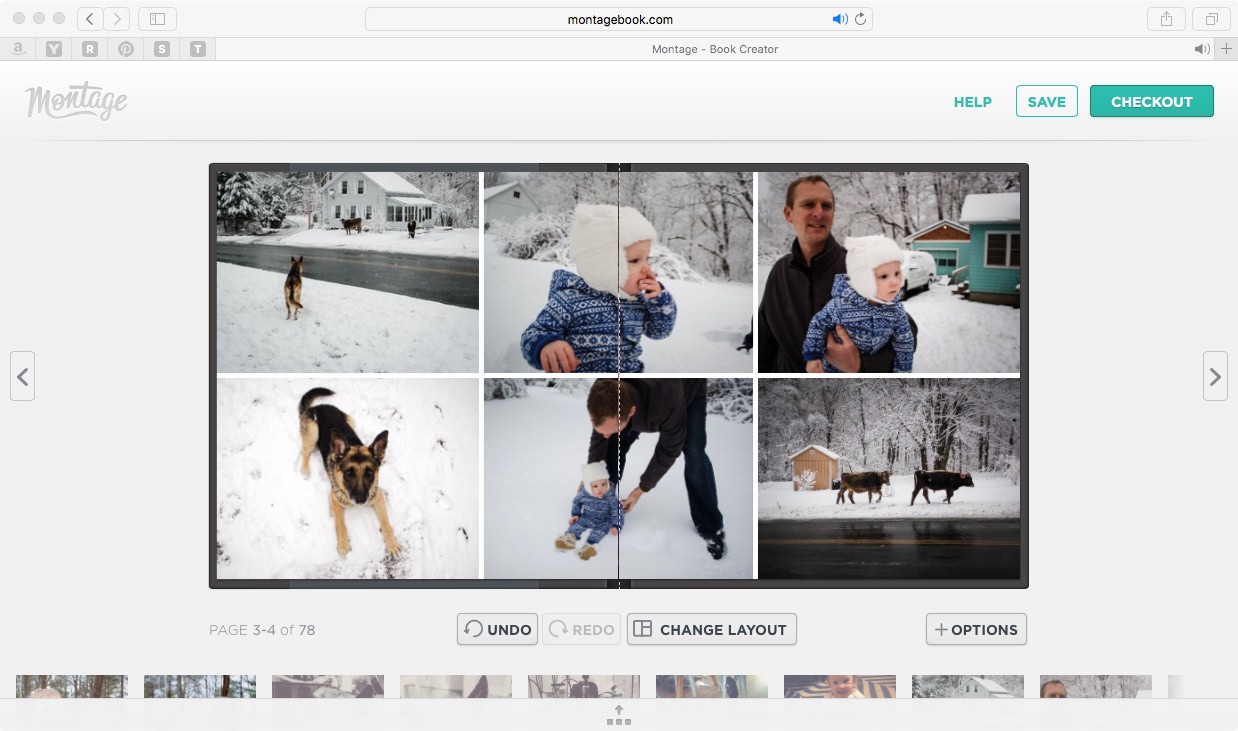
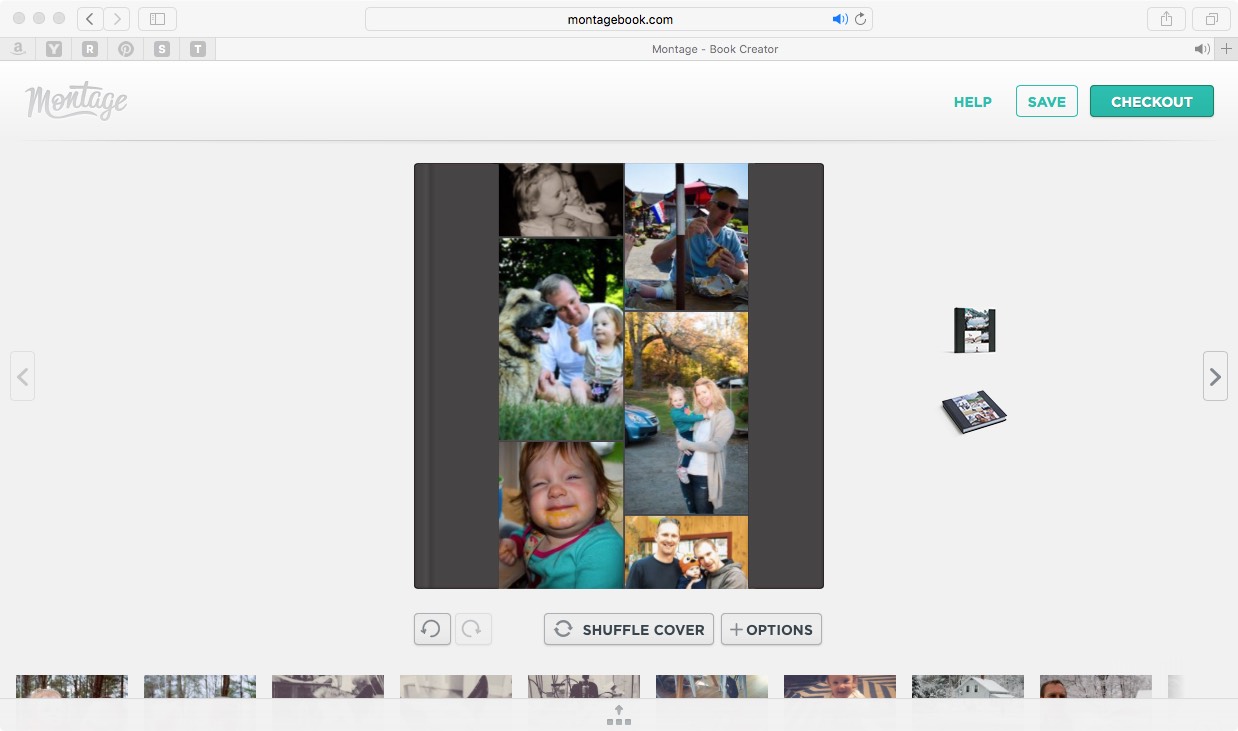
If you want to change around the layout of a particular spread, it as easy as hitting the button change layout.
Below I deleted a photo off the page (I can always grab it and add it back into the book at anytime).
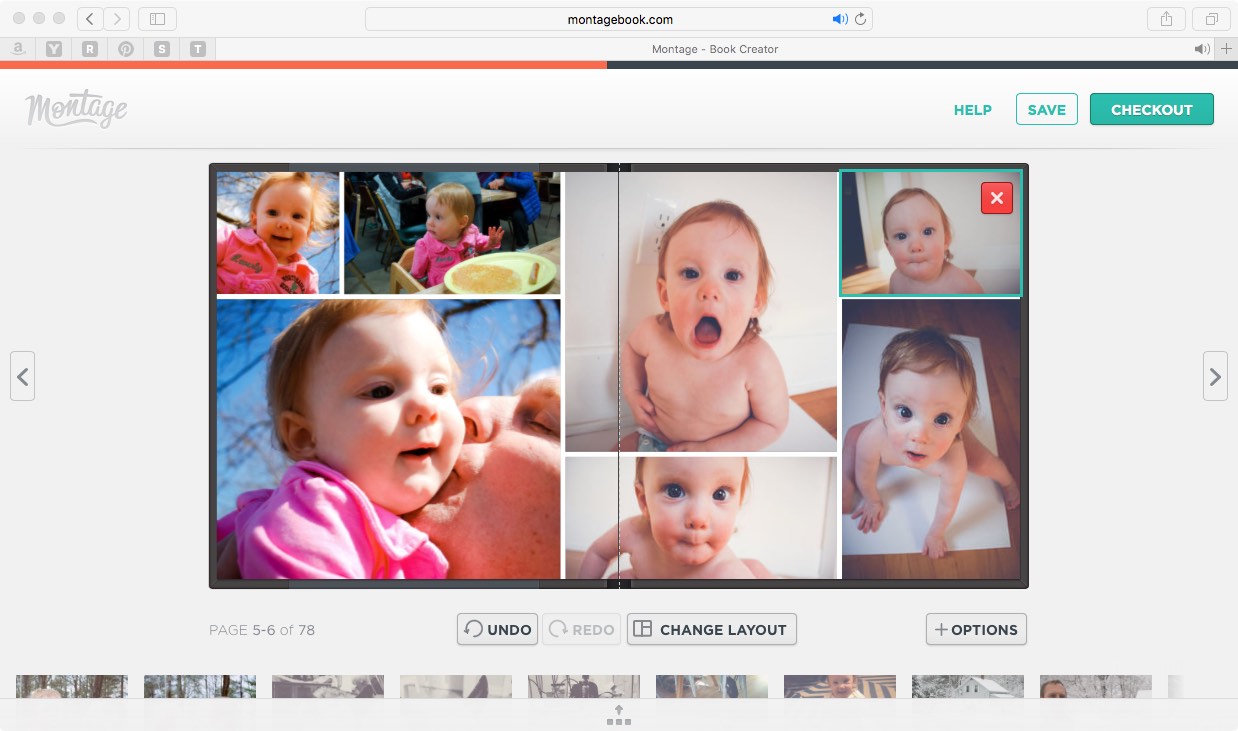
And here I hit the change layout button again to get something I liked.
Once your all done with a few adjustments, your all set to order. They have only a few extra options: a storage box, and premium paper. That makes ordering simple, and the end result a classic photo book with just enough variation.
We've found the 8x8's to be the perfect size, substantial enough without being this huge book that will never fit on a bookcase. When I ordered our 2016 yearbook the estimated delivery was mere 5 days later!
Although these are very fairly priced for the quality of product you get, I have to cut down how many photos I upload. The book's come with 20 pages and any after that would be extra (Even one spread for each month of the year will put you over the 20 pages). So you can easily get above and beyond the base price for the books.

Follow along with our Giant adventures as we fix up this 1847 Historic Colonial in Western Massachusetts.
P.S. Expect lots of wallpaper removal and don’t say we didn’t warn you!
Powered by Squarespace.